Friday, 19 March 2010

the problem with colour: making machines see the same

The problem with colour is that no-one really knows what we're looking at. A recent discussion reminded me that no matter how much is written on this topic that perhaps there is still room for writing more.

Of course people who are starting down this path will have purchased a tool such as a Spyder to "calibrate" their monitor. This however is only about 1/3 of the chain of events which are important for getting everything right from your desktop to mine.

Browsers are mainly unaware of colour profiles, so the "default" is sRGB. Its not well understood but Macintosh are much more advanced in this area and Safari is cognizant of colour profiles. Which can lead Macintosh users to make stuff which looks fine to them but sucks for their clients and audience.

Getting back to the discussion about an image, the image in question was this one.


Which with everything in the colour chain working properly looks quite nice ...

sadly in my Firefox browser it looked ghastly on the Flickr page ... looking at this segment in particular, it looks like the colour channels are blown.


However all is not what it seems, because when downloading the image from Flickr I found that when opening it in my default viewer (Irfanview which is not colour profile aware) it looked great.


So I then opened the same flickr page to see the image in IE 6 and it looked fine there.

The picture is beginning to form, and its all down to small errors in the colour management chain.

To muddy the waters a little more Firefox 3 has just introduced colour management (2.0 does not have it) and it seems to not be at the right standard just yet (read this for instance).

So, when I open the image in Photoshop I got the following message:


which indicates that the image had the Adobe RGB profile associated, but seeing it in Photoshop with the right profile associated with it again looks dreadful


so, now, to simulate the effects of a non-colour aware application, I assign the sRGB profile and then preview it using the "monitor" as the preview tool .. and suddenly it looks OK.


So, to photographers out there who are playing with their images in Photoshop just be careful what you do with colour profiles. You may see things the right way (cos Mac is simply more consistently better in this area and only a few applications on PC cope with colour manaement, and nearly none Linux) , but your audience may not.

Do your audience count to you?

That's your call, but the rest of the browsers in possession of 98% of the viewing public will not know this. and see your images badly.


I recommend that you keep your camera set to sRGB as the colour space (not Adobe RGB) and be careful when working with raw exactly which profile you import and convert your RAW images into (RAW has no colour space). If you intend to display them, you need to convert the image to a profile of sRGB.

Cambridge in Colour has an excellent tutorial on this, which I recommend. But keep in mind essentially this: If you're editing in your preferred working space, remember to
  • save As for your reduced web sized image
  • convert (not assign) the profile to sRGB
  • make sure your rendering intent is set to perceptual
and you should be fine :-)

Lastly, I'll suggest that those with patience read this fellows page. He knows his stuff well, even if his HTML looks like a blast from 1991 and he is a self declared Mac addict.
Tuesday, 16 March 2010

small cameras keep on comming

I happen to own a Panasonic G1, as any quick look at my blog will attest to. I happen to like it a lot not because I'm a T-Shirt wearing Panasonic fan, but because the camera does what I want. Samsung seems to have quietly released a compact mirror less camera (EVIL- Electronic Viewfinder Interchangeable Lens camera)

My friend over at Soundimageplus has recently obtained one of these little beasties and is presently having a great time with it.

The camera has only reached preview level on DPReview despite it having been around for some months (I guess they're too busy). Looking at the images they have of it on their review, it seems to be quite similar to the G1 in size


but I notice they pit it up against the E-P2 for the "plan view"


which is strange, as the G1 looks fatter viewed like this too ... perhaps they're trying to make it look worse than it is?

who can tell ... however seeing Davids images from the camera I'm very keen to know more.

There is precious little else is written, and the prices seem high on eBay right now. Still Novoflex already seem to have an adaptor out for it which is great.

387198762_d59616222b.jpgFor me the advantages of compact are mainly evident in the shorter focal lengths.

Recalling that this has always been the traditional strength areas of cameras like the Leica M6 and the wonderful Bessa (cosina made) cameras.

Once you start talking about longer than 100mm then the differences are really starting to diminish.

So a Samsung with a 30mm pancake which is compact as a bessa R2 is highly attractive.

Right now I keep using my G1 and wishing for a 25mm pancake ... maybe I'll have to get a Olympus E-420 and the 25mm pancake ... that'd likely cost the same as just the Panasonic 20mm after all.

Monday, 15 March 2010

exploring RAW and Exposure: getting the right mix

Its often said that digital cameras are like slide film, in that exposure needs to be controlled within 1/10th of a stop to make the best out of the media.

To be honest that's really just not possible with most gear.

Why do you need this control anyway? Well perhaps you don't, but if you do want to get the best out of a shot, avoiding ugly blow outs (that you may not want) and minimizing noise in your images (again, that you may not want, though some like noise) then getting your exposure 'bang on' is the goal.

As I wrote yesterday, this can be hard to achieve with the in camera tools such as the histogram and the light meter. So today I thought I'd take a 1/3 spaced EV series and pick the one that clips and then the one just before it (1/3 an EV) to demonstrate the differences.

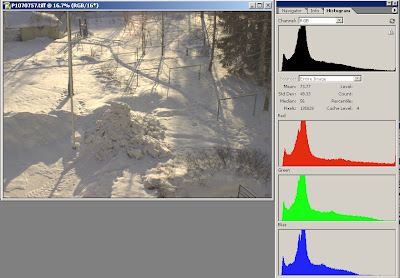
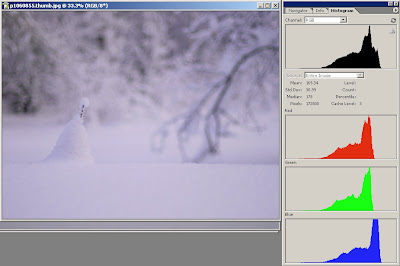
This is the JPG from the camera (set to daylight white balance, and taken in daylight), note that its slightly clipping.

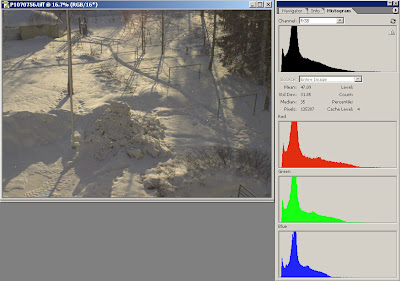
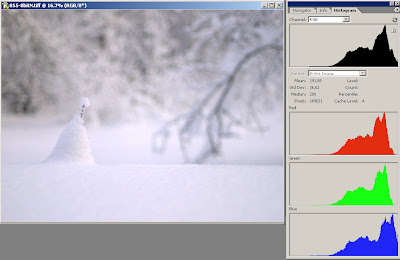
This is the one that's just 1/3 EV less.

and that histogram would not make you think you only had 1/3 of an EV to go ...

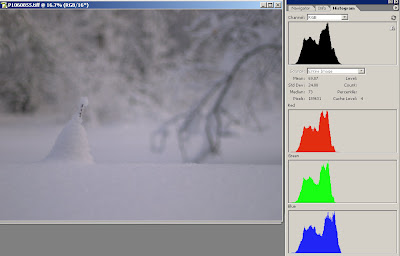
Looking at a linear decoded TIFF using dcraw we can indeed see that the red channel is clipping here.


but at 1/3 EV less we're well away from clipping.


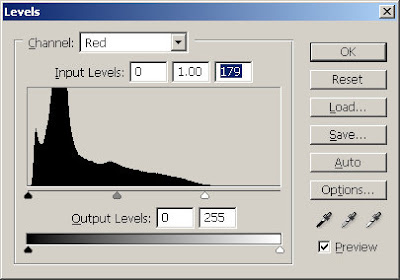
to see just how far away I used the level tool in Photoshop with its ability to show the clipping graphically (hold down the alt key as you slide the white level to the left and you'll see)

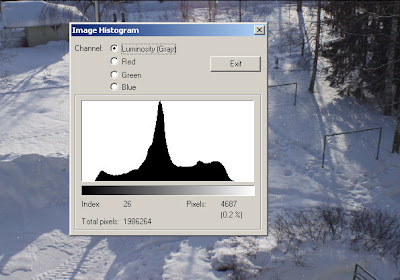
I adjusted it to get the same amount of clipping in both images and as you can see (in the figure beside) I had to essentially strip off 76 steps or levels.

This is significant, as for people who advocate expose to the right it makes it very hard in practice to actually achieve this without bracketing in small steps to get this.

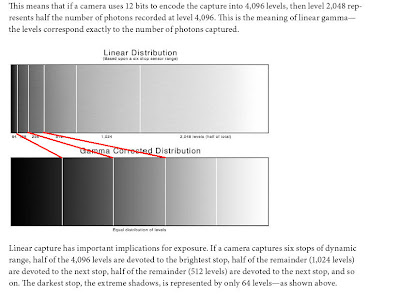
Due to the nature of the linear capture in digital cameras by avoiding over exposure you do run the risk of having far to little data to make the best image your camera can make. Bruce Fraser makes this point well in a white paper published by Adobe which (at the time of writing was still) is published here. Essentially the point is that applying the Gamma to make the image look as it should you stretch the shadows (and thus posterising them) further than you need to.


thus the less of your image that's down in the darker areas the better your image will look when its ready to view. That RAW image above looks murky and dull, but when you apply a little gamma to it it starts to shine more.


so with gamma applied (by me by hand to my taste in this case) we still don't get clipping and get a better image.

As Bruce suggests in that above article:

You may be tempted to underexpose images to avoid blowing out the highlights, but if you do, you’re wasting a lot of the bits the camera can capture, and you’re running a significant risk of introducing noise in the midtones and shadows. If you underexpose in an attempt to hold highlight detail, and then find that you have to open up the shadows in the raw conversion, you have to spread those 64 levels in the darkest stop over a wider tonal range, which exaggerates noise and invites posterization.

Correct exposure is at least as important with digital capture as it is with film, but in the digital realm, correct exposure means keeping the highlights as close as possible to blowing out, without actually doing so.

Since he wrote that (and as sadly he has passed on he will not be updating it) perhaps the cunning tricks that camera makers can do with their in camera JPG engines has increased, making picking that clipping point harder. In the case of my Panasonic G1 I can see that if it clips in the histogram then it clips in the RAW, but you'll need to experiment with that on your camera.

Tools such as ACR and LR have hilight recovery tools (so too does dcraw) which can make it easier to get better images from your raw files by perhaps blowing out the high lights a little and then setting up curves in LR to bring your images back to how you like.

I hope that by reading this it has helped you move a little closer to getting the best quality image you can out of your digital camera.

The RAW we've just worked through (saved as a JPG of course)
out the window

the JPG as it came out of the camera
out the window camera jpg

which one do you prefer?
is it worth your effort?

now those are questions I can't help you with :-)

tools for the job: why don't we have them?

I was reading a post by a friend of mine who has written of what he's found in looking at the RAW files produced by his G1 via a tool which has no bling, and just does the job of converting the RAW data into an image. He focuses in that post on the extra pixels which are available around the edges of the image (normally 4000 x 3000) which can be had by using dcraw (however wrapped in funky GUI apps) as the underlying tool for conversion of RAW files into images.

NOTE: after a comment from Don below I thought I should add that I do not really recommend you turn to a tool like dcraw for your general RAW conversion, as tools such as LR and ACR are more suited to production processing and will be faster. However they do mask much of what is happening happening in the process, so for those who seek to explor and understand what is there in the RAW file I encourage you to play with dcraw.

This got me to thinking about the other issues I have with digital cameras, and that is exposure.

Exposure is something with digital which has driven me nuts, and comprehending it without access to RAW files is like comprehending your exposure on film looking only at prints. Thus this article is about determining exposure and is also a complaint about the tools we have at our disposal for determining a proper exposure.

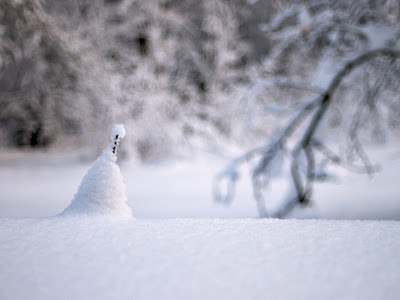
Lets start with this image, I took it a few weeks back when we had lovely soft -20°C snow that softly lay in big flakes over the garden (some 30cm deep).

snow covered stick

I've tweaked this image a little, so I thought I might present what I had started with. Below is the JPEG image as the camera made it into photoshop.

looking at this I did not really use expose to the right (which I am certain is the best strategy for minimizing noise on) but I was a little concerned with the possibility of blowing out a channel.

Out of interest I converted my RAW file using dcraw to make a 8 bit TIFF file with standard gamma. Now understanding gamma is important, nay critical to really getting digital imaging. If you come from a history of printing with enlargers onto paper you may begin to think of this as choosing a grade of paper ... not perfect but that'll do.

The result of the "standard" conversion to a TIFF gave me this ...

which looks quite different, and quite acceptable to me (close to my personally tweaked one). However it doesn't take much to notice that the blue channel is going to be showing some clipping in there looking at that channel (and I'm sure I can guess just where).

This of course got me wondering what was really lurking there in the RAW file because I didn't see anything like that in the JPEG ... so I converted it using a LINEAR gamma. This basically applies no corrections. Now keeping in mind that digital cameras produce numbers to represent levels (0 is totally black and 255 is totally white), gamma basically applies a maths function to the starting number and then writes a file with the changed number as the new value for the pixel.

Eg
  • 1 might become 1
  • 10 might become 15
  • 100 might become 180
  • 180 might become 255
stuff like that.

So, using a LINEAR gamma shows us what we had to start with ...


bloody hell ... I call that under exposed if you don't.

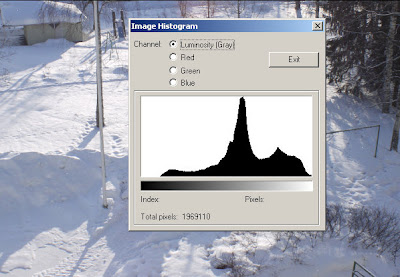
Its a reasonably well known (and bitterly complained about) fact that digital cameras histogram is based on the JPG data and not the RAW data. So while we have the cameras light meter for determining exposure it really is not sufficient to work out where clipping is (should you want to expose right).

Of course Film is a different creature to digital sensors, especially negative where you can bravely shoot with the sun in your face and still not get a blow out.

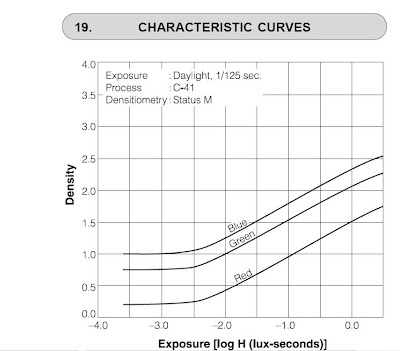
This is of course because film has a shoulder which you can see appearing in this spec sheet of the characteristic curve of neg ... the maker (Fuji in this case) cuts the response curve while its still mostly linear but you can see its starting to shoulder off over there to the right hand side.

It gets difficult in film because the linearity of the responses is uneven after this graph stops ... but that's not my topic today ...

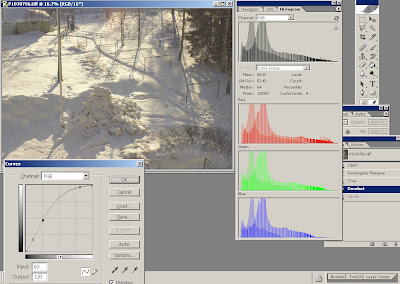
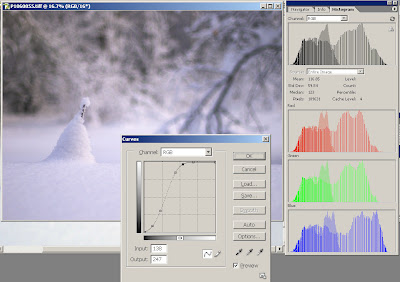
So with that thought in mind I thought I'd attack this RAW file and put my sort of preferred gamma for this subject and this lighting. You can see that its really steep and rolls of gently with a taper at both ends (not in a hard angle).


This results in (what I think) is a pleasing rendering of the scene and in keeping more with what I saw with my eyes when I was there.

This of brings me to further support that you should never apply harsh machine like maths to a subtle thing like an image and certainly the light meter and histogram are inadequate tools for determining the right exposure or capture of the image in the first place.

If you download and examine that image (click to get a 1600 pixel version) you can see that noise isn't dreadful, but remember this was 100ISO ... it should be nearly perfectly noise free.

The "near enough is good enough" approach may suite some people but just as scene brightness ranges vary and need different gamma applications to obtain the best results, so too do we find histograms as an exposure determination tool inadequate because of the Gamma applied to them. Particularly as I've found that the greatest strength of digital is the subtle renderings it can yield in soft light, its sad that we can't maximize this with the tools on the camera.

I'm tempted to take my spot meter with me ... which if I'm going to do that I might as bloody well use my LF camera with all that hassle.