one of my pet "disturbances" is people taking pictures of a tiny toy on their keyboard from 5cm away and going on about the DoF and Bokeh of their new lens, especially when its clearly going to be useless at "normal focal distances"
The only way to get DoF is by pupil diameter, not "f stop" ... the bigger the pupil the shallower the DoF
Of course to get that pupil bigger for the same angle of view one needs either a bigger f stop OR a larger format. For instance a 50mm lens on a FullFrame camera has a pupil diameter that's about 25mm at f2 ... while the pupil diameter of a 25mm lens on a 43rds camera (capturing the same view from the same spot) will be 12mm. Meaning less DoF
So I thought that (not having a full frame or a good 50mm f1.4 lens handy) that using my 45mm f1.7 would do the job at imaging my favourte tree if I stitched together an array of 4 shots (as it would approximate a 50mm on a full frame single frame grab).
Here that is:
Seems that while its better than my earlier attempt with the 20f1.7 (single shot with m43) it looks like its not really doing what I want ... a pixel peep (or a big print) shows that it does indeed have better DoF popping it out of the background, but not as much as my 4x5 had (standing pretty much in the same spot).
Well its better and shows more "separation" from the background.
So, I was right but there was a lesson to be learned
On a larger (again) format (like what is called Large Format) a "normal lens" (like the 50mm) is a 180mm lens and (my f5.6) lens yeilds 32mm at "wide open".
Perhaps a Full Frame with a 50mm @ f1.8 (using a 1.4 lens so as to not get too much corner darkness) would do it. However when one is using even 100ISO full sunlight will require super short shutters (or a ND filter) if you're using f1.8 ... Then there is the highlight clipping to deal with...
I still keep my 4x5 camera and some chemistry around for just this sort of specalised thing (and its cheaper than a Sony A7).
Its hard to believe (for me) that I've been using my Toho 4x5 camera for nearly ten years now. Seems almost impossible in the days of digital where we now change our cameras as frequently as our clothes.
As I was recently contacted by someone with some questions about the camera now seems as good a time as any to consider putting together my thoughts and impressions after ten years of use.
If you're not familiar with the camera, Kerry Thalmann has done a great review some ten years ago on his pages here. His images and descriptions cover so much more and in such a logical flow that I would not be tempted to try to redo that. I recommend you read that if you don't know the camera, as it will help you to make more sense of the images of the camera I present here.
Instead what you'll find here are some of my thoughts and findings of the camera after taking it with me through several countries and quite a diverse shooting environment.
and a diverse range of photos (mainly landscape). I've used it out on lake shores in Finland in -25°C with chilling winds...
and in harsh Australian inland summers. Through all this the camera has proven to be a robust and reliable device. I can honestly say that in the years of ownwership nothing has gone wrong with the camera.
Two things attracted me to the Toho in the first place:
it was light
there were no reasonable restrictions to movements (it being a rail camera)
I was therefore willing to live with every other issue the camera may have had.
The first thing is complexity. Being a extending rail camera with tilts and shifts on both front and back there are knobs every bloody where. This is something that you may find confronting, but with discipline everything falls into place.
On this point I'll raise two items; many years ago I started studying Akikdo, and I'm left handed. You may ask what this has got to do with anything here, but the significant point is this:
you need to learn to do everything according to a system and apply a strict discipline to what you do. This is not to get in the way of creativity, but to free you from the confusion of needing to think about every move you make. Secondly as a left hander next to nothing is made to work in a way that feels natural. So you have to spend time with everything to get used to it.
So with the above declaration of nothing going wrong in mind I thought I would focus on the issues that I have come to know and understand on the camera ... which are essentially few.
Even with Kerrys fine pictures I thought I would introduce the camera as it will look to you on the tripod.
The camera has two separable parts, the rail and the camera itself. The bellows is the essentially permanently attached to the front and rear "standards" of the camera.
As I said, my camera didn't come with a bag, but I thought that I'd get something nicely made from a canvas shop, in water resistant canvas ... cos I go out in the rain. If you live somewhere humid do not store the camera in this kind of bag, you are just inviting fungus to invade your bellows and ruin them. The same goes with your lenses. Store them in a dry place ... there are lens cabinets which de-humidify the air, alternatively use a sealed plastic container with some products like the potassium hydroxide based ones. DO NOT USE ANY SCENTED TYPES.
Then with the rails on the tripod we can get a look at these, their size and how the rails extend.
Next, putting the "body" onto the rails
The next issue is then making adjustments. If you look over Kerry's images of the camera you may not really grasp how fine the tolerance of the camera rails are. They are essentially sections of alloy which are dovetail wedge shaped to slide in and among each other. So the rail extensions look like this:
and the support arms for the front and back of the camera look like this:
As you can see, a wedge essentially presses into the dovetail and locks it in place.
and mounted look like this:
What this means is that with weight on the mounts (like having the camera mounted on the rails) things require a little assistance to move up and down ... You can see the anodizing wearing off on the inside of that rear support there from movement, but this has little real impact on anything.
So essentially its better to support the end you're moving with one hand undo the clamp knob a little, slide it up, then tighten down.
For kiddes who can only drive a mouse, a playstation or a plastic digital camera this will represent problems (as I see many can't even mount or unmount 35mm lenses without going into some sort of panic). Its not a problem to me, but it can lead you to think that something is tightened down properly when its not.
You'll notice in the videos that I tend to 'wibble' things as I'm moving them and tightening down ... this helps you to overcome friction and make sure the moving surfaces meet and tighten down properly.
Perhaps you'll see what I mean in this video where I show moving some of the cameras joints for tilt / shift / rise and fall
again, discipline is your friend, do things methodically and you won't have any problems.
If this is sounding like a hassle, then clearly LF is not for you.
Putting a lens on the camera
The Toho has a circular lens board, which is quite unique. I find that its easy to mount, and if you mount it top in with the bottom secured last, you won't get any nasty surprises of the lens falling out when you didn't expect it.
So for example I can rotate the lens to put the shutter release on either side (depending on which side I wish to work on .. there could be for instance a cliff on the other side of my tripod as there was here.
Note the order that I put the lens on in. Top clamp first bottom clamp second.
The camera uses rear focus, personally I prefer this as particularly with macro you don't get the lens moving around relative to the subject when focusing:
This is a good time to mention the nylon washers I added. I thought that the original ones were not compatible with the fact that both the locking crown and the base were anodized alloy. I didn't like the lack of 'feel' and thought that the nylon would be smoother to tension down and as it compresses a wee bit more than metal give a little better 'feel' to tightening down. You can see them in the above close up pictures if you look at them again.
Film handling
The Toho has a "universal back" which is essentially a flap with the focusing screen in the middle and all on a hinge to allow you to insert film holders and even roll film backs.
As you can see below, putting in a double dark (which holds 2 sheets of film, one on each side) is a peach
but putting on a roll back without a Graflok back is a little more annoying.
It pisses me that my Canon A520's video cuts out at the times it does .. what I was saying is that you can't see the film advance counter on the roll back. Essentially the problem is that with a Graflok back you'd be taking off the ground glass and then clamping on the film holder. While the advantage of the universal back is that I don't need to take the screen off out in the field (where you then have to have somewhere to put that screen, not down in the mud) when you put your film holder on the camera. However it means that the screen now does not block your view of the holders back, and for many roll backs this is something which is important. You need to see the back to advance the film and read off the counters.
So essentially I can take one picture then I have to pull out the back to wind on for the next. Annoying if you're wanting to bracket ... however in reality now that I use a digital as my light meter I get my exposures perfect each time (and I use Neg mostly which is more forgiving than chromes).
This image was taken with the 120 roll back in 6x12
Having both the roll back and the 4x5 holders is nice, but brings me back to wonder about weight.
Light Weight
Well you see with film holders, light meter (my G1), tripod and lenses it works out that the light weight of the Toho is not such an advantage as you might think. Still, its always nicer to have less in the pack ... right? If taking lots of images then clearly the roll back and a few rolls will weigh less than a bunch of double darks: 180g for a Lisco holder vs 680g for my roll back. I can take 6 images on a roll of 120 with the 6x12 which is 3 darks. Still, its not always as easy as that, sometimes I don't want the wide format but do want the larger area of the 4x5 sheet (meaning I don't want to crop off the edges of 6x12s).
I sometimes go armed for a weekend with 10 holders and a few rolls of 120 ... still, if I'm doing a days packing I'll try to trim that down ....
But its not only about weight, as the Toho has some advantages in setup and carrying.
If you refer to Kerry's picture (Fig2 - disassembled for transport ) I often take my camera apart and leave the rails on the tripod and put the body back into its carry bag.
Clearly if you're going a long way it may be annoying to leave the rails on the tripod, but for packing into the car or just a few km hike I leave it on the tripod and sling the tripod off the side of my pack.
But don't under estimate the advantages of leaving your rails locked where you used them last. I've moved to another place to find that my last set of tilts worked out really close to my next set. Not to mention that it can make changing focal lengths (lenses as there's no zooms) easier with often exactly the same back tilt needed and just the rails extended.
Summary
all in all the Toho has been a great tool, nothing I have beats 4x5 black and white for tonals and if you get the focus right (and nothing moves) then detail is equal to the best in digital.
Would I recommend it? Sure, if you're after a 4x5 then in my opinion it has all the control of anything you can get and all the movments. It does not have interchangeable bellows, but then I've never felt the need for that. The only downside is that you won't get the looks you get from an Ebony ... or is that an upside.
Its compact, tucks away well and very well made. If you're after one, they turn up from time to time on Ebay.
Is 4x5 for you? ... well I can't answer that ... but if you know what movements are and why you may want them
then 4x5 is perhaps cheaper than a bunch of TS-E lenses and a 5DMkII
99% of digital cameras are APS-Cor smaller sensors, this makes them quite a small format. While they often create excellent image quality in an outright sence there is often something lacking in there ...
This chart shows the sizes for those who aren't familiar with this with the outside being the largest size of professional digital sensors such as in the Phase One or Mamiya or Hasselblad cameras (you don't normally read about these on supermarket digitcal camera sites like the big one owned by Amazon).
One of the things I'm finding about smaller format digital is that I'm often out of my preferred depth, as in depth of field. I happen to like controlling Depth of field and I understand that the inability to do this is exactly why I'm unhappy with most of my digital images.
For instance, I took this image of a Stone God around a temple (facing out) in Korea,
however its just that little uninteresting in some ways. Now if I'd have had my 35mm camera and my TS-E 45mm with me I'd have probably taken something like this (which I munged up quickly in photoshop to see)
personally I prefer this ability to control focus, and its the reason I like taking images with my LF camera (and my 35mm when I had the TS-E lenses). Images like the ones below make use of focus to control interest
and small format digital is just too deep a depth of field and I just can't do that.
So I feel better in the shallow areas.
Don't get me wrong, its not like all my photographs are this way, some are deliberately worked to get as full a depth of field as I can:
but its nice to have the choice :-)
Now of course I can get a full frame camera (and re-buy my TS-E lenses) but that might just be out of my budget right now ...
I think its more natural (and doesn't blow out the sky). With the digital, I could have metered to prevent hi-light blowout, but I always meter for film to get the mids and shadows looking good on the digital ... the Negative has more headroom (and natural compression) than the digital. If I had chosen to expose more carefully for that on the digital I know from experience that it would be quite noisy in the shadows.
In some ways its of course a similar sort of look and feel the the black and white ... (here is an ADOX sheet of 4x5)
but with (in my view) better colours than the digital. To be honest I reckon I'd need to have gone down the HDR path (and hope to shit nothing moved) to get a better rendering than the Negative ... which btw was 400 ISO.
In case you're wondering how much detail was on the negative, well here is a 100% section from down the bottom ... and this is only a 1200 DPI scan with my Epson
not bad ... sometimes the big camera is worth the struggle
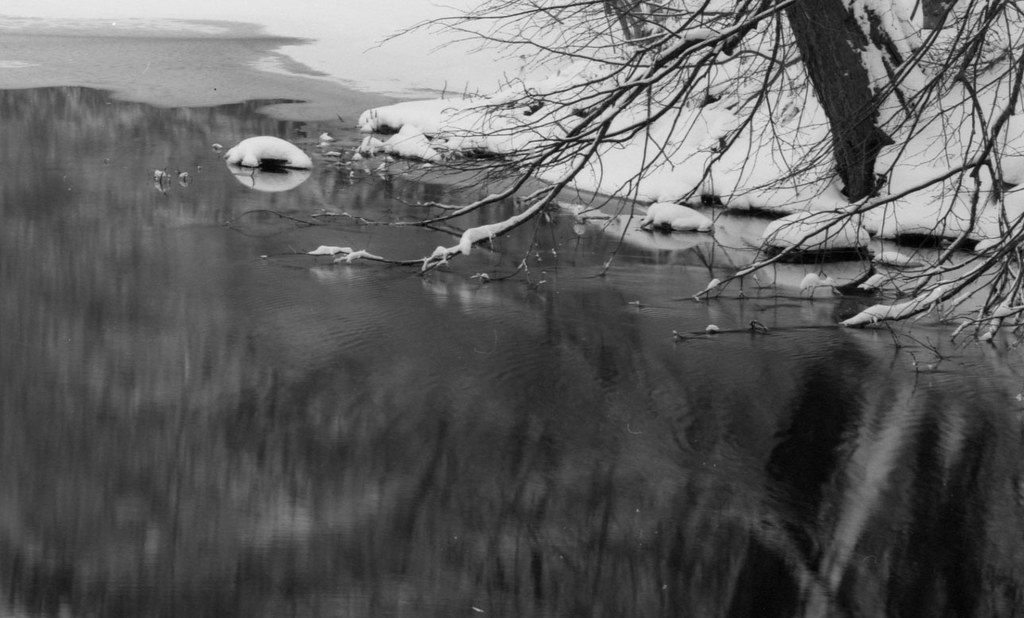
Yesterday I decided to pull out the 4x5 and go off to try my photographic luck in an area where there is an interesting blend of ice, a bridge ruins, a water flow between lakes and trees.
I like working with my 4x5 because I can get images that are bigger and more detailed than even a Canon EOS 1Dn MkIII can produce. Sure its not something you can photograph the olympic gymnastics with, but then that's no what I do.
This is one of my "failures" on the day (and why should I put my success stories where poachers can steal them) Its a failure because I forgot to reset the front standard, its not as sharp as I wanted on the right hand side.
The ice along the stream edge and the reeds however are just where I want them.
In another location not far from there (out on the lake edge). I usually use my digital to make a metering assessment for my LF camera (and it comes in handy for colour balancing in colour negatitve work sometimes too). This is what I got with my G1:
which is a nice image, but I wanted a more abstract look and didn't want such a busy image with more or less everything in focus.
The 4x5 camera of course using a 180mm lens has nowhere near this sort of depth of field (even if I wanted it), instead one needs to apply some tilt (lens plane or back plane) to get things in focus.
I decided that I wanted to get rid of the focus on the ground snow detail and instead focus on the tops of the grasses and the tree tops. This is what I got...
One of the features in this black and white film stock is that it does a great job in covering wide scene brightness ranges. This can be an advantage, but in this case it lacks in that it just does not get the subtle textures of snow in those foreground grasses. I took a colour negative shot too, but unlike black and white I don't develop that myself ... so we'll have to wait a while for that one to come back from the lab.
I like the control that I get with 4x5 and I like the fact that a half day of photography gives me 6 images. I can focus on them and give them more attention than I could have done with 3000 images.
So, its swings and (tilts?) roundabouts isn't it. I win on some areas, and have to give in on others.
Lastly I'll leave you with a "mistake" which I made, caused by leaving a sheet of anti-scratch paper on the film when I loaded it in the holder ... serendipity works wonders now and then ... despite it being soft looking (created by a thing sheet of white tissue paper infront of the film) I really like the look.
hey, and it was way easier than doing this in photoshop ;-) Of course the 'right one' looks good too..
Amateur Photographers (perhaps especially landscape photographers) are often almost obsessed with how to get the most of scenery detail into their pictures. I guess that its because most photographers seem quite attached to their particular equipment (in some cases almost religiously) that the first thing examined is getting a better lens. So sites with lens tests are consulted, to see if this or that lens has more or less resolution than another seeking a better lens than they have.
This seems like the right path but it misses out on understanding a couple of critical points.
Lens test charts are not scenery.
There are other limiting factors in the system.
Perhaps you've read this before, in my reading in the past its never been shown clearly just what this means, so in this post I'd like to shed a little light on thes important points.
It may seem (later in this comparison) that I'm attempting some sort of film vs digital discussion, and I'm not. I'm trying to discuss something bigger ... in fact its bigger and denser capture. I just happen to have only MF and LF in bigger capture.
Part 1: Lens Testing charts
To the left you can see the result of a lens test using Norman Koren's test system. The lens being tested is my "nifty fifty" the EF 50 f1.8
Looking at this it seems that the lens runs out of grunt shortly after 50 line pairs / mm (line pairs per millimeter), and you could argue the toss that it goes to 60.
This is not a bad result with some saying that getting better than 50 lp/mm in the real world (with all the factors like camera shake, focus issues .. against you) is as much as you can get. Being a digital system what I've got here is a final usable result which will directly translate onto a print.
(BTW If you're not familiar with terms such as line pair / mm, I suggest reading this.)
So I thought that I'd test also my EF 24mm f2.8 lens (which in 35mm full frame is my favourite landscape lens). At left is a 100% crop of an image taken (in RAW) using flash as the primary illumination (for increased contrast and to eliminate any issues of shake even on a tripod).
Again not a bad showing for what is not thought of as the hottest lens in the canon stable. It seems to run out at about 60 lp/mm.
This all looks good, but what I didn't mention yet is that the method for the test is to photograph the target at a distance of 51 x "focal length".
Since this is a 50mm lens, this means that the target is 2550mm (or 2.5 meters) from the lens or 1.2 meters with the 24mm lens.
Now, just think about this for a moment:
How often do you stand that close to the subject when you take a picture with a 50mm lens or 1.2 meters with the 24? Especially with an APS sensor DSLR (not a full frame one) it is just what you'd do for a portrait and not what you'd have in most scenery.
What is more common is using a 24mm a few more meters away in a scene like this:
So, I put the lens test chart over there on the wall ... to see what I'd get ... well here's the 100% view if it..
Wow, nowhere near as good is it.
You can see that its not giving the wonderful results of the test chart above. Well, that's because its now further away in the scene, and the subject detail is now smaller (being further away). Inspection shows that we can barely read the details just past 10 lp/mm.
So from this perhaps you can see what I mean when I say: lens test charts aren't like the real world).
So knowing how the lens is able to perform is one thing, but what you can get with it in the real world is another thing. It all comes down to what is the "feature size" in your picture and how does this relate to the parameters in your testing.
Part 2: " other limiting factors in the system"
Ok, so now that I've shown the issues involved with "Lens test charts are not scenery" I'd like to move on to "other limiting factors in the system"
Consider your camera, a camera like the 10D (or the 5D for that matter) will have a limit of something like 50 lp/mm because of the array of the sensors (see Bob Atkin's article on that here). Look again at the details of the 24 and 50mm lens above, notice how they coincidentally run out of detail at almost exactly the same point?
Sure cameras like the 20D and 50D have higher detail sensors than the 10D, but this essentially means no matter how much better lens you get, you'll see no difference without spending more money on a higher resolution body.
Welcome to the one of the reasons why camera companies love digital cameras.
Conclusion: Alternatives to the lens arms race.
So, if you're going to spend money on sharper lenses, you'll need something better to capture that. You could use a Canon 5D II or something better spec (Nikon and Canon both make things like that. There is even the alternative of the MF digital backs.
But its all starting to sound expensive for the landscape photographer isn't it, here's where I'd like to show another test with a different camera system.
I'll start with my old Bessa RF camera, this is a 1940's folding 120 roll film camera which uses a 6x9 format *(6x9 if you're not familiar with film and its sizes the please take a quick look at this article which sheds some light on that topic).
The Bessa is by no means any kind of bench mark, in fact its about the cheapest 120 roll film on the market. My Bessa RF can be had for less than a new lens for a DSLR (I see them on eBay regularly for between $100 and $300).
The Bessa RF uses a 105mm lens and so using the same test target and system I need to position the camera 5.36 meters from the target. This is a scan of the entire 6x9 cm image on the film (pardon the gudge at the top, that's from my tape where I taped a bit of film into the camera because I'm too cheap to sacrifice a complete roll for a test image).
Now, another important point here is that these film scans were made with an old Epson 3200 flatbed scanner, which cost a couple of hundred bucks. There is no doubt at all that with a more professional scan (send it out if you have a beauty which begs to be printed big) you will be getting even better results than shown here.
Now, this time I'll start with the overview image of the test setup.
Did you notice that this is exactly the same angle of view in the scene that I used in my "real world" use of the 24mm lens from above.
Why? well because of the bigger format film the 6x9 to get a wider angle it needs a longer focal length lens. In this case its 105mm.
So in some ways this old camera is designed to take best advantage of real world photographic and optical issues to make the most from what it has.
Using the same method above I tested the lens on this camera and found that it had a much lower result than the EF 24mm in the lens test.
Looking at the result (below) perhaps you can pick its somewhere just after 20 lp/mm that the lines merge into mush.
So in test setup the Bessa scored 20 while the 10D scored over 50. This makes the Bessa look bad and the 24mm on the 10D look good ... but only if you forget to look at the scene and focus on the test result numbers.
When comparing scene for scene the older camera actually makes a sharper image for the same scene than the camera with the lens which tests better.
In a usable scene the Bessa ended up with 20 lp/mm available in the scene VS only 10 lp/mm for the 10D.
So what small formats gain in terms of specifications, they can also loose in terms of what you can get in your image.
Thus you'll end up with features that are much finer in this image than in the 10D's image. How interesting, a 60 year old camera with an ordinary lens is doing better in some ways than a modern DSLR.
Why? Because what the Bessa lacks in sophistication and accuracy it makes up with in generous lashings of image area.
Hopefully I've shown that by using the lens test charts for reference that taking images of real things shows up the issues of buying gear based on lens test charts and there is more to it than just simple numbers. I have an image which has the same "angle of view" using a lens which 'tests to much lower resolution' but in the real world makes an picture which is much more detailed than another camera system. Here's the over view of each again to show you the relative sizes.
So if you're thinking that you'll spend a thousand bucks on a 'better' lens for your DSLR to make sharper landscape images, perhaps you might now consider adding new tools to your methods of making images not just spend more money on nifty lenses for your DSLR.
This represents only the beginning of the scale in MF gear, and with great cameras and systems out there for literally give away prices its really hard to go wrong.
But if you go for a higher quality MF camera (to make higher quality images) you'll need a higer quality scanner in your work flow. I don't personally feel like making that sort of investment, so I went to another alternative again. Large format.
Size matters when it comes to images as I've just shown with the comparison between a 6x9cm (in reality 56mm x 87mm) image negative and a smaller 22 x 15mm. I prefer larger formats again for my landscape photographs. Using the smallest of Large format 4x5 (which has an image area of 92 x 118 mm) I can get even larger capture, beter control over my image focus and still make use of cheap scanners to get great images.
Here is a sample of the same scene with my 4x5 camera mounted on the tripod.
Because its using a 90mm lens (quite close to the 105mm in the Bessa) its about the same distance from the wall. The angle of view though is significantly broader, showing in landscape the same height that the others showed in portrait orientation. No looking at the detail, obtained from the lens its nearly the same (although being a 90mm it was a little closer to the target than the 105mm lens, creating a little bigger image of the chart).
this is almost the same result in sharpness but with a system which captures more than double the area of view than the digital. For example this picture
and as its 14 000 pixels wide (while a DSLR will give you about 5000) will make nice detailed prints well over a meter wide if you want it.
I hope from this long (and perhaps difficult) analysis of the subject you can see that the bottom line is that if you want to make bigger more detailed prints of your favourite scenery, then rather than going to all expense of newer and 'better' lenses you will end up making much sharper prints if you use the right tools for the job.
I took a walk in the park today and took a leaf out of Edward Westons book today in photographing the colour of autumn.
He's attributed with saying: "Anything more than 500 yds from the car just isn't photogenic." So rather than backpack my stuff anywhere, I went to the local park and looked for some angles. Here's what I took with the digital for my "light metering" shot
I hope the LF comes out well too (but knowing my luck it'll be the test shot which is best ;-)
The Bessa RF is a 6x9 120 film format folding camera. You might not be so keen on a 1942 camera (even if it is cheaper) so stay tuned for developments on this front, as it appears that there will be a release of a newBessa III in 2008. That camera will be by Fuji, and if you find this camera to be interesting that one will undoubtedly address every niggle and problem I have with this camera. Very exciting stuff, but anyway back to this camera, the RF.
A while ago I bought a Bessa I and was impressed with the camera despite its limitations. Although the RF is an older camera I was eager to see if the RF would be a better tool for making images than the I.
Despite being older than the Bessa I it has a couple of features which are not found on the I (although can be found on the more expensive Bessa II)
focus is by rack
there is a coupled range finder to assist with focusing the camera
For people brought up on SLR cameras (where a mirror system allows you to see what is focused) these cameras are more like the point and shoot digitals with only a small peep hole on the side of the camera to allow you to point it in the right direction when taking a picture. Focus (since they didn't have auto focus in 1942) is done by the photographer.
If you're not familiar with Range Finders they are a tool for determining distance. If you know the distance you can then set the focus by positioning the lens. You can see the focus knob more clearly in this image. Its that knob on the bottom there (which when holding the camera is the left hand side)
It works by moving the lens (by that chrome arm there) back and forward, just like you do with a view camera. The main difference (aside that its much smaller) is that you can't view the image on the ground glass to confirm focus.
The camera has three small windows along the top. The one on the left (of this picture) is the view finder, just like my Bessa I this is what you use to roughly point the camera at what you're taking. Then left and right of the bellows (second and third along from the left) you can see the two range finding windows that the system uses to help you to focus.
You may notice a tripod mount over on the bottom corner of the front cover (swung to one side) . This is a tripod mount for portrait orientations. The whole thing folds down neatly to a compact package not much bigger than your hand. Its smaller in all dimensions than a VHS cassette (remember them?) and weighs about 800 grams.
Its slim and easily fits into the side pocket of a backpack. I've found so far that it makes VERY good images (when you get the focus right). Unlike many 6x9 cameras you actually get very nearly 6cm by 9cm, now, if you consider that 4x5 sheet film is about 10cm by 13 cm it means that you can take 3 images with this and stitch them together in your favourite stitching program (mine is PTGui) to make the equivalent of scanning a sheet of 4x5.
Well, I took my 4x5 out the other day, and set up with my 90mm lens (about the same as 28mm on a 35mm or Full Frame DSLR camera). This is a little shorter than the focal length of the Bessa, which is 105mm making it slightly wide of normal, but when you combine three images to make one larger image (as I mentioned above) they are almost exactly the same.
The image to the right is a screen grab of the scans I took with both cameras. To me the top one stands out as being sharper than the bottom one. Well folks the bottom one is from the 4x5 and the top one from the Bessa RF.
Hot dam that's sharp!
These are scans at 2400 dpi using my Epson flat bed scanner, which is right at its limits at this sort of detail (some say slightly past them ... but anyway). But still, both are scanned on the same gear, so if you get a better scan with a better scanner, then both will just look better!
Assuming a little overlap on your images when you take them this will make an image that is 14,000 x 8000 pixels in size. Thats around 100 megapixels if you want it!
I hope your PC is grunty.
So if you're a landscape photographer, and presently using a compact digital camera but are not satisfied with its image quality (even though it might say its 10 megapixels). Then keep taking your compact with you as its an excellent light meter (and for the snaps too) and add a Bessa folder to your pack! The other weekend I took this image (which I've even scalled back here from 5200 x 7700 pixels) if you click on it (like all the images on my blog) you'll see a bigger one (though not the full size).
its not all roses though. I've had some issues with the camera, so stay tuned (or if you're in the future search on the Bessa RF key words.
As surprising as it may seem I have not yet done any close up work with my large format camera. Perhaps all the 'bellows factor' calculation has put me off at a subconscious level.
Well, I had some fresh flowers handy last weekend, and thought "why not".
I used my 90mm lens and the image is nearly 1:1 (meaning that 1cm of flower will appear as 1cm of negative). I am really quite surprised how well the 90mm (a wide angle) performs in close up. Not only is the angle of view better than what I get using a smaller format (such as the digital) but the depth of field is good too. All in all its come up rather well I think.
As well as the wonderful tonality seen here, there was significant detail available from the image too.
I thought I'd include a segment of a scan from the film done at only 600 dpi (click it to see that sized on your screen properly) to give you an idea what's visible in the image. I've inspected the negative at x10 and found that its quite sharp, probably supporting scans at 3000 dpi. Sadly my scanner runs out of grunt at about 1800dpi so I'd need to pay for that ;-)
This would allow you to make a print about 1.2 m high if one wanted to print something as big as that! You can click on either of these images to see them a little bigger :-)
For the last few months I've been looking at some of my large format camera images and shaking my head ... is it my wide angle lens (Fujinon 90mm f8) ... I don't know. My images just weren't sharp enough for my tastes (not to mention the time and energy put into capture).
The clue came when I was testing some new (to me) film, and I happened to use my 90mm and my 10D for metering. I was doing metering and film speed testing and my first impression of the test was that my metering system was working well, but I quickly spotted that the digital was so much sharper than my 4x5 negative.
What?
Looking about the image I soon discovered that vibration was at work, as I spotted that the LED on the small stereo was not a precise dot, but more oval looking! (note the section highlighted and zoomed in on the left here)
Using judicious quantities of BluTac to 'nail' my camera down onto a table, I have decided that my new Manfrotto 190 tripod just isn't up to the same levels of stability as my old one was.
It holds the camera, but a laser pointer placed on the camera shows that the thing vibrates like a tuning fork when faintly touched, or (worse) when the shutter goes click. A quick look at the 'stem' of the tripod shows that the head is now attached to the neck by plastic!
The cheapest solution for me was to attach drinking straws with some BluTac to the camera and the tripod legs to 'brace it up'. Looks odd, but it works. So now I'm getting the details I'm hoping for in my pictures. For example this shot of the forest floor the other day.
Shows the right amount of detail, and this is only a 1000dpi scan of the film!
whereas my 5Megapixel digital shows only this amount of detail (below) and even taken with more 'zoom in' than the film image.
Just what I expected to see.
So now I'm comfortable with my imaging systems again, and know that new Manfrotto tripods are not what they used to be.