Fan-fukken-tastic idea if you aske me ... So I thought I'd give it a whack.
As you can see below, the front of the lens inner surface is smooth ... no filter thread ...

While the procedure is not for those with 10 thumbs, it certainly does not require a Master tradesman.
Please excuse the lack of process shots as while I intended to document the process, I got carried away with it and ... well soon enough it was finished and done.
method
You start with a 55mm filter, of any kind and any cheapie on ebay will do.Step 1:
with your dremel or small grinding wheel, you carefully work around the outside of the filter wearing it down evenly and periodically testing for fit. Basically you want it to be very snug so that it will hold itself in by fit alone (no cement or glue needed). Do not remove the glass of the filter yet, it will add support so you don't distort or bend your filter (soon to be just a metal thread). Be neat.
Step 2:
when this is accomplished you can now remove the glass from the filter (I used a small hammer with the filter on a bit of wood and tapped it lightly to smash it gently). Wearing leather gloves and using a pair of pliers carefully remove the glass shards. The retaining ring which held the glass in now, simply unscrews.
Step 3:
It will be obvious now that there is a thread at the back of the filter which is designed to screw into a 55mm threaded surface ... we don't need that, so again with your dremel tool (and again wearing gloves) carefully cut off the thread with the 'metal grinding cutting disc' ... be patient and just work your way around. When this comes off you can then just sand the back with some 240 grit paper on a flat surface (I use a large book).
Last step:
The filter is now ready to mount, so using the 67mm stepup ring screwed onto the front (as a holder so you don't bend it) carefully twist it onto the front of your GWC-1 as far as it will go by hand. This should be most of the way. Now remove the stepup ring so you can access the front edge of the filter, which will be almost flush with the front. Then using a bit of hard wood (such as say the handle of your hammer) holding the lens in one hand and the hammer handle in the other tap it in working your way round so that its then snuggled in tightly against the edge of the inside of the GWC-1
It will look like this:

You can see that next to none of the ex-filter(now thread) protrudes ... we want exactly this.
So now you can screw on the step-up up ring normally and then screw on the 67mm filter.

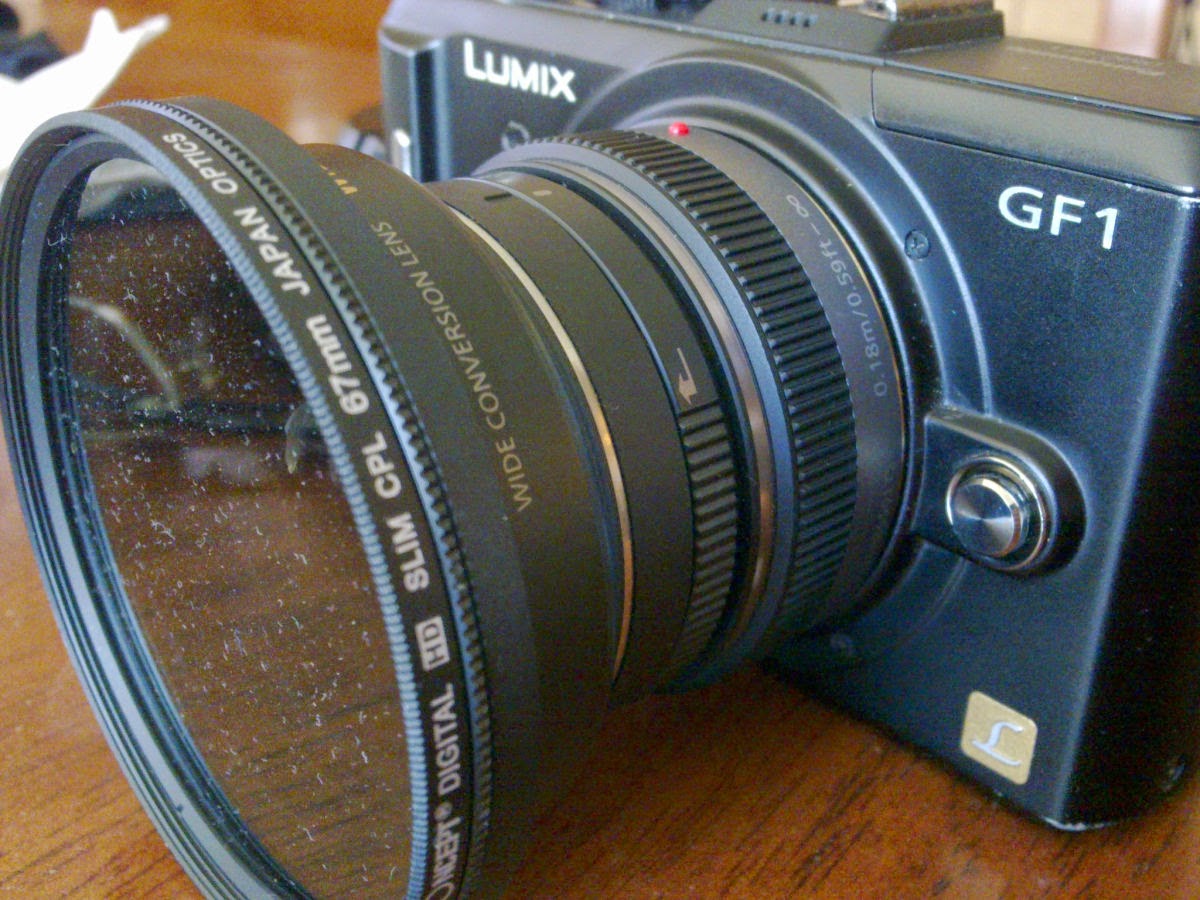
looks perfectly suited ... while you will need to remove the filter and stepup ring to replace your GWC-1 lens cap, and yes, the lens cap just goes on as it did before because you have not actually altered your GWC-1 in any way.
So here is the entire kit (man my house is dusty)...
Discussion
Now, I'd picked the 67mm because previous testing showed me that (with a step up ring) that was the smallest size which did not cause obstruction of the image (you know, vignetting).There is a weee teeny bit but it is only visible if you shoot RAW and convert without any correction for distortion.

but when you shoot JPG you never see that as the reshaping applied to correct lens distortions streches them out of visible range.

perfect


No comments:
Post a Comment