Having recently started using 120 film, I wondered about making or buying a 120 pinhole camera. I did a little searching online and found that a basic wooden box camera was some hundreds of dollars. While its fashionable to be able to spend hundreds on toys I'm not so fashion
able.

Just as I was resigned to making my own (perhaps from a junked folder) I came across the Holga pinhole on ebay. It arrived yesterday, and I've tested it and posted my first findings on the camera here. I'll probably post more as I find it.
The camera is a little bigger than I'd imagined, but considering that it does 6x9 and 6x12 I guess that I shouldn't have been surprised.
In terms of features, its surprisingly well appointed, with not only a lens cap (an able shutter in itself) and a shutter (seen to the left of the camera).

The camera back has the typical red window for determining the exposures (NB by reading the paper backing of 120 film) meaning that 220 is out of the question.
Also, the manual is not only unclear on this issue but entirely wrong. To use the 6x9 mask you need to put the switch up (with the arrow pointing to 16) and the number beside 12 visible. Then, you need to read the numbers as if you were taking 16 exposres (which you aren't) and use every second number. I tried evens first, and found that I had too much wasted leader and a ½ a frame when the film ran out. I'll use 1,3,5 ... next time.

As you can see from the paper tape here the locations for the window do not correspond with the correct location for 6x9, rather they're (as the numbers suggest) for 645 and 6x6. So to get (for example) 6x9 one will need to start at 1 and wind to 3 for the next frame. There will of course be double the border gap between frames :-)

The film access is by removing the entire back (no sophisticated hinged door here ;-)
These little latches double as the neck strap holder, and slide down (quite easilly) to allow the back door to fall off. The neck strap (when attached) prevents this (
note to users).
You can also see the 'film advance' knob here. It has the feel of a cheap ratchet mechanism associated with a kids toy. I don't know how long it'll last, but hey, it only cost $50!

Another lovely touch on the camera is a bubble spirit level. This is a very handy feature, considering that you need to be using this on a tripod and as it also does 6x12 getting things level is really important for some landscape shots.
I'd reckon that when using the larger format that it might just be handy. The camera also comes with a shutter release cable as well as the masks for 6x9 or 6x12 (as you can see below).

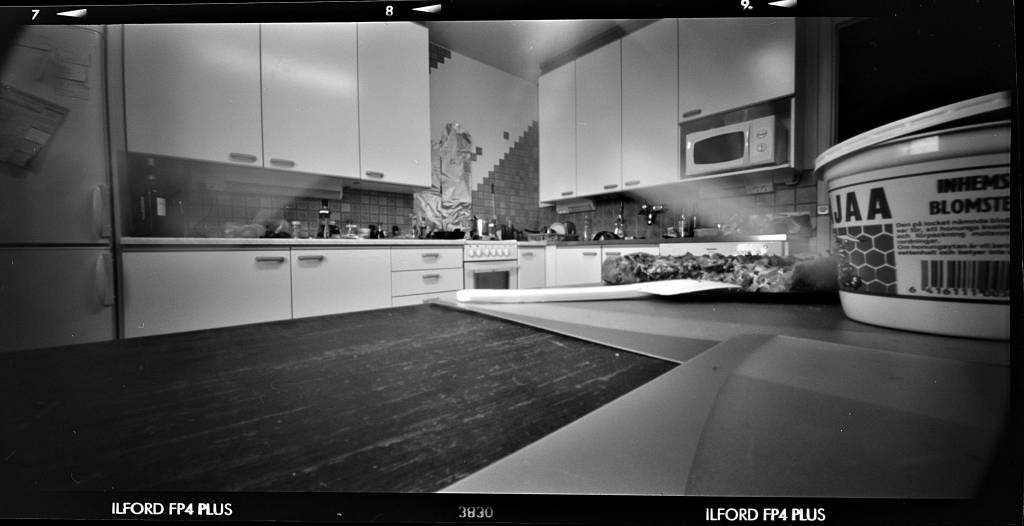
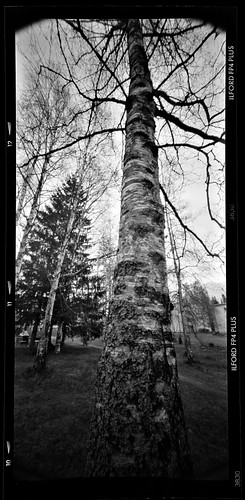
Lastly, how well does it work? Well quite impressively in my opinion. Here's a few images from my first roll of film. I set exposure using my digital camera(at f5.6) , and calculated the required shift exposure by multiplying the time by 1000 (based on 2
10 which is near enough). I used ADOX CHM 120 film. This kitchen image in particular is actually the best tonal range (to match my scanner) I have ever had from the film.

the lounge room. Note again the exceptional range here. this is based on 15th @ f5.6 for the shadows, and even the full sunlight on the floor only just hit the edge of the film capacity! HDR pinhole!

Lastly I'd like to leave you with an 'eggs with oranges' comparison. This is an image which I've taken with at a different time also with my 10D. Comparison is fascinating. The lighting is (of course) different, but its from the same balcony of the same apartment.
First the overview

Then a 100% segment

Then the image that my 10D gets with a similar angle of view lens (a Tokina ATX at 15mm). This is taken on a tripod with mirror lock up. You'll notice that the composition is not exactly the same, this looks more to the right.

Then the 100% segment.
 Conclusions:
For sure, the Holga image is grubby, but (of course) its largely diffraction limited. If I could use f64 on the 10D it wouldn't look so crash hot (let alone f135). So the Holga is damn fine value for money, and a welcome addition to my image kit!