Showing posts with label Snapseed. Show all posts

Tuesday, 5 February 2019

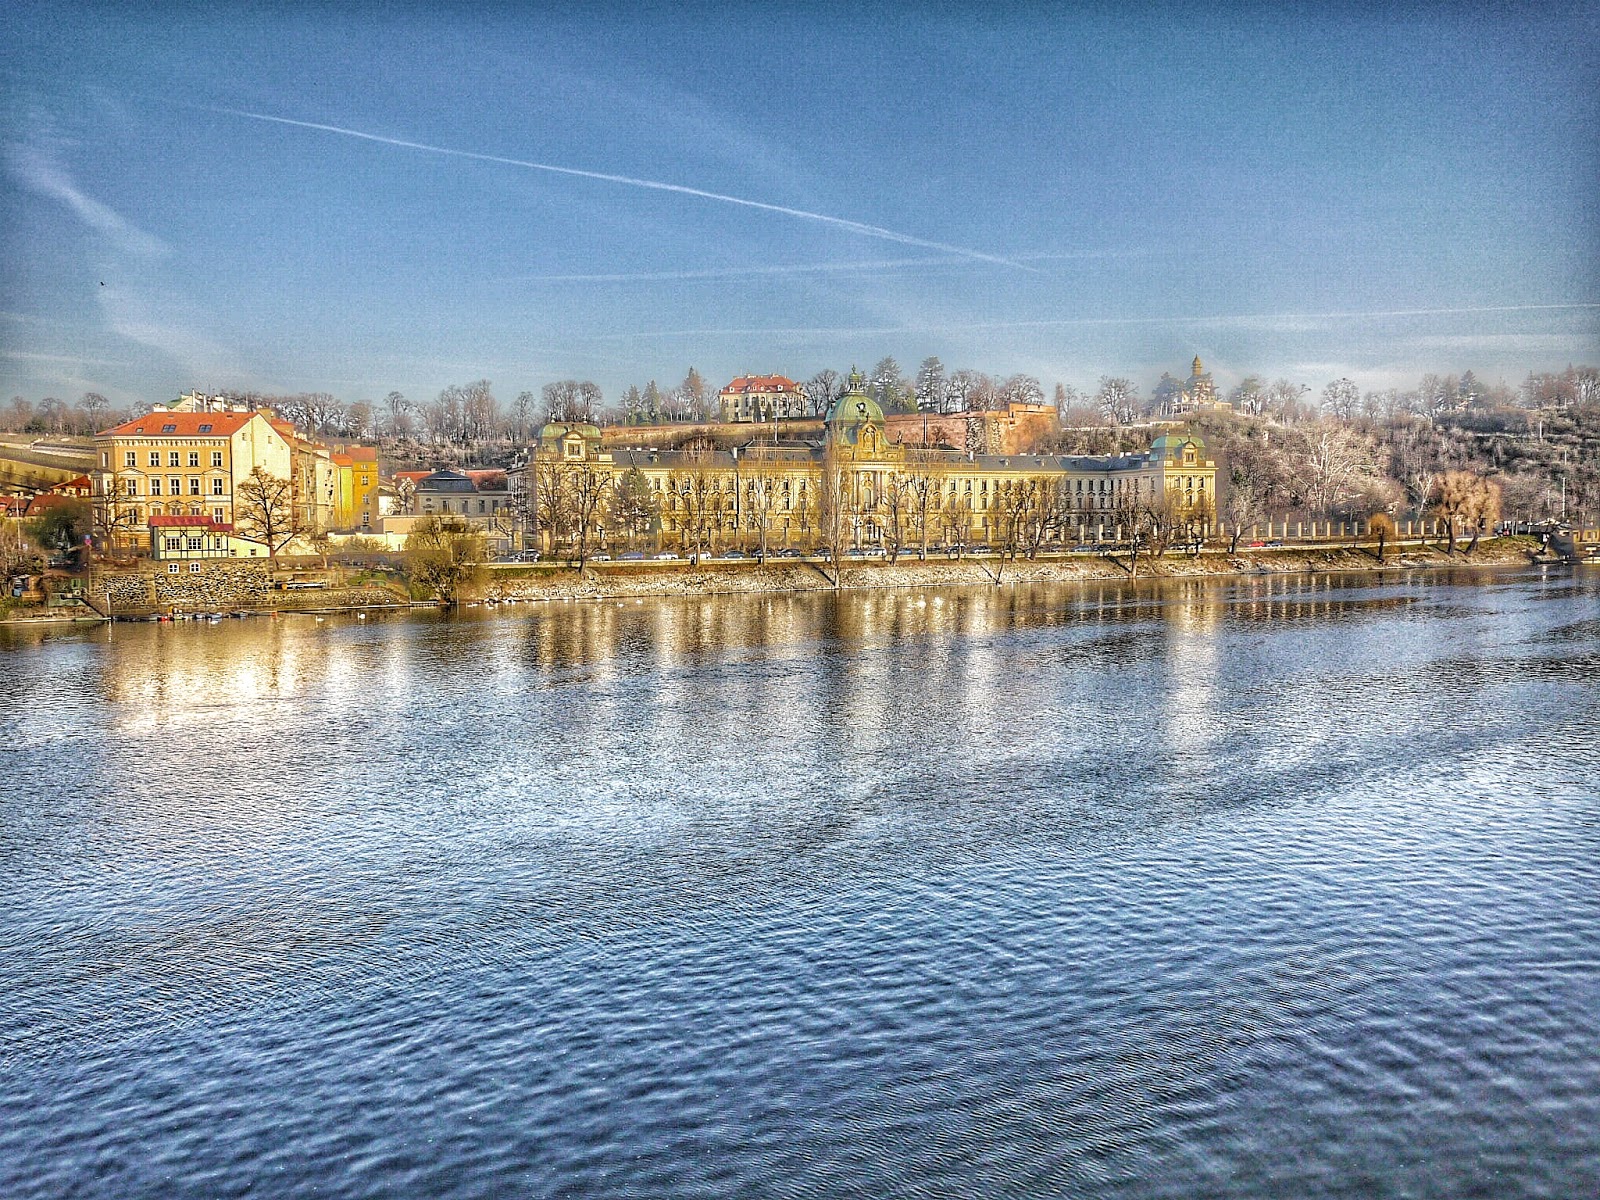
Good Evening

Nice light

Its a nice spot.
[Sony A7, FD20mm f2.8 @ 5.6]

Sunday, 17 September 2017

Snapseed and noise (but from where?)

The other evening I was out walking (to watch the ISS go over) and took this image with my Oppo F1 phone (it being the only camera I happened to have with me) while I was out. (Note, blogspot seems to be causing posterisation on the images I load with its recompression of gradients ... Uhgg)


I took it with the phone/cam set to RAW so that I'd be able to play with the image later (cos I already know how much better that can be). I put it into Snapseed (which has become my default phone image processing tool) and applied my basic preferred steps and was disappointed by then noise it had in the image. I wanted it for Facebook so knowing it was going to be scaled back anway (meaning noone would notice) I cropped it a bit and resized it down and loaded it up. So wonding if the processing of HDR Scape was introducing the noise I pulled this image out of the same DNG file and had a look around. Even at this scale the noise is clear..


so lets have a pixel peep ... (cos even scaled back it looks a bit 'rough')


quite noisy ... and applying a little HDR (I've found gentle HDRI to adjust the brightness and at a low filter level cleans up a lot of vignetting) to it only made this worse.


I tried a few tools to remove the noise and was resigned to it being "how it is" at an ISO over 1000 (1229 actually) in low light.

Then it occured to me "I wonder what DCRAW Mobile would render" as I know DCRAW has wavelets for noise control. So while I was unable to see any difference using those parameters, DCRAW did a significantly better job.


without seeming to make the image any softer really (no sharpening applied, but I think Snapseed always does a bit).

So while this makes me feel comfortable that I can push my phones limits that bit more, it also makes me wonder what Snapseed are doing. I suspect that they may be adding noise in their process because (to save space) they may work with lower bit depths. Its well known that adding noise can cover gradient posterisation caused by inadequate bit depth. If you are interested I suggest reading this article over at the University of Chicago (totally worth the read for the technically inclined). The author examines how you can keep apparent tonal range with reduced bit depth (faster to process) as long as you have enough noise to cover it up.

NB: from that page


Given how fast Snapseed processes my DNG files (compared to DCRAW) it makes me wonder if they are not doing something like that. I already know (from asking the developer) that once the conversion from DNG to a demosiaced image occurs they only work in 8 bit ... hmmm ... I for one would be very interested to know why there is so much more noise even without the HDRI filter.

So I have reached out to the developer of DCRAW Mobile to ask if the wavelets are actually doing anything and hopefully they'll comment back here. Perhaps even answer if the slowness of demosaic in DCRAW is exacerbated by lack of threading on phones.

Meanwhile, my final image is this one, which somehow I find not quite punch enough but anyway:


Thursday, 31 August 2017

Flogging a Dead Phone (for pixels)

well my Oppo F1 is not exactly dead, but it is in the view that they are no longer sold new by Oppo (perhaps you can get one somewhere).

The reason for this post (which will be of little interest to even less people than usual) is to provide an answer to a question which was asked of me recently:

Which is better: DNG (*and then process the DNG, with say Snapseed) or the Ultra HD mode
So I set about to answer this question...

Firstly lets look at some images, the overview I took, which has plenty of "natural detail" and is at a distance where the blur caused by atmosphere isn't going to effect things (like a mountain range):


I took (essentially) 3 shots the Ultra HD, then a DNG (which then automatically takes a) JPG.

Basically the Ultra HD mode uses some upscaling and combines (as near as I understand it) a number of images and attempts to work out the sharpest portions of each image to:

  1. jam together the best bits to make an over all
  2. upscale it and save it to a JPG

Lets take a look

So lets dive into the pixel peeping now shall we? First lets look at a segment of the OOC (Out Of Camera) JPG and the Ultra HD at the same level of detail (which means that the UHD will be shown at 50% so they are effectively comparable.


To me there are no surprises ... the two images look close, with the usual "over sharpened look" to the OOC JPG. Nothing screams out at us however.

I've never understood the mental masturbation over MegaPixel Madness, and I'm willing to bet that 99% of the images from these phones will end up on Facebook or some other social media and therefore scaled down ... very very few will end up being printed taking advantage of the 4000 pixel width ... but most of the "selfieObsessed" users attracted to the King Wang name will not even understand any of the above anyway ...

The next step is to look at the UHD more closely and compare that to the OOC JPG. To make this easier I did a bicubic upscale in Photoshop of the JPG so we can see clearly:


This makes it pretty clear (to me at least) that the final written JPG just doesn't have the "right stuff" to make an upscale work ... meaning that this is a win to the UHD image. Probably because the image is upscaled prior to the mushy crummy JPG algorithm that Oppo uses is applied to the OOC JPG (meaning its likely it does it in an uncompressed image space, perhaps even RAW).

Ok, so now lets take the DNG (which I've already established to be heaps better than the OOC JPG in so many previous posts it does not bear repeating), Starting with the DNG (processed in Snapseed with not much more than a straight conversion, which is of course then saved as a JPG by Snapseed) and then upscaled in Photoshop to compare to the UHD at 100%


Which is very close, but to me actually gives better tonals in the ridge of the rear wheel arch (the rust and cracked paint more clearly defined). So even upscaled the DNG is competitive to the UHD

As well (as a side benefit) we have the opportunity to do more post processing (without getting posterisation of the sky)  from the DNG than we would from the UHD (because we're dealing with more bits at starter).

For the hell of it I thought I'd downscale the UHD to compare it at 100% with the Snapseed to see if there was something in that:


Which to my eye looks pretty good (although I prefer the colour balance of the DNG over the UHD).

So what's the point and what's the benefit to a photographer? Are there drawbacks?

Advantages , Similarities and Drawbacks

As it happens the DNG is about the same physical size as the UHD shot (even though its a JPG), but the nod goes to the DNG because its actually a little smaller (should you be pushed for space on your phone) at 25Mb vs 26Mb (for the UHD) : advantage DNG

A drawback of each is that you have to remember to engage that mode (either RAW or Ultra HD), however the UHD has the additional drawback that (because it takes multiple images) you have to hold the camera steady longer ... or get a crummy shot. advantage DNG

Because the UHD is a JPG, you can (assuming you want to) just get a big print made directly from it and know that (printing to 140cm monster prints) you'll get a much crisper print than from a regular OOC JPG and won't need to bother with processing software or mussing up your hair : advantage UHD

Myself I'll keep using DNG because I happen to be OK with the use of Snapseed (or other future advances in DNG processing), however I hope this has helped you to work out what you'd like to do and why.

:-)

Monday, 21 August 2017

processing the bird

I was out in the back yard today and there was this crested pigeon sitting on a branch, so I happened to be holing my GH1 and the FD300mm f4 (because the bird I was actually wanting to photograph flew away as soon as I tuned my camera on), and thought well ... lets photograph you.

So I came inside, pulled the SD card and moved the RAW file onto my phone and processed it with Snapseed. Here is a scaled version of that


This made me think ... hmmm ... I wonder what I'd have got with a PC based editor ... so I had a quick whirl in a photoshop alike product called RawTherapee


so its not ball tearing difference is it. In fact I kinda like what I could do with Snapseed and (drum roll) it took less time!

Lets zoom in

Snapseed:


RawTherapee:


Not that this is the first  time to really see this or present it, but it is at least entirely different subject matter and shows that Snapseed stacks up across a variety of uses.

Like this guy...


Wednesday, 31 May 2017

the camera you have with you ...

despite my overwhelming urge to pound my phone into a rock every time I try to type on the fucking thing (only those who can't type, have never used a decent QWERTY keyboard and can tolerate so many spelling errors and interpretation errors could confess they like on screen keyboards) the phone makes a good camera. Not least because its always  with you. Like today, I was out wandering around and enjoying the beautiful weather when I looked back (in anticipation of some good backlighting) and found just that:


These days I reflexively put the camera into RAW and then I've got that too. I've earlier found that this combination is about 85% of the quality my GF1 (with the 14mm f2.5 lens) gives.

The camera app did a pretty decent job of this challenging lighting situation (I'd tapped on the brightest cluster of leaves over there mid lower right) but RAW and Snapseed enabled me to pull the highlights down in development and sharpen up a good image.

Here is a full segment


Based on my experience with printing I reckon this'll be good for 52.6 x 71.1 cm (20.69 x 27.97 inches).

I reckon this'll go nicely on a wall back in Australia (to remind me of here when I'm there).

Friday, 17 March 2017

Snapseed on the road

Well having tested Snapseed at home I'm now making good use of it in the road with my phone as my processing tool. Making use of sitting around time I can turn stuff like this


Into this


Without fiddlefarting around with exposure in the church. (Note: the above image looks better on my tablets and phone, yet shadows looks crummy on my laptop on this bottom image ... yet the others in here not ... so it highlights that what you see on your screen may not be what others see)

One more


Into


Of course you can always go at it like a 5 year old with mums make up


But I was never into the eye bleeding.

The trip to Prague is working very well and I'm much more impressed with the reality of the place than I expected I would be.

Truly a beautiful city

Monday, 13 March 2017

ways to cook up a RAW file

No matter what, I've never been happy with being in a monogamous relationship with Out Of Camera JPG's

So to me the only question is not which setting but "how to process it". Raw processing tools have come a long way in the last dozen years and we've seen a lot of movement in tools. Myself I'm always looking around at what I can use to process things with. While I'm a long time Photoshop user I've been reticent to keep upgrading Photoshop (which isn't cheap) just so that I can keep processing my RAW files?

Clearly that wasn't appealing (or financially justifiable) and so I've always been on the hunt for tools. Over time I've used also dcraw , Photomatix, RawTherapee and of course recently Snapseed (which I've been evaluating here for some few months on my blog here).

I like Snapseed because its fast, its free and it runs on my phone. Considering that I like to travel the phone (which is really a octa core CPU in my pocket) allows me to process stuff out in the field (or in this case at home) in a convenient manner.

But is it any good?

This post really just serves to show how well Snapseed can compare to the "PC" based alternatives.


So today I took a picture which I thought was a nice processing challenge. Black and White with details I could see in the whites and and in the blacks.

So here is the OOC JPG


which isn't bad but a little disappointing.

Good old dcraw has the advantage of being free and allows me to make 16bit TIFFS if I wanted to then process that in a version of Photoshop that won't support my RAW files.


better, but it actually blew the reds making the snow a little discoloured ... so I'd need to fiddle.

So I whacked it into RawTherapee where I needed to play a little with a few bits and adjust levels and I also employed a little bit of ToneMapping (which is exactly what what Snapseed or Photomatix does).


So here I've managed to get some of the tones in the waters but lost a bit of the sense of "blackness" ... I  could fiddle more but

Snapseed


This file took the least work, but that I liked the most. It controlled the levels in the development, I applied a little tone mapping (the HDR tools) where I could also work on enriching the water ripple and sky reflection details. As you can imagine getting it to look "perfect" requires a monitor which is perfect so at the end of the day (across 3 monitors) I prefer this one. The "proof" would be in a print (and getting that right).

So how does Snapseed actually stack up with the details if you were then wanting to actually use this to make a full sized print from the the files:

So in the same order:

OOC JPG


dcraw


RawTherapee


Snapseed


The astute will observe that these are all 50% magnification because its my experience that what you observe on a screen at 50% is about what you end up seeing on a well made print at large sizes.

So, in summary all really good ... so essentially there is no penalty for sharpness in using Snapseed and indeed even if you didn't like the specific tonals I pulled, well then that is something you could simply adjust.

That it folks ... your call ... but I'm super happy with using Snapseed. Its free, fast and convenient. My only grips is that I need to use raw2dng converter to convert my RW2 files (although the maker claims the latest version works on RAW on android devices it doesn't an any of mine and not on some others either given the support forum).

People on various internet forum seem to obsess about expensive methods of how to back up their images when travelling and have ways to process them too. Well if you ask me you can get a bunch of SD cards for the trip for next to nothing. They don't need to be large (unless you're doing a ton of video) and to be honest SD cards are at least as reliable as the hard disks in those expensive "media back up" tools.

You can use your Android phone to back up your SD card to another SD card (if you're really that paranoid) via the reader (especially if you stick to smaller cards like 8 or 16GB (which are bloody cheap and take thousands of pictures).

I personally can't imagine filling up even on 8GB card with images on a holiday and then being able to ever find time to look at them ... but then I suspect for some people photography is about using the camera "like a pro" and never really doing much with the 12,000 images they took.

Anyway, I'm off to Prague in the next few days and I'll be able to simply take my phone (which I would) and my camera and a USB OTG cable + card reader.

Then I can either:

  • use the OOC JPG
  • process with Snapseed
then post to here, email, post to social media ... or even just keep to print later

Enjoy this revolution of free tools and powerful transportable processing in phones - I am.

Wednesday, 22 February 2017

quick n dirty Snapseed example

I thought I'd throw this together to show you what I get with a little bit of effort from Snapseed and moving the images from my Camera to my Phone (using a USB OTG cable and card reader).

The JPG from the camera was this:


which is sufficiently exosed but a bit flat. I'm not that "camera guy" who futzes about in the field rooting about with exposures. I look in the viewfinder and get exposure 90%  (not too dark, not washed out) right and move on.

This isn't a bad shot but its a bit flat ... but then this is why I use RAW, so  I can process later. As it happens these days I can do that in stages of the day (pick your down time) as long as my phone has battery.

I have the camera set to capture RAW + small JPG (which is 2048 wide and usually enough to email or Facebook anyway if it didn't need tweaking). As discussed in an earlier post I:

  • transfer the JPG and RW2 files to my phone via a utility (I use ES File ...)
  • run raw2dng app to convert my RW2 files to DNG
  • open the regular image browser to see my files and open to Snapseed from there


So here's what I did


Which got this as the end product:


I recommend you open them both in separate tabs so you can switch between them and observe the differences them in an  A <> B manner.

As I've observed before the raw2dng app is not preserving the lens corrections (which Snapseed will honour if they are there) so there is a difference in barrel distortion between the images.

Still ... when raw2dng gets around to adding that it will be a compelling processing method.

Sunday, 5 February 2017

Sunny Day

Was nice and sunny today, so I went out with the GF1


Quite a nice day, and people were walking around on the lake too


Processed and uploaded (indeed written) on my phone.

:-)

Friday, 3 February 2017

raw2dng app on Android (what I've learned so far...)

Recently I wrote up my findings of using Snapseed and an app for Android called raw2dng (here), which extended the ability I'd already found (but was a bit pointless) when having a look at how well Snapseed actually processed the files. To understand that I took some RW2 images from my Panasonic GF1, converted them to DNG and then transferred to the phone. I wanted to see if the noisy results I got from my phone was because of the phone sensor (which I assumed it would be). Read this post about that process.

Back to the app, as the name of the app implies its intention is to make an Adobe DNG file from your Cameras native RAW file. It will also make a TIFF and a JPG (if you didn't already have that). So keep this in mind as it does not facilitate other operations (like file copying).

I guess that I should start out with some basic assumptions I have.

Assumed:

I normally have my camera set to RAW only. I normally don't bother with the JPG because all RAW files have a JPG in them and if I want JPG then I'll just pull that. Its smaller but I've never found myself wanting to make a big print from an out of camera JPG, 99% of the time what I want with JPG's is to Facebook, email to friends or the blog here. Thus resizing down from 12 or more MegaPixels was what I ended up doing with JPG's

If for some bizzare reason I wanted something that looked like that (usually inferior) Out Of Camera JPG image, I'd still convert my RAW file using any number of tools that I have available and just get a better image anyway. This preference shapes my thinking in the following workflows (for reasons which will become clear).

If you were a JPG only shooter ... well then for a start you won't be processing RAW anywhere (let alone on your phone) and if you were an occasional RAW shooter, specifically setting RAW for a shot here and there then some of the issues raised won't effect you either.

I've been enjoying being able to just carry a USB-OTG cable (like this one) to allow me to simply move my images from my camera, to my phone so that I can process them and then email / facebook / blog them simply when I'm away from my computer (I'm writing this on my computer).

The problem is however that unless one wants to just use the JPG on your phone then more sophisticated processing requires the use of the RAW file. That's something which until recently I wasn't able to do with my Android phone but (as I wrote about here) is now available.

The system is pretty good but has a few bumps in the road which I wanted to address in this post which would transform the app from an interesting thing to play with, to a viable tool.

Workflow

Take a breath this isn't short even as a summary.

summary option 1: this option uses less memory and speeds things up
  1. use the App to read the RAW (in my case RW2) file from the cameras SD now mounted USB OTG
  2. select a file destination for it to write the DNG to which more than likely will need to be your phone primary storage
  3. tap "CONVERT" and wait till its done (depending how many files and how fast your phone is you may want to have a beer)
  4. You may then find the dng files in the location you set


summary option 2: this option uses the most memory but may be simpler but has some issues
  1. navigate to the camera SD card with your file explorer (I use ES File Explorer, you may have your own fav) and copy the RAW files you want and the JPG if you have them (again, see the discussion on this). 
  2. navigate to where you want them and paste
  3. use the App to read the RAW files you just pasted (yes you'll need to navigate there
  4. select a file destination for it to write the DNG to the same location
  5. tap "CONVERT" and wait till its done (depending how many files and how fast your phone is you may want to have a beer)
  6. You may then find the DNG files in the location along with your RAW and the JPG
  7. feel free to now delete the RAW files to recover storage space.

And that was the summary... So if you're not put off yet (I'm stubborn and the appeal is still there) lets go on to...

Discussion

Ok, lets get into the nitty gritty. Fundamentally this app is pretty good, but is very poorly integrated into the Android system in some ways and requires the user to understand lots (or give up) if its to be used as more than a curiosity or toy to pull over one file at a time.

The app allows you to browse to the USB mounted directory, but its a little unclear where that is if you don't know much about the file system. Happily I do so that's not a problem.

I just "up" the directory tree from where it lands by default and then look for the location in /storage which is the USB mounted "disk". In my phone's case that's called UDiskA and the others are sdcard0 and sdcard1 (for the on-board memory and my own expansion microSD card). This is where I pick UDiskA from on the app on my phone


one navigates "back up" the tree by the tap on folder called ..

So far so good, one then needs to tick the files one wants to bring across (I usually don't want to bring everything over) and navigating your own cameras SD card is something that people either know about or don't (if you don't ,then try a tutorial or plug it into a reader on your PC and have a look at the structure or just give up now).

Choices

Now we face choices, some need to have been made before you started taking pictures.

Are you a RAW + JPG kinda photographer or a RAW only kinda photographer?

This is an important question due to the way that (at least my) Android works with images and file systems (you know, your SD card and where shit is).

Most "image browsers" (or Gallery applications) that you use to show your images will only work with JPG images. So if you want to use the "picture gallery" to look through your images you'll need to keep that FIRMLY in mind. This is because you'll need to either
  1. only bring one file over and work on it
  2. wish to browse through the files you've brought over visually
Snapseed allows you to work direct from your Gallery App on the DNG file if (and only if) there is a JPG of exactly the same name in the same folder. If not then you'll need to use another application (like ES File Explorer) to send it to. If there isn't then you'll have to browse the file system with Snapseed and then open the DNG directly. 

NOTE: no preview will be visible for those DNG files.

read that again....

So unless you wish to make an act of memory as there will be no preview available for your DNG files (assuming you have made more than one) you will need one.

If you shoot RAW + JPG then you'll be more able to see the required files. I recommend you do this for other reasons that will become clear soon. I normally don't do this because the embedded JPG in the RAW file is normally all I need, but in this system no. So I recommend that you use RAW and the JPG ...

The next choice is how are you going to get the files across from the cameras SD card?

Easiest way: If you use ES File Explorer then its easiest, grab the RAW and the JPG and copy them into a folder on your phones memory ... which is essentially meaning you will be following the 7step process above.

This is of course slower because you'll end up doing reads on the RAW file twice:
  1. reading the RAW file to copy it to your phone
  2. raw2dng will be reading the RAW file to write the DNG file (onto your phone)
If its one or two files no problem, if its many files, then it will be much more tedious and  ... well you may just run out of space on your phone using option 1

I want to bring a bunch...

So assuming that you want to use raw2dng to make only the DNG files as a copy from your SD card onto your phone then you need to make a setting choice (in the app) of where the output for the new DNG files will be.

A trap for the young player is that the app defaults it to the same location. On some versions of Android (later ones) this is forbidden ... so one needs to write to the only place one can, the primary storage ... annoying, but that's life thanks to the rectalCavities in at Google, writing the Android source who saw fit to do this after 5.0

This of course means you'll have the DNG files but no JPG files as discussed above. So you'll need to do another operation in ES File Explorer to copy that again (annoying right). However if (like me) you select the most compressed JPG option and the smallest JPG size (has no effect on the RAW) then that's fairly fast.

The app does offer a JPG option, so you can re-run the same selection on the RAW files you've already ticked (in the file picker) but to be honest that's as slow as making the DNG was.

your call.

One last critical point

Snapseed respects the lens correction data that is embedded in the RAW files, DNG files which I have made on my my PC using the Adobe DNG to RAW converter. Looks sweet to see things as they should be (with pincushion distortion and chromatic abb already removed for you) , however raw2dng app does not seem to embed this in the DNG it makes, so you'll notice doorways suck with wide angle lenses.

Conclusion

The app makes it very cumbersome to work with more than one or two files (unless you can memorise file names). If the photographer wants to bring a bunch of files across then they would need a preview method, and thus dragging over the JPG's from the cameras SD card into that folder are helpful. To make matters worse the app de-selects your selected images after its done the conversion so you'll still need to go back and select them again AND its still slower to read the DNG and make a JPG from that ... easier to just copy in ES File Explorer as discussed.

As I see it the app developer could make a trivial change to the process and while it was writing the thumbnail preview into the DNG, it could then create a JPG file with that (already obtained) data.

The benefits of this approach would be to put both a DNG and a JPG with common name in the same folder thus allowing the various image browser softwares to see the JPG and have it automatically associated with Snapseed.


For the forward thinkers, I've already tried using DCRAW (which is blindingly fast at extracting the thumbs from the RAW) but that has the problem of naming the extracted file something like Pxxxxxx.thumb.jpg which is then not associated until one manually deletes the .thumb from the name.


Is it worth it?

Well to me yes, because I don't like the flat images one gets in some situations, or the blow outs in others. Here is a Before / After version of on image from the weekend with my Panasonic


Sky and snow was flat and the image lacked contrast. I could also have used the JPG and processed it, but then the shadows had too much noise.

This image needed a lot of help in fact too much  ... the camera OOC was pretty much DoA


with blown highlights and inky shadows which has nothing to rescue. However from the RAW (which had more) I was able to make it into this


Which still has blown reds (and isn't as good as colour Negative film would be) but then, I don't need to explain this stuff to those who already are "converted to RAW"

So, if you need / wish to have RAW processing on your trip, and don't want to drag your laptop along, this is the best way to go as of right now.

;-)


Tuesday, 31 January 2017

Weekend trip to Oulu

well I spent the weekend away visiting friends. Took a few snaps along the way, so no, this isn't a plug for the sights and night life of Oulu.

As seems to be my wont I took some typical landscapes exploring themes I like. This one was at a totally fog shrouded lake, with the sun clearly not far above the fog (note red hue to right)


as always Digital (as opposed to negative film) makes it very hard (read impossible) to work with high contrast lighting (and not get blowouts) but the attraction is of course ease of use and speed at which I can get results. Having just got back I have these and am not still waiting (then needing to scan).

A little further down the road and I was stopped by the gorgeous image of the sun just sinking below the tree line and the mist lowering to just knee height ... this was the best image I could rescue from that ...


but the foreground pine trees are devoid of the rich greens I  saw with my eyes and the mist hardly noticeable..

My friend ...


and her husband and kids (playing Egg on my phone)


I had a great time and it was nice to walk out onto the sea (frozen) and see ice (normally dense snow in Oulu) and see fantastic patterns (I left my camera back in the house) that were simply the most beautiful thing I'd seen in a while.

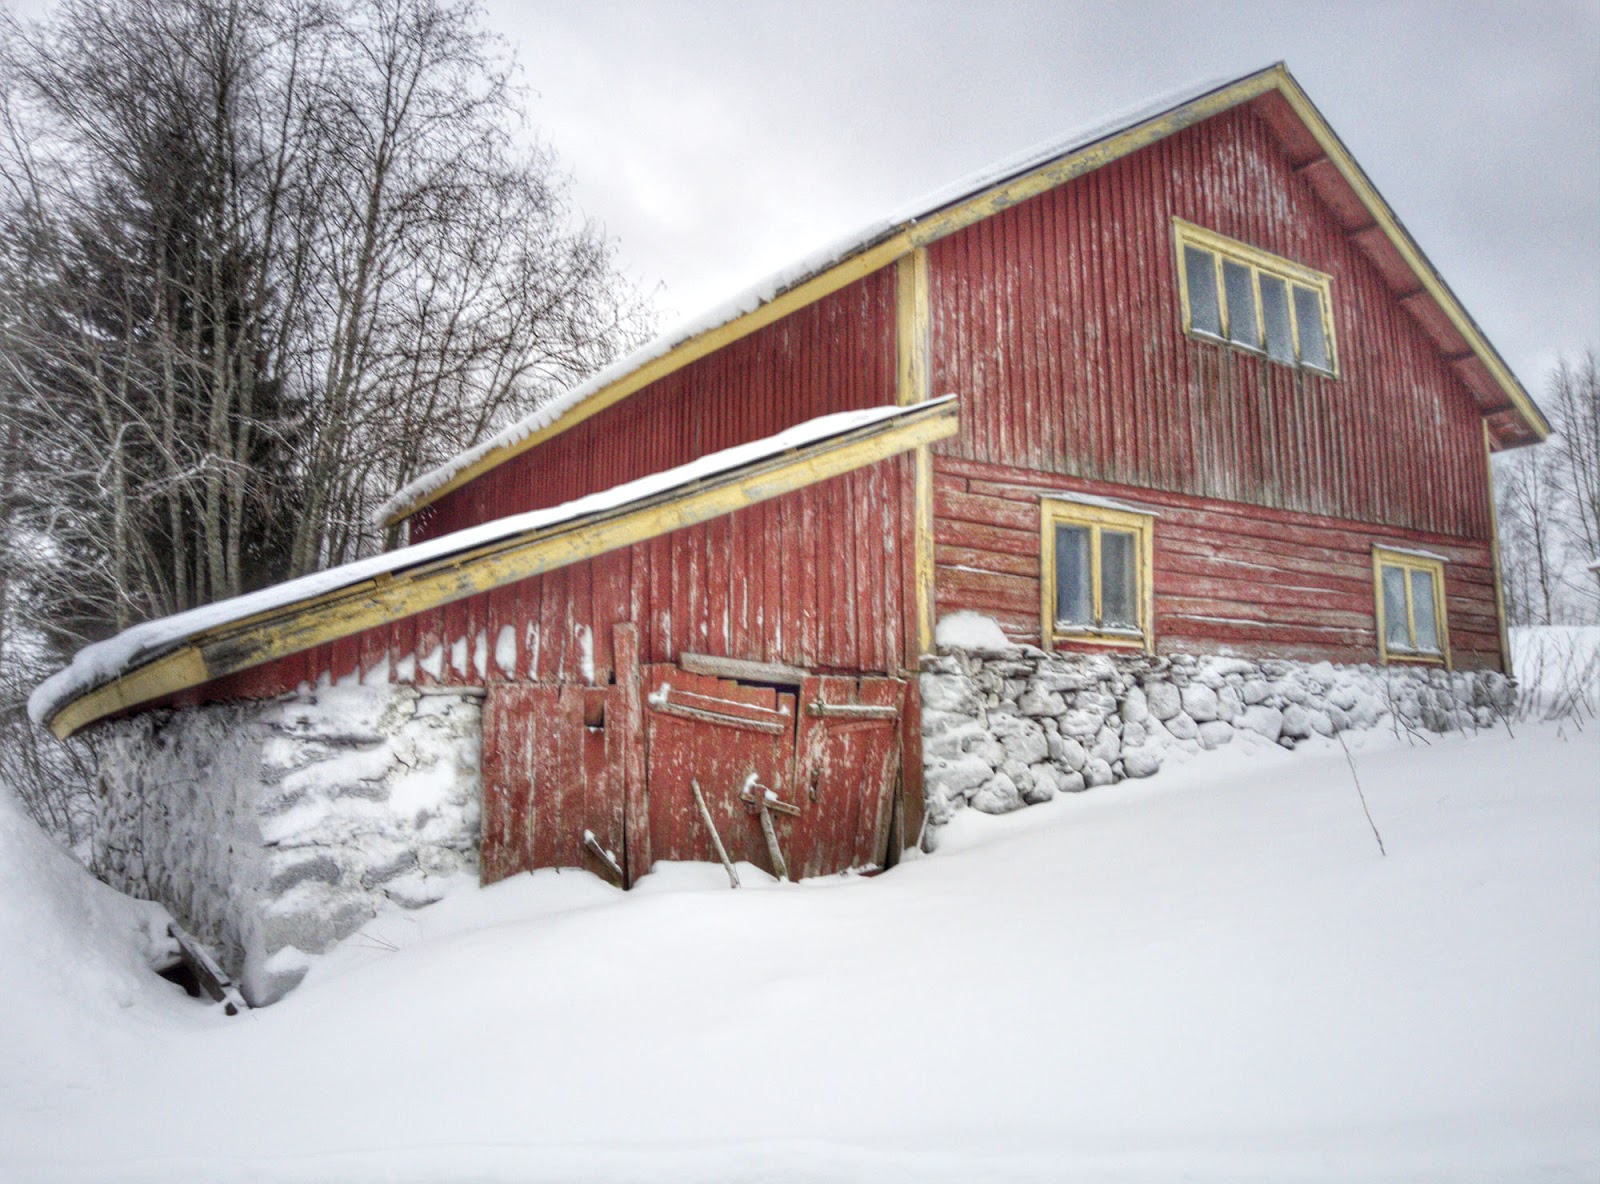
On the way home I passed a few old sheds and just had to indulge myself again


and further up the hill this one..


It was a nice break and good to drive up the guts of Finland and see some scenery I'd not seen before (last time I was on a bus).

I had lots of time to think and think that I've come to some understandings of things about myself and my future.

Maybe
(NOTE: everything here has been edited from camera RAW on my phone with Snapseed)

Sunday, 22 January 2017

On Phone Camera Processing just got better

Hi

Using the computing power (and beautiful screen colour rendition) of your phones to process RAW images taken with your actual digital camera (not just the phones cam) is an attractive idea. In an earlier post late last year (here) I explored using Snapseed to process the RAW files from my Panasonic camera on my phone (an Oppo F1). But as it turned out there was a problem for me in getting the Panasonic RAW files to play with Snapseed, it only works with DNG files, not the RW2 produced by the camera (no such problems with iPhone versions now nor dcraw for Android BTW). As I like the way that Snapseed works (its interface) I have wanted a way to get this happening on my Android devices.

Well now there is an app for Android called raw2dng (playstore) which does exactly that step for me.

So I now:

  1. pull the SD card from my Camera
  2. plug it into the SD reader 
  3. plug that SD reader into a USB OTG cable
  4. open the app and select the images I want, save
  5. Open the new DNG images in Snapseed and process 
Sweet!
I think that its not actually any slower than any other process because it is still constrained by the requirement to read the RAW from the SD card and then process and write the data to the DNG. Its faster than using the PC (which you may not have) as an intermediary step as it saves an extra cycle of read / write.

Example


A sample: this RAW file was (I was a bit agressive on EV compensation) set to -1 EV as I was worried about snow being washed out on the kids head. This is the JPG extracted from the RAW file:


while on that point it boggles my mind that people are still wasting camera space by picking RAW + JPG when all RAW files include an embedded JPG anyway (so you can see it on your camera).

Then running that through Snapseed I just did a quick and dirty of develop (no compensation) and HDRI (held back a bit in strength and picked "Nature" filter)


which isn't bad when you consider it.

Of course if I just wanted to pull the JPG's out of the RAW files on the card I could have used DCRAW for Android (which is a bit clunky, but quite powerful) to save the embedded thumbnails to my phone.

For reference, this is an attempt with Snapseed to just pull up the exposure +1EV and hold the highlights back a tad


also quite good, but missing the details of fallen leaves in the grass over there on the left ... which is why I like to tonemap (and always did a little doge and burn when I was printing negatives back in the wet process days).

So there you go ... make better use of your camera with your Phone (if you have Android, dunno how that goes on iPhone)