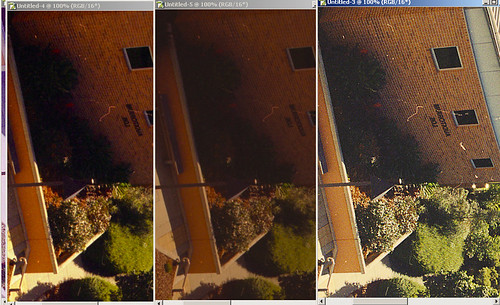
Showing posts with label film. Show all posts

Saturday, 7 March 2015

my Full Frame camera is 35mm film

Fortunatly we've had 35mm around for longer than digital, and while I really DO like my micro43 cameras I am under no illusions about it and know that good old 35mm full frame (there was half frame you know, such as the Olympus Pen F series) exceeds it in many ways (though convenience isn't one of them).

At about the time when digital cameras (my main snapshot cameras for 15 years now) were good enough to use as a reasonable substitute, Film Scanners were expensive and their use was poorly understood. By the time that good scanners were at reasonable prices and systems like Noritsu's 35mm development / scanning process machines were around it was too late.

For the enthusiast picking up 35mm gear at bargin prices, and for those pulling out their old images, the quality you can get with a good scan rivals the best of the current Full Frame digital cameras (like the Sony A7 or any of the Full Frame Canon / Nikon cameras). Especially if you don't have shit hot lenses.

I was going through some older shots I took in Tokyo back in about 2002 and liked this one of a temple just up from where I lived


Its a good 20 Megapixels.

I took it with my faithful (still running fine) EOS630 with an EF24 f2.8 lens (still running fine too).

So lets have a look at some details ... at pixel peeping levels ... from over there on the left ... just under the roof


then the gutter above it ...


moving over to the right hand side:


and lastly one from the middle:


Which makes it clear also (judging by the reflections in the windows) that I could have focused a little bit closer than I did (instead I relied on the infinity "stop" on the lens) and the rope would be sharper .... when magnifying this much (which is what a good scan does) the DoF assumptions many people make on 35mm (like what's on the lens barrel) are inadequate.

So, all in all I'm not about to stop using my digital camera but I recognize that its got its place and that there is still a place for 35mm for me (especially for 4 day hikes in -15C where batteries freeze).

Enjoy

Tuesday, 14 January 2014

a Negative printing experience

I normally don't get my negatives printed until I've scanned them. This is because quite simply the places who print your film are incompetent (I really can't think of what else to say). Today because the shop didn't listen (more evidence to support my hypothesis) I ended up getting prints with my 24 exposures.

I glanced at them quickly and thought FFS

Item of Evidence 1


Now looking at the timber of the desk it looks like I see it here ... so my scan of the negative.


The blue light on the snow is classic up here, and as the sun is going down the sky was lit with low cloud and lovely reds. That's why I took the picture.

If I was a person learning about photography and all I saw was the print I'd be so disappointed with the my camera or me or something. But the issue is firmly at the shop. For if I take my file there (in sRGB colourspace) and print it, then it will look like my scan.

Item 2


shit, the ends of my glasses have more colour than this print.

My scan:


now I want to emphasize that I did fuck all to these scans aside from my usual process:
  1. scan as positive and set levels conservatively to not loose data
  2. invert in photoshop
  3. trim up levels
  4. apply some gamma to each channel
So its no wonder that people think prints from negatives don't look as good as digital prints. The real irony here is that negative was designed with printing in mind, not scanning.

I don't mind paying 5 bucks for the negative developing but the extra for the prints of this quality is just insulting. Sometimes you just don't get what you pay for.

Wednesday, 27 November 2013

why I love negatives

People may get the wrong idea that I don't like digital cameras, if that was the case I wouldn't be as supportive of and invested in and investigative of digital as I am. Its simply that they have limitations and I'm one who gets sick of "kool-aid" drinkers of hype who ignore reality.

So with that aside, I was just out yesterday with my old friend the OM-1 (and a roll of neg) testing my 28mm lens (after being surprised just how much flare my 21mm has when pointed straight at the sun).

I was wandering around the riverbank in the -4°C day with the intention of seeing how the river is freezing up slowly and testing my OM1 + 28mm f2.8 (200ISO negative) against my GF-1 (set to 200ISO) when I stumbled across this (among others) great scene.


Now, the red rectangle is in there because in my enthusiasm for examining the beauty of it, I took the digital zoomed in too tight, and the red rectangle is the digital framing ... and no I wasn't using a tripod ;-)


When I got home I scanned the film (dropped off at a 1hour developer) and looked at my digitals. The JPG's sucked but as I'd captured RAW I put the ones I liked through dcraw and got this 16bit TIFF from it.

Now its worth re-iterating that the digital is more zoomed in than the digital ... which will help the digital have greater clarity due to lower magnification. So with that said:

Film detail screengrab:

Digital screengrab:


the digital is just so luscious you could suck on it for a week. But the negative isn't so bad as to make you spit it out.

In particular I'm really impressed with the lack of 'grit' and the depth of the shadows details while still holding highlights. That's the reason I dropped the shutter speed to 30th, to get more shadow details.

Now bear in mind
  • that the film shot was handheld at 30th of a sec so higher chances of some shake
  • the digital was a bit higher at 50th of a sec (lower chances of shake and an OIS lens)
  • the film scan is of a much larger area
and I think that its fair to say that the Neg did pretty bloody well. The Nikon LS-4000 made this a peach.

So why am I mucking around with this still?

sure, the "war is over" ... digital won.  I guess noone needs to paint anymore either?

Well the reason for me to fool around with film still (apart from the fact I like some of the look I get with it) is that when I go on a 2 or 3 day excursion in -10°C (or lower) the batteries die on the digital unless I go to extreme lengths to keep them warm. So my plain old mechanical film camera just keeps keeping on.

Not to mention in the contrasty highly reflective lights of winter shots like this one below


are just not possible with digital without resorting to HDRI (and pray there is no wind). I'll leave you with this one from the same spot.


Film too ;-)

Saturday, 23 November 2013

looking into the (high contrast and bright) light

Recently I got the GWC1 adapter for my Panasonic 14mm f2.5 lens. I've written about that over here and here. One of the reasons for getting it was because I've been after something which equaled my OM21mm f3.5 lens (on film) in the micro 4/3 digital realm. So having satisfied myself that it was good enough for me, I then sold my other wide options (the Olympus 9-18mm zoom) and moved on.

The release of the Sony A7 camera has been very interesting for me, and has had me wondering again about if I should go to full frame. I like many things about full frame, but what I don't like is that cameras like the EOS 5D (and most of the new series lenses) are bloated creatures. I would quite likely not be carrying them, and thus (it not being with me) the best camera I had would be something else like my GF/GH camera (or probably my phone). I find it disappointing that full frame digital was only in such obese bodies while my OM series film cameras had been quite compact devices.

I decided to put a roll of 35mm neg into my OM1 and whack the 21mm onto the front and go for a walk with both cameras and see, as it happens I took these shots over the period of a week.

Firstly I was looking for any differences in "Shallow DoF" that could be obtained with a wide lens, because I don't always want everything to be in focus. So I took these two shots. Ohh, and all digitals were shot RAW and many and varied methods were employed to not have blowouts ... more on that in a moment.


GF1 + 14mm + wide
 

OM1 + 21mm


The perspective difference between 4/3 (4:3) and 35mm (3:2) makes them look a little more different, but essentially the horizontal view is similar between the two systems (and therefore I can crop the 4:3 into 3:2 no dramas) and the DoF is really similar. However I did notice that (when taking and then processing the shots) that the digital blew out in the highlights. Really that just shits me, and this isn't even harsh light compared to stuff I work with in Australia.

So I wandered around down to the river and took these shots:
GF1

OM1


This is the proverbial "chalk and cheese" and cuts to the heart of why I hate digital ... blown colours in real world situations. Sometimes this just isn't recoverable. The 35mm negative held the cloud details and the irregularity of where blown channels are (red often blows before green or blue) makes the clouds look horrible to me.

Perhaps with a lot of time on my hands (and I already tried using Adobe ACR, dcraw and Photomatix) I could perhaps work this into something nicer. But you know, you just can't recover data that's lost, you can only work it into something acceptable buy effectively "painting".

So this got me thinking (seeing those blinkies and knowing about this issue) that I'd give my OM vs GF a torture test. I waited for a clear day and took a shot looking right into the sun.

GF1

OM1

So, first impressions were:
  • holy shit my OM21mm had massive flare (and a lens hood isn't going to help here)
  • holy shit the blowouts on the digital are massive ... its pathetic
 Ok, so I dropped the exposure on the GF by two stops and tried again (shot on manual BTW) in an attempt to give it more room, and got this:


The blowout is less, but geezuz its still hot. Lets take a closer look...

GF1

OM1

Which actually has details and didn't blow the channels of Neg (but must be hitting hard I have to say) ... just amazing. Tweaking the contrast and you can actually see the graduation to the disc of the sun!

  • A better lens would fix my film camera shots lens flare, but nothing will fix the digital.
  • just how far do you have to under expose to not blast out the digital (and at what expense of the shadows) 
  • the clouds around the sky in the digital are artifically red due to channel blowouts
The astute (looking at the 100% images) will also notice on this that the 35mm shot enlarges bigger because the 35mm film scan is 5590 x 3780 pixels while the GF1 is 4000 x 3000 pixels. That's a bit more than 25% more pixels to play with!  So you could either print large or scale down and clean up the film grain to have the print looking nearly as smooth as the digital.

So where does this leave me?

Well while my intention was to see how my lenses may "look and feel" on the Sony A7 this exersize has left me wondering if there is any point in moving systems from micro4/3 over to the Sony full frame system, simply because no matter how many more pixels (and I've got enough IMO already) or how much the larger format is going to look better I'm still going to be stuck with the dynamic range issues of digital.

So compared with keeping 35mm neg and micro4/3 (NB going to the Sony A7) I would
  • rationalize bodies and lenses (being able to use the 35mm lenses on both systems)
  • but still need to carry a 35mm film body for high contrast work
and still need to spend a bundle on the A7 (and more or less be only getting a small advantage?).

The wide lens on the 4/3  did give me sufficiently shallow DoF for my purposes and quite enough resolution too. So as long as I don't get blowouts (and I have enough experience to predict that) and since the GF/GH camera is about as compact as the Sony (and really how much more compact can it get?) perhaps I don't get much extra bang for my thousand bucks??
That would be body only and selling my micro4/3 gear to offset the price, so I'd still not have any AF lenses then) at lest with a EOS camera I'd have a couple of EF prime lenses too.

So maybe I won't get the Sony just yet ...

Sunday, 7 April 2013

Bessa I with Colour Skopa lens

I have had 2 Bessa cameras now I find that I like them. I found that  I prefer the simplicity of the Bessa I over the Bessa RF cameras and some time ago sold my RF. Sadly I made an attempt to service the shutter on the first Bessa I I bought (blog post on that here) but ended up damaging the threads of the lens when disassembling it. I have been variously distracted in the intervening time with things that some readers of my blog will be familiar.

For some time I have been looking for a Skopar lens version on eBay and recently I picked one up. Its a tidy camera with everything in largely good order (except that the shutter is a bit sticky, but I'm not going to touch this one ... yet).

I put my first film through it this week and was stunned by the results. I uses a roll of Fuji Superia X-TRA 400 through it and scanned the results on my Epson 4870 flatbed scanner.

WOW

The camera is not without issues (who isn't) and light leaks interfered with a number of the images, and operator error interfered with a few more. However where I didn't screw it up (not withstanding the light leaks, which were probably operator error too) the stunning shallow depth of field on what is essentially a mild wide angle showed me just why it was I loved this format.


Further the sharpness of the lens from side to side is (in my view) sharper than the Vaskar lens on my earlier one.

I was so impressed with the sharpness and detail I went and took another shot of the same scene as one of the negatives (without a flaw) with the GH1 so that I could make a comparison. It is this which I wish to show you in more detail.

 Bessa I - overview

GH1 - overview

Anyone who has done much with colour negative knows that scanning colour negative to get exactly what a digital camera gives is nearly impossible, so please forgive the colour differences.

However firstly I'll point out that the 6x9 camera produces an image which is a ratio of 2:3 where the GH1 produces one of 4:5 (well in this setting). I happen to like 6x9 as its the same image dimension ratios that 35mm is.

Methods:
I set the zoom on the GH1 to give the same horizontal width as the angle of view of the Bessa.
I scanned the film at 1200 dpi. Both cameras thus produced an image which was more or less 4000 pixels wide. Of course I could probably get 2000dpi out of the scanner without difficulty and looking at these images I'm inclinded to believe that I would indeed get more detail out of the film ... it would not just be the scanner equuivalent of 'upscaling'

So, lets have a look at the details:

Bessa - segment 1


GH1 - segment 1


Dam that's close ... ok, lets look over to the skyscrapers in the LHS background

Bessa - skyscraper segment2


GH1 - skyscraper segment 2

I think that the Bessa is actually resolving the details in the buildings better than the GH1 is. That's astounding as at this level (100% pixel view) we are clearly at the limits of the GH1s capacity and yet there is scope for better out of the Bessa negative

Bessa - segment 3


GH1 - segment 3

Well again (forgetting tones) the Bessa has done a better job of resolving fine details in the leaf (particularly that fresh frond that is vertical and as yet unspread).

If you disagree that there is enough in it to call, then that means that simply this is a tie. So I will go as far as saying that this digital camera which was released in 2010 has caught up to what 6x9 film cameras with box brownie film could achieve back in the late 1950's. Certainly when I did this with my Canon EOS 10D the Bessa with the Vaska lens was its equal.

This does not mean that I'll stop using the GH1 (or any other digital camera for that matter) but does re-enforce why I keep using the Bessa. For there are times when Negative can capture a better image than digital can (such as high contrast situations). My initial view of what to use the Bessa for was for those times when I wanted to have something light weight as a backup camera and didn't want to drag the large format camera around with me.

For me this shows that if you are wanting to use a 6x9 folder for some images, that you don't have to feel that you are not going to get top notch results. If you aren't getting results like this out of it, then you are doing something wrong or you have not set your camera up properly (AKA doing something wrong)


:-)

Monday, 11 March 2013

Film: pulling images out of the mists of time

This weekend I thought I would give some time to a project which we started back in 2010.

My wife was ferreting through a cupboard back at her parents place in Finland before we came to Australia. She came across an old 110 camera which she recognised from her childhood.

I noticed that it had film in it still. I knew from buying my Pentax 110 series camera and lenses that this film was not processable in Finland. I said "for sure we can get it processed back in Australia. It turns out I was right.

Not unexpectedly however it seems that the film was more or less ruined from more than 20 years of sitting in the camera in a cupboard. None the less I could see something in the murky ink of each of strips, so I was willing to give it a go. This image (below) is what the film looks like to the eye on a light box.


Firstly I tried firstly my Epson flatbed scanner (the 4870) and was a little disappointed that I wasn't able to get as good an image as I'd like.

A bit of fooling around with strip holders and I was able to feed it into my Nikon LS-4000.

As per my normal view of scanning as if a positive, adjusting the levels and then throwing in some extra bits that the Nikon has (such as multi sampling) I was both pleased and surprised to be able to get the images off the film. This is one of them

Given the blackened murky neg I had to start with this isn't too bad. Sure its grainy and the colours are off, but keep in mind that this film has sat in the camera undeveloped for way past its ideal.

Actually if anyone remembers the prints one normally got from 110 its actually pretty darn good.

None of the images are prize winners, but its been great for the family to see images of long lost events and people who are sadly no longer with us.

This exercise has left me wondering about the age old question I have had over the archival nature of digital.

If someone left a consumer grade digital camera in the cupboard for 20 years from today, will anyone be able to get at those images? Will we have media readers to access the SD cards? Will USB even exist then?

Interesting question isn't it.


Thursday, 17 January 2013

interested in photography? (he asked him knowingly)

nudge nudge ... wink wink

well any reader of my blog knows that I am :-)

Tonight I was looking around Farcebook and notice an image use to sell up some real estate.


no doubt taken with a digital camera, and (looking at the shadow in the top middle of the frame) not a very big sensor one either. That bit of 'dust' is classic small camera stuff.

I thought it would be interesting to compare this with the image I got from a pinhole camera I use of my house. Now this is using box brownie 120 roll film which dates from 1901.

The Pinhole Camera dates from much earlier than that. So looking at what sort of image we get from more than century old technology ...


I don't think I see a shit load of development in that time.

As always the advantage of digital comes down to:
  • rapid delivery of product
  • convenience
  • no skill needed
Now that is not to say that skilled photographers don't use digital cameras, rather it is to say that users without skills can't use film cameras.

There is of course no point to this post (that is if you haven't already found it in examining the image)

Saturday, 29 October 2011

Scanning as neg or scanning as pos

This topic comes up again and again, with people not seeming to actually do anything to verify their work. So I'll put up this post to clarify differences I see when I scan negative on my Epson scanner with the supplied Epson software

I usually scan negative as positive and invert, the reasons are mainly that I get better control and I prefer the results I get. If you don't like to scan this way then by all means don't. If you think that you may gain something from this work flow then what follows are my reasons and some evidence.

Keep in mind that no matter what, the goal here is to produce a result that gets you a satisfactory image from your negative. If you can reliably and consistently get satisfactory results using a method then aside from learning about alternatives for "just in case" then by all means stick to the method you prefer.

Having said that I will say that over the years of scanning I have many times come back to stuff and thought "gosh, I know I can do better with that now". So if you happen to be reading this thinking about scanning your life's work of negatives once and for all just keep in mind that scaning can be a journey of learning.

You may also find the following useful links:


Firstly Methods


I thought I'd start with a slightly over exposed negative. This will exacerbate the problems associated with trying to get shadow details, especially if one follows expose for the shadows and let the highlights fall where they may. I began by setting my Epson 4870 scanner in professional mode and scanned in a variety of ways. I notice (as previously observed in this post that (among other things) scan times varied.

Below is a table of my operations and results, note the changes in scan times in different operations:

Neg as Pos
scan 1 33:95 default adjustments
scan 2 34:00 auto exposure
scan 3 45.61 manual setting, blue hard right

Neg as Neg
scan 4 42:33 auto exposure
scan 5 42:49 manual adjustment of levels

You will find the images named accordingly.

I am not certain as to why there is a scan time difference but I find that the only explanation that makes sense is that the scanner is making alterations in exposure time. Its interesting to note that the scanning of Negative as Negative results in nearly as long an extension of exposure. Previously I have noted that some extension of capture can be found into the darker areas using epson scanners by altering the scan time in the above manner. How much is not a lot, but if you want it, you may just be able to pull a little more out (again also previously discussed).

So now, lets look at some images. Please note these are hosted on Flickr, so feel free to open them in another tab for closer examination if you require.

Firstly lets work with linear data

So scanning neg as pos the first three operations give the following results. Please also note that its important to assign the correct colour profile to your scan after capture. I have mine set to EPSON ColorMatch RGB ...

Again, I prefer to set things myself because I think "never send a machine to to a humans job" (unless you want an insensitive result).


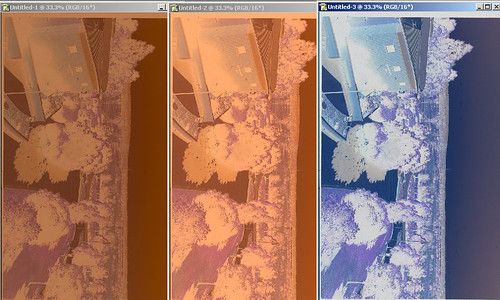
scan-fig3

We can see perhaps there is different contrast ... so now, inverting the image


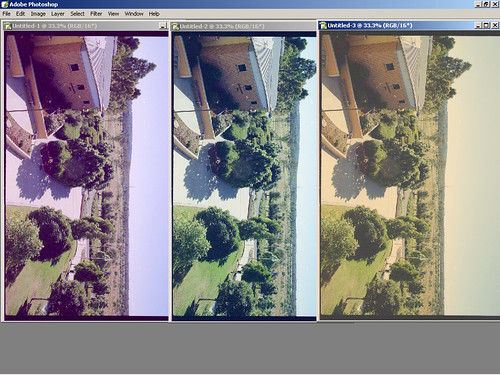
scan-fig4

Definitely there is different contrast. Clearly we get different shadow details here ... as well as different contrast. And naturally there is different colours as I have not perfectly tweaked each image to match the other yet.

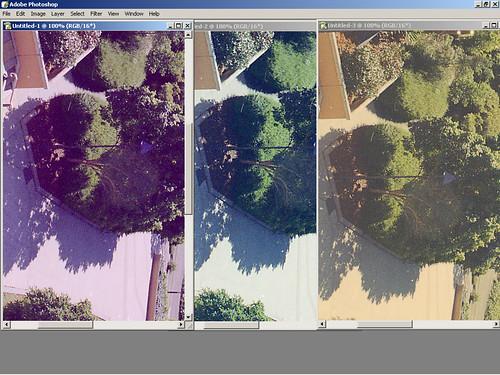
Looking into details in a area of high contrast we see this:

scan-fig5

Dense and inky shadows on the two images done "default" and "Auto" but much better shadow details on the image 3. I happen to think the middle image is about right on colour.


By setting the capture area of the scan (the black and white points) we can capture the density range that negative has. As I have mentioned before negative does not have an even or a linear response. There are some good reasons for this and its not a mistake or a design failing.

The R G and B layers are at different density for a given exposure AND have a different range of density.

So its important to tweak that as soon as you can.

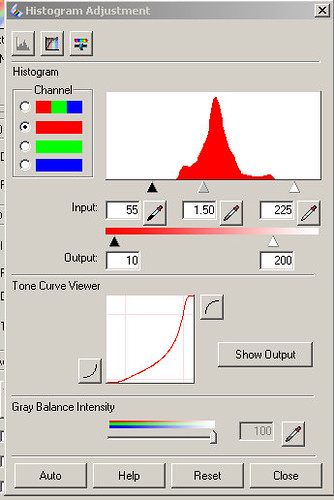
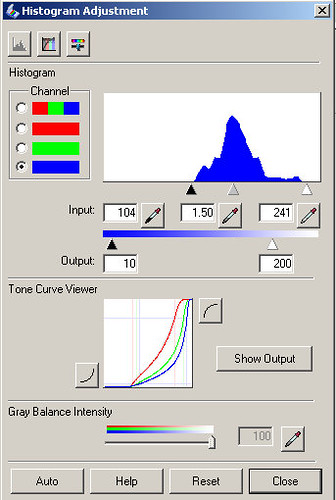
Because each film will have different response characteristics I think its essential to apply curves YOURSELF. One can use the "neg pos" software that has already pre-programmed in various films, but the last time I examined that, it resulted in a much noiser blue channel. I believe that this is not related to the software, but to the way that the scanner driver is handled and the changes that alteration can make.

Of course the linear scan is a little lacking in contrast, and so tweaking it (I only bothered with scan 3 on the right) we get a more 'natural' looking image of the scene.

scan-fig6

So we get a little better shadow details in the image ... but then that may not be noticeable or needed. It is however there if you did need it rather than not being there.

In my opinion this method allowed for better and more accurate setting of black point and seems to have resulted in a better output. I believe that this is related to there being more information in the "heel" of the image (dark is dense on negative) particularly in the green and definately in the blue.

Lets now look at the results of scanning negative on the negative settings


Firstly lets look at what we see in the scanner driver .. we see that the default settings leave red in the middle, and a curve being applied already


scan-fig1

but apply a CURVE to the data which does not occur when you scan negative using the positive setting.

The more you adjust the black and white points, the steeper that curve is ... and please note that its not a linear curve. The blue now appears more moved over to the right than it did when you were viewing it as a positive.

scan-fig2

and you'll also see that the curve bellies out more ... I guess that it could be "up to you" to decide if more or less processing in the scanner driver is better or not.

Without a doubt in my mind if you are not editing this in 16 bits, do as much in the scanner as you can.

Now lets over lay these two scans on top of the other 3

scan-fig7

Now, looking at this I think its clear that Scan 4 (which was auto exposure) actually looks less contrasty than the Scan 5 (which I set manually) but BOTH are more contrasty and darker than the linear scan.

Perhaps you can tweak this in photoshop, but pulling the curve back out will result in loss of information due to the integer nature of the data. You can not do log maths on integters in an orthogonal way and not expect data loss.

This supports my experience that scanning negative as negative applies way to much correction to the image and throws away data which you don't want to happen. Its even worse when you look into the shadows as below.

scan-fig8

Both Scan 4 and Scan 5 are much much murkier than Scan 3 (which follows my recommended negative scanning method).

Finally
I am only reporting what I find, if you want "the truth" go to church and the preacher will tell you what to believe.

If you ask questions about my findings I'm happy to reply. I do get a little bored with the simple re-iteration of the initial question, implying I'm wrong while not providing any of your own evidence and general not reading of the posts I link to. Questions about those posts are happily answered as I am not a professional writer I may make my posts with assumptions not properly clarified.

Monday, 14 June 2010

Nikon, Noritsu, Epson: a comparison of scans and prints

well ... and a little more

Recently I decided to photograph parts of a wedding using my 35mm EOS and negative film. I thought about it and was having trouble deciding if I should go with 4/3 digital or 35mm film but decided on the day (on the spot) to do the main ceremony with my 35mm EOS after taking some test shots and feeling that digital was going to be challenged with the lighting.

For the impatient, the findings


In a nutshell:
  • Scans of 35mm negative perform much better than digital in the harsh light of full daylight when you expose for the shadows and let the film compress the highlights
  • for zero effort the Noritsu scans at develop time give dam good results, to the point of making other systems nearly pointless (make this definitely pointless if you're not a scanner nerd or a skilled / professional scanner operator)
  • Epson flatbed scanners (like 4870, 4990 V700) do really quite well on prints up to 8x12 if you know what your doing
  • if you want to get everything out of your negative you need a good scanner such as the LS-4000. When you do you'll be amazed what is in 35mm negatives (and wonder if you really do use that 5D MkII enough to justify spending AUD$3000 on it?)
  • I love a full frame 35mm size capture for shallow DoF
back to the details

The lighting was under gum tree shaded outdoors, at 11:00am ... so yes, stark shadows and bright bright high lights = blown whites and blacks that resemble inks from Satans bottom. I just wasn't going to risk it.

Now before anyone says fill flash, I'll remind you that on a sunny 16 sort of day (or even f11) that as many cameras are limited to 250th of a second with a flash it would mean that I'd be using f8 on the lens if I wanted to do fill flash (even with 100ISO).

f8 might be good for scenery but on 4/3 it spells sharp not diffuse backgrounds (and pretty clear ones on 35mm too).

YUK ... I may as well use a iPhone or compact digicam. So if you desire shallow depth of field then you can't use fill flash with a focal plane shutter camera ... Even 500th (on a lens shutter) will still only bring me to f5.6 so its available light or sharper backgrounds

Using available light and large aperture was of course perfect in that situation as it gives shallow depth of field, diffuse backgrounds and fast shutters to freeze action / counter camera shake

Now one of the reasons I entertained doing this wedding in Negative was that a local photo place (Photocontinental in Brisbane) uses a Noritsu scanner in their minilab. Readers of my blog will perhaps recall that I'm very impressed with the Noritsu scan quality. I like the fact that I get 3087 x 2048 Pixels ( thats about 6 MPixels) images which are certainly good enough for prints up to 8x12 inch straight from the box. No cleaning, no time spent in scanning, no hassle.

I thought this was an excellent opportunity to:
  • sus out how good PhotoContinentals quality of service is with the Noritsu
  • save my self time in scanning only the potentials for big enlargement
  • have everything on CD for everyone with no effort
This is where I hit my first hurdle, you see when I called and asked about the service I asked if they (Photocont) could do the high res scans. This is were I hit my first hurdle: the staff had no clue about their stuff or how to drive it.

After sorting that out (why is it so hard?) my next hurdle was they neglected to mention that the price for the high res scan was higher than the low res scan ... $9 vs $25 Noone can give me a valid justification of why this is, but I digress.

$25 is of course verging on the highest prices you can pay for this sort of service ... $9 is a good price and one I'm happy to add to the $4.50 for develop of the film, but $25 (plus the $4.5 for develop) pushes the friendship and makes 4 rolls of film start to feel expensive on a job. I'm now well over $100 for materials alone, which is $1.22 per image. Man, no wonder photographers are leaving film for digital.

Even if I want to use film its just put my costs up way higher and that's forgetting about the film stock costs...

My next hurdle was that the files contained no colour profile information, a phone call reveals the futility of asking as noone knows what it is I'm talking about. I assume *(perhaps falsely) that its sRGB. None the matter ... they look OK on my monitor ... a little red for my taste.

Its also worth mentioning to anyone reading this that the standard reply from PhotoContinental to any question about their quality is met with "we don't offer a professional service"

Right ...

Don't get me wrong ... the staff are often very helpful and very professional, its a management thing. If you want my opinion ... don't go to PhotoContinental for printing or development services. I mean their price structure is nearly exactly that of Prolab's and they do offer a professional service. So while PhotoContinental's staff are great, helpful and friendly, their corporate strategy has them charging professional rates but backing down on any responsibility with "we don't offer a professional service"


comparing the scans


With the images in my hand (on the CD actually) I thought I would see what I get with an Epson 4870 (my 4990 is in a box in bubble wrap from the trip over) and my Nikon LS-4000 (broke that one out of packing).

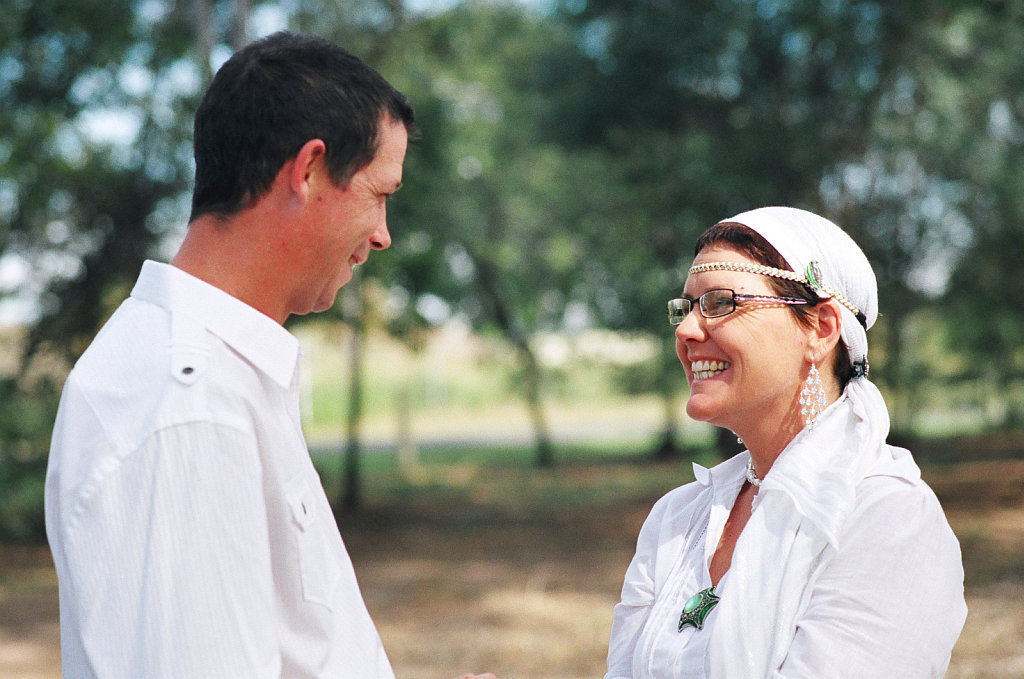
This is the image I picked.

I liked it because: the brides got lovely bright metalic bits and white in full sunlight, the groom has dark hair and he's in shadow, some parts of skin tones are in full sunlight others are in shadow, it shows the DoF of a 100mm lens at f2.8 (hah) and the image was as sharp as a razor.

Hard to ask for more to start with.

I noticed that the scans from the Noritsu had clipped high lights in the white and the blacks were a little dark and inky ... nothing dreadful, but even if I wasn't inclined to compare before I was now.

Naturally all overviews will look identical (colour balance not withstanding).

Procedure:
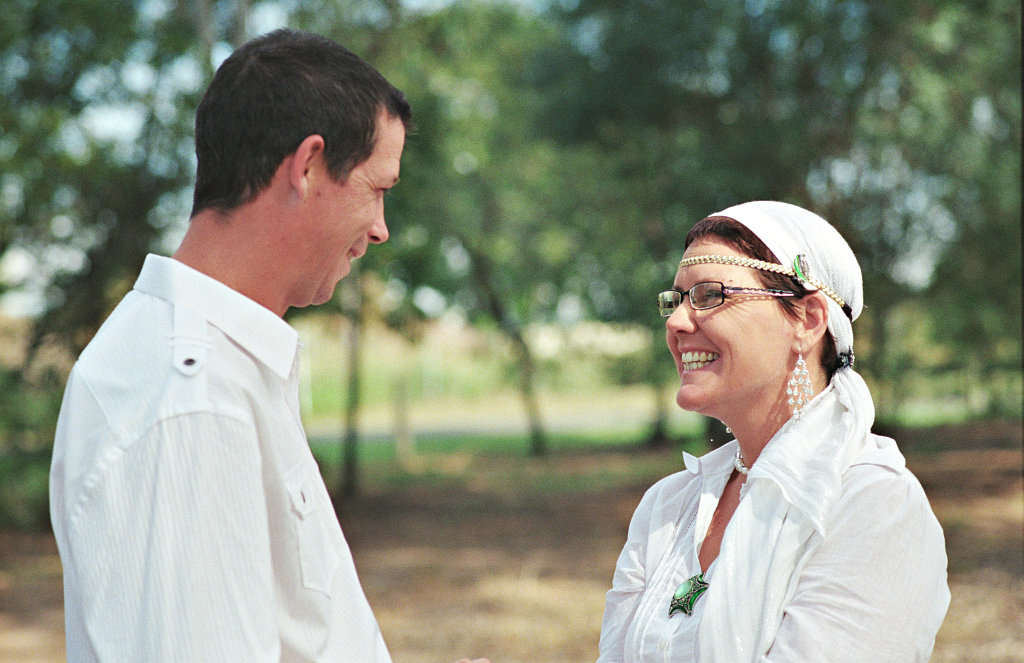
I scanned the negative as positive on both my LS-4000 and on the 4870. I followed my normal colour negative methods on both scanners and got quite close results. Here they are:

Epson 4870
4870-3
I scanned this at 2400dpi as I don't really feel that there is more to be had from this unit and this still works out at 3344 x 2252 pixels which is more than the Noritsu.

next is the:

Nikon LS-4000
LS4K-3b
I scanned this one at 4000dpi which is a significantly bigger hunk of data than either of the other two at 5648 x 3656 pixels.


Pixel peeping

Now, noone is going to be surprised when I say that the Nikon got the best results


followed closely by the Noritsu ...

they have a distinctive look to them which I'm starting to be able to identify. Its a kind of sharpening that looks like pointillism (if that makes sence).

and a reasonable result from the Epson (some thoughtful sharpening has been applied, but more care will fix much of this)


Now, look carefully at:
  • the sharpness of the star
  • the clarity of the parts of the necklace
  • the handling of whites (yes, there was metallic thread in the white cloth)

Ok ... so the Nikon LS-4000 shows how well you can do there, but if you're not printing big then you will certainly not benefit from the Nikon ... you may as well save the thousand or so bucks on it and just go with the Noritsu scans (if you can find some place that does not charge like a wounded bull for the scans). Either that or only pull it out for the ones you like. You'd be ahead on the time involved for scanning.

Of course one also needs to compare prints (hard to do in the internet) but for my own personal interest I thought that I'd also get some prints done.

so lets compare the prints


I got 8x12's done of the three above. I also printed two of them to 12x18 inches but thought I'd restrict myself to the Nikon (which of course does that at a print density of 300dpi) and see how well the Noritsu scales up to that size (essentially dropping the print density to 180dpi ... which should be tolerable).

One of the first things worth mentioning is the reaction of the person doing the prints when I picked them up. Naturally with three prints of the same scene she at first assumed when she pulled them off the machine that there were three copies from the same file. However (being used to checking the images) she noticed there were subtle differences and wondered "what the bloody hell is wrong with the printer". Our discussion at collection time was interesting, as she only noticed subtle colour differences.


Each of the three 8x12's look good, and in isolation each will be considered as good.

There are of course colour differences, as I did not balance each to one another. Partly this was because I wanted to see what the results of taking the image sourced from the PhotoContinental Noitsu process was when taken to another service (KMart in this case).

Close inspection revealed that the print operator (and I) thought that the noritsu and the nikon were equal in sharpness, but the whites and blacks were handled better by the Nikon. The Espon looked good and handled the whites and black well too, but was a little soft.

I felt that the screen results (my screen has been tweaked by a Spyder) reflected the results in the prints, that is to say:
  • the prints from the Noritsu system were a little strong in the red
  • the prints from my 4870 were a little soft when inspected closely and compared against the other two
  • the prints from the Nikon were great.

Looking at the 12x18's the first thing I noticed was that Noritsu looked pretty darn good at that size; no real trace of break down. This leads me to wonder what the real native printing resolution of the printer is ... is it more like 180dpi?

As expected the blown high lights in the Noritsu did indeed result in lessened perception of texture in the blouse. Here is a photo of the prints taken with my digital camera (same height on a tripod).


This of course shows how difficult it is to photograph prints! There is not this sort of colour cast in the prints and I was too lazy to obsess over lighting and copy standing the prints (as I'm not trying to show colour here anyway). Perhaps it shows what I mean well enough.

Forgetting (if you can) the issues of colour happening in photographing a print in my living room using copy stand and a fluro light, you can see from this close up that detail is pretty darn good on the 12 x 18 inch prints

Here is a much closer photograph of the prints:

the Noritsu


and the Nikon LS-4K

Essentially either of these 12x18 prints is sharp enough to actually reveal more detail (such as in the blouse and in the green pendant) than was in the 8x12 and be satisfactory to hold 20cm from your nose and inspect it.

Examining the prints shows that the Nikon sourced file looked great in the shadows (the grooms hair was detailed and held dark better than it appears on the monitor) and tonal range was great. The Noritsu files showed the heavy handed treatment of shadows and clipping of the high lights, exactly what you'd choose negative for.

Don't get me wrong, its not bad, the Noritsu is enough to satisfy 90% of needs and perhaps 90% of professional portrait or wedding photographers needs. If only they could tweak that output a little better it would get stellar results from it with the 35mm negative.

I feel that the operators of the Noritsu should (for their $25) put that little more effort into tweaking the high and low ends of the data sourced from the negative and then apply a little curve to that to push down the noise while keeping the signal (anyone remember dbx noise reduction?). After all ... its in the subtleties that we find the difference between hand made wooden furniture and IKEA.

Summary


This exercise has shown me that the Noritsu scanning system gives results which require a very high end desktop or professional scanning system to beat. I have found that digitisation systems allow me to get images from my 35mm film which are quite satisfactory and it remains to be seen if a digital camera such as a 5D will produce better results in the same challenging lighting situation. I have found before that digital makes it easy to get super results when the light is within the range of the capture, but with hard sunny outdoor light digital does not do as well as negative (especially black and white).

The Noritsu system allows film photographers to digitize their images and gain access to the range of services (like printing) which is available to the photographer. Using this systems allows Photographers to leaverage their 35mm outfits (very competitive prices) and get good results, I believe better in some situations than digital ... certainly better bang for buck.

But it has shown me again that it is all let down by the distribution chain. Photocontinental price their scanning service at nearly exactly the same price as the high end professional services such as Prolab do. Yet despite this pricing do not have a clue about their process, do not let you know the colour profile and appear not to know what this means. I have yet to print their file with them to see if the colours look better "in house", perhaps they have tuned their system scanner and printer by eye?

People in the industry have no idea on how to communicate what their service is and what they offer. When you ask about the scan you get useless answers like we scan at 300ppi ... really ... you start with a 1.5 inch negative and give me 3087 pixels from that ... so how is that 300 points per inch?

Something I have not discussed is the scratches on my negatives (nothing major, but without the ICE on the LS-4K fixing after scanning will be a pain) which if questioned would be answered with "we don't offer a professional service"

Again I'm left feeling that *(as in 2001) 35mm cameras with colour negative film will give results which are equaled by only the best full frame (and larger) digital cameras but at a cost which involves a much higher up front investment than using your 35mm does.

If you used your pocket digital for the snaps and your 35mm film camera for the weddings and sporting events how often will you really use it? If you are buying a $3000 DSLR kit will you be ahead on costs after 4 years? I'm betting most will still drag along that pocket camera too.

However the entire film concept has been sadly let down (still) by the industry which hopes to profit from it the most ... if the pricing of stuff like Noritsu scanning was $9 then at $14.50 (scan + develop only) per roll of 36 it would be very attractive to be using negative and getting scans like this done. Certainly it would fulfill 90% of people's needs for the high end ... heck even 90% of wedding photographers.

Given that fewer and fewer clients of wedding photographers see or appreciate the difference, I feel that to use film today you have to be aware of what makes it better, able to get at this yourself and have a client that appreciates the difference.