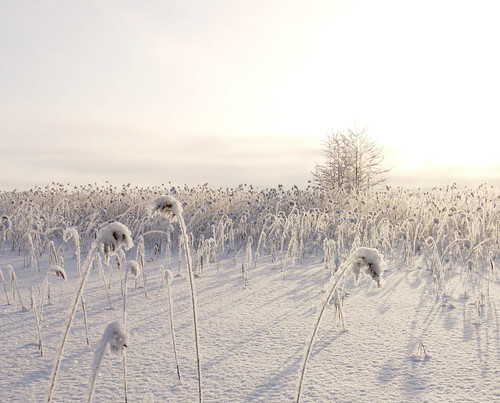
I was out visiting relatives yesterday to see how their new house by the lake is going. While there I wandered down to the shore to see what it looked like. I knew that we had not had enough low temperatures yet to allow skiing on the lake yet, but wanted to see the progress. The house is looking fantastic, but the scale of what they are doing is enormous.
We have had some heavy snow falls. Normally lots of snow slows down the process of freezing the water (acting as an insulator) and its interesting to see how rocks can act to break the water stratification layers and bring warmth from lower up to the surface (preventing freezing).
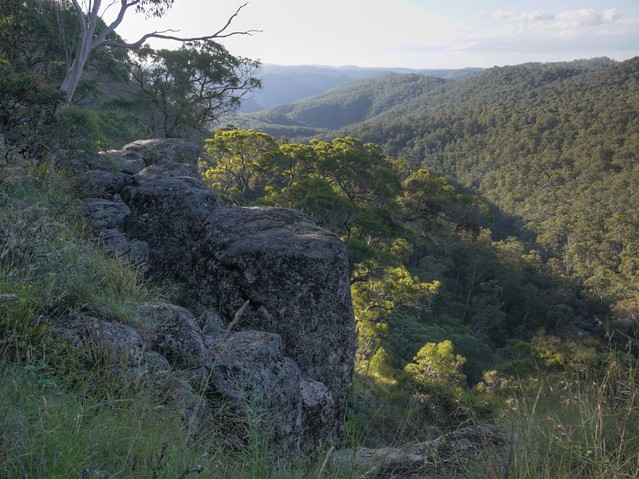
I took that with my GF and the 20f1.7 lens (as RAW) ... moved it over to the phone to have a go with Snapseed. I kind of like this "brash" retune of the image, and like the way its emphasised textures in the hills on the other shore and exaggerated the clouds.
Snapseed has a much more "rough and tumble" approach to its HDR, and so that can go for or against it in specific situations and outcome wishes. For instance below is the image I made using my old favourite Photomatix (a far more delicate tool)
far more photographic in appearance and without the brightness artifacts around the grasses. Still better than the Out Of Camera JPG though
I guess it depends on what you're seeking ... myself I think that the above image would get more comments when printed by my desk than the lower one.
After all ... people love Rock and Roll ;-)
Showing posts with label hdri. Show all posts
Thursday, 1 December 2016
Monday, 20 June 2016
Oppo F1 - HDR mode further explored
important "pre" POST SCRIPT:
this morning I took a photo off the balcony which I put the camera into HDR and I got an interesting shot, I say interesting because I took two shots and attempted to make a proper HDR. In doing this assembly, I found that there were actually interesting artifacts in one image image which is familiar to anyone who makes HDR images by hand ... movement artifacts. To Wit:
the double image or "ghosting" of the wires, and support and the birds is quite similar to image overlay artifacts. You may note that I had to zoom in in my viewer to 214% to make them clear, but to me they seem to match the "pattern" I know so well. This suggests to me that it may actually be taking 2 or more images and blending them ... which would also explain the oddness I find below with the ISO as it may be recording only the lower of ISO's used in taking two images. This is because ISO shift is another method (shutter speed is the other) for gaining the two exposures. If you take two images and combine them what do you do with the data of each? Usually ignore it, or perhaps use one of them.
More Testing Needed
So now later in the day more testing is done: I've taken a shot in full sunlight (to force a high shutter speed) of a friend rapidly moving his hands. That should test any HDR algorithm that composites 2 or more images as this will reveal movement ghosting were it present.
Now, examining that image carefully I found just such a ghosting artifact over on Kevs left hand:
So this answers the question of "is the Oppo HDR a proper HDR" ... yes it is.
To be clear the image above has sufficiently high shutter to preclude "motion blur" with the speed that Kev can move his hands at:
Filename - IMG20160621100231.jpg
Make - OPPO
Model - F1f
ExposureTime - 1/1503 seconds
FNumber - 2.20
ISOSpeedRatings - 100
What it doesn't solve is why a tone mapped single image from a RAW file actually gives a better result ... except to say that the JPG writing engine on this phone is crummy.
Eg from my earlier post:
Standard JPG
So HDR is a big improvement over the standard JPG, but you know it could be much better, it could be as good as Snapseed made from a single exposure.
Why Oppo? Why cripple your camera module with this crappy JPG engine.
The rest of this post now serves to show what benefits you can get from using HDR mode in many situations, for most owners will be barely wanting to even engage another mode like HDR, let alone bugger about with RAW and have an app like Snapseed on their phone (or drag it across to their PC and edit it there).
Why Oppo? Why cripple your camera module with this crappy JPG engine.
The rest of this post now serves to show what benefits you can get from using HDR mode in many situations, for most owners will be barely wanting to even engage another mode like HDR, let alone bugger about with RAW and have an app like Snapseed on their phone (or drag it across to their PC and edit it there).
carrying on from my previous post on this topic I thought I'd put the Oppo on a support and without it moving take two shots in identical light to answer the question of:
That could be part of the algorithm or it could just be that it "picked differently" due to slightly different composition ...So forgive my lack of foreplay and lets just get to it. So with the phone on the support I took these two shots. The left is "default" and the right is HDR
I know which one I prefer ... now, as I did nothing more than trigger the shutter button, change mode and again trigger the shutter button. They are both "undisturbed" and identical compositions, the differences therefore are down to the algorithm chosen as a result of the camera programming.
Lets look in more detail, top left corner:
where I see not only brighter, but more smudging from noise reduction algorithms. But...
better contrast and details on the HDR, but
slightly more "oversharpening" on the text on the HDR. Interestingly the wood textures came out better on the HDR
Yet, whites were unsaturated in either:
and if you ask me, the whites are better represented as whites (not greys as in the left hand "normal" image). When I did a course on photography many decades ago one of the early printing assignments (ohh, and we were using film and darkroom printing) was to photograph something white with texture and print it so that it looked white with texture still.
To my eye the right hand (the HDR) side looks better.
So lets look at the data from the EXIF:
Filename - IMG20160619175720.jpg IMG20160619175704.jpg
...
ExposureTime - 1/10 seconds 1/10 seconds
FNumber - 2.20 2.20
ISOSpeedRatings - 2007 800
So the primary settings are the same, but ISO is about 1.5 stops higher on the "normal" shot when compared to the HDR shot. Since the shutter speeds are the same, this should mean that the normal shot would be brighter than the "HDR" shot which it isn't.
So what's going on?
To answer this we need to get a little into the issues of ISO and dynamic range. Normally as you squeeze more sensitivity out of a sensor (IE increasing the ISO) what happens is that dynamic range (the total difference between floor noise and clipping) falls. This is well known.So what this suggests to me is that default camera settings attempt to push up the ISO, and squeeze the sensor captured dynamic range into a tighter band which is more compatible with the dynamic range of JPG (which is restricted to 8 bits per channel).
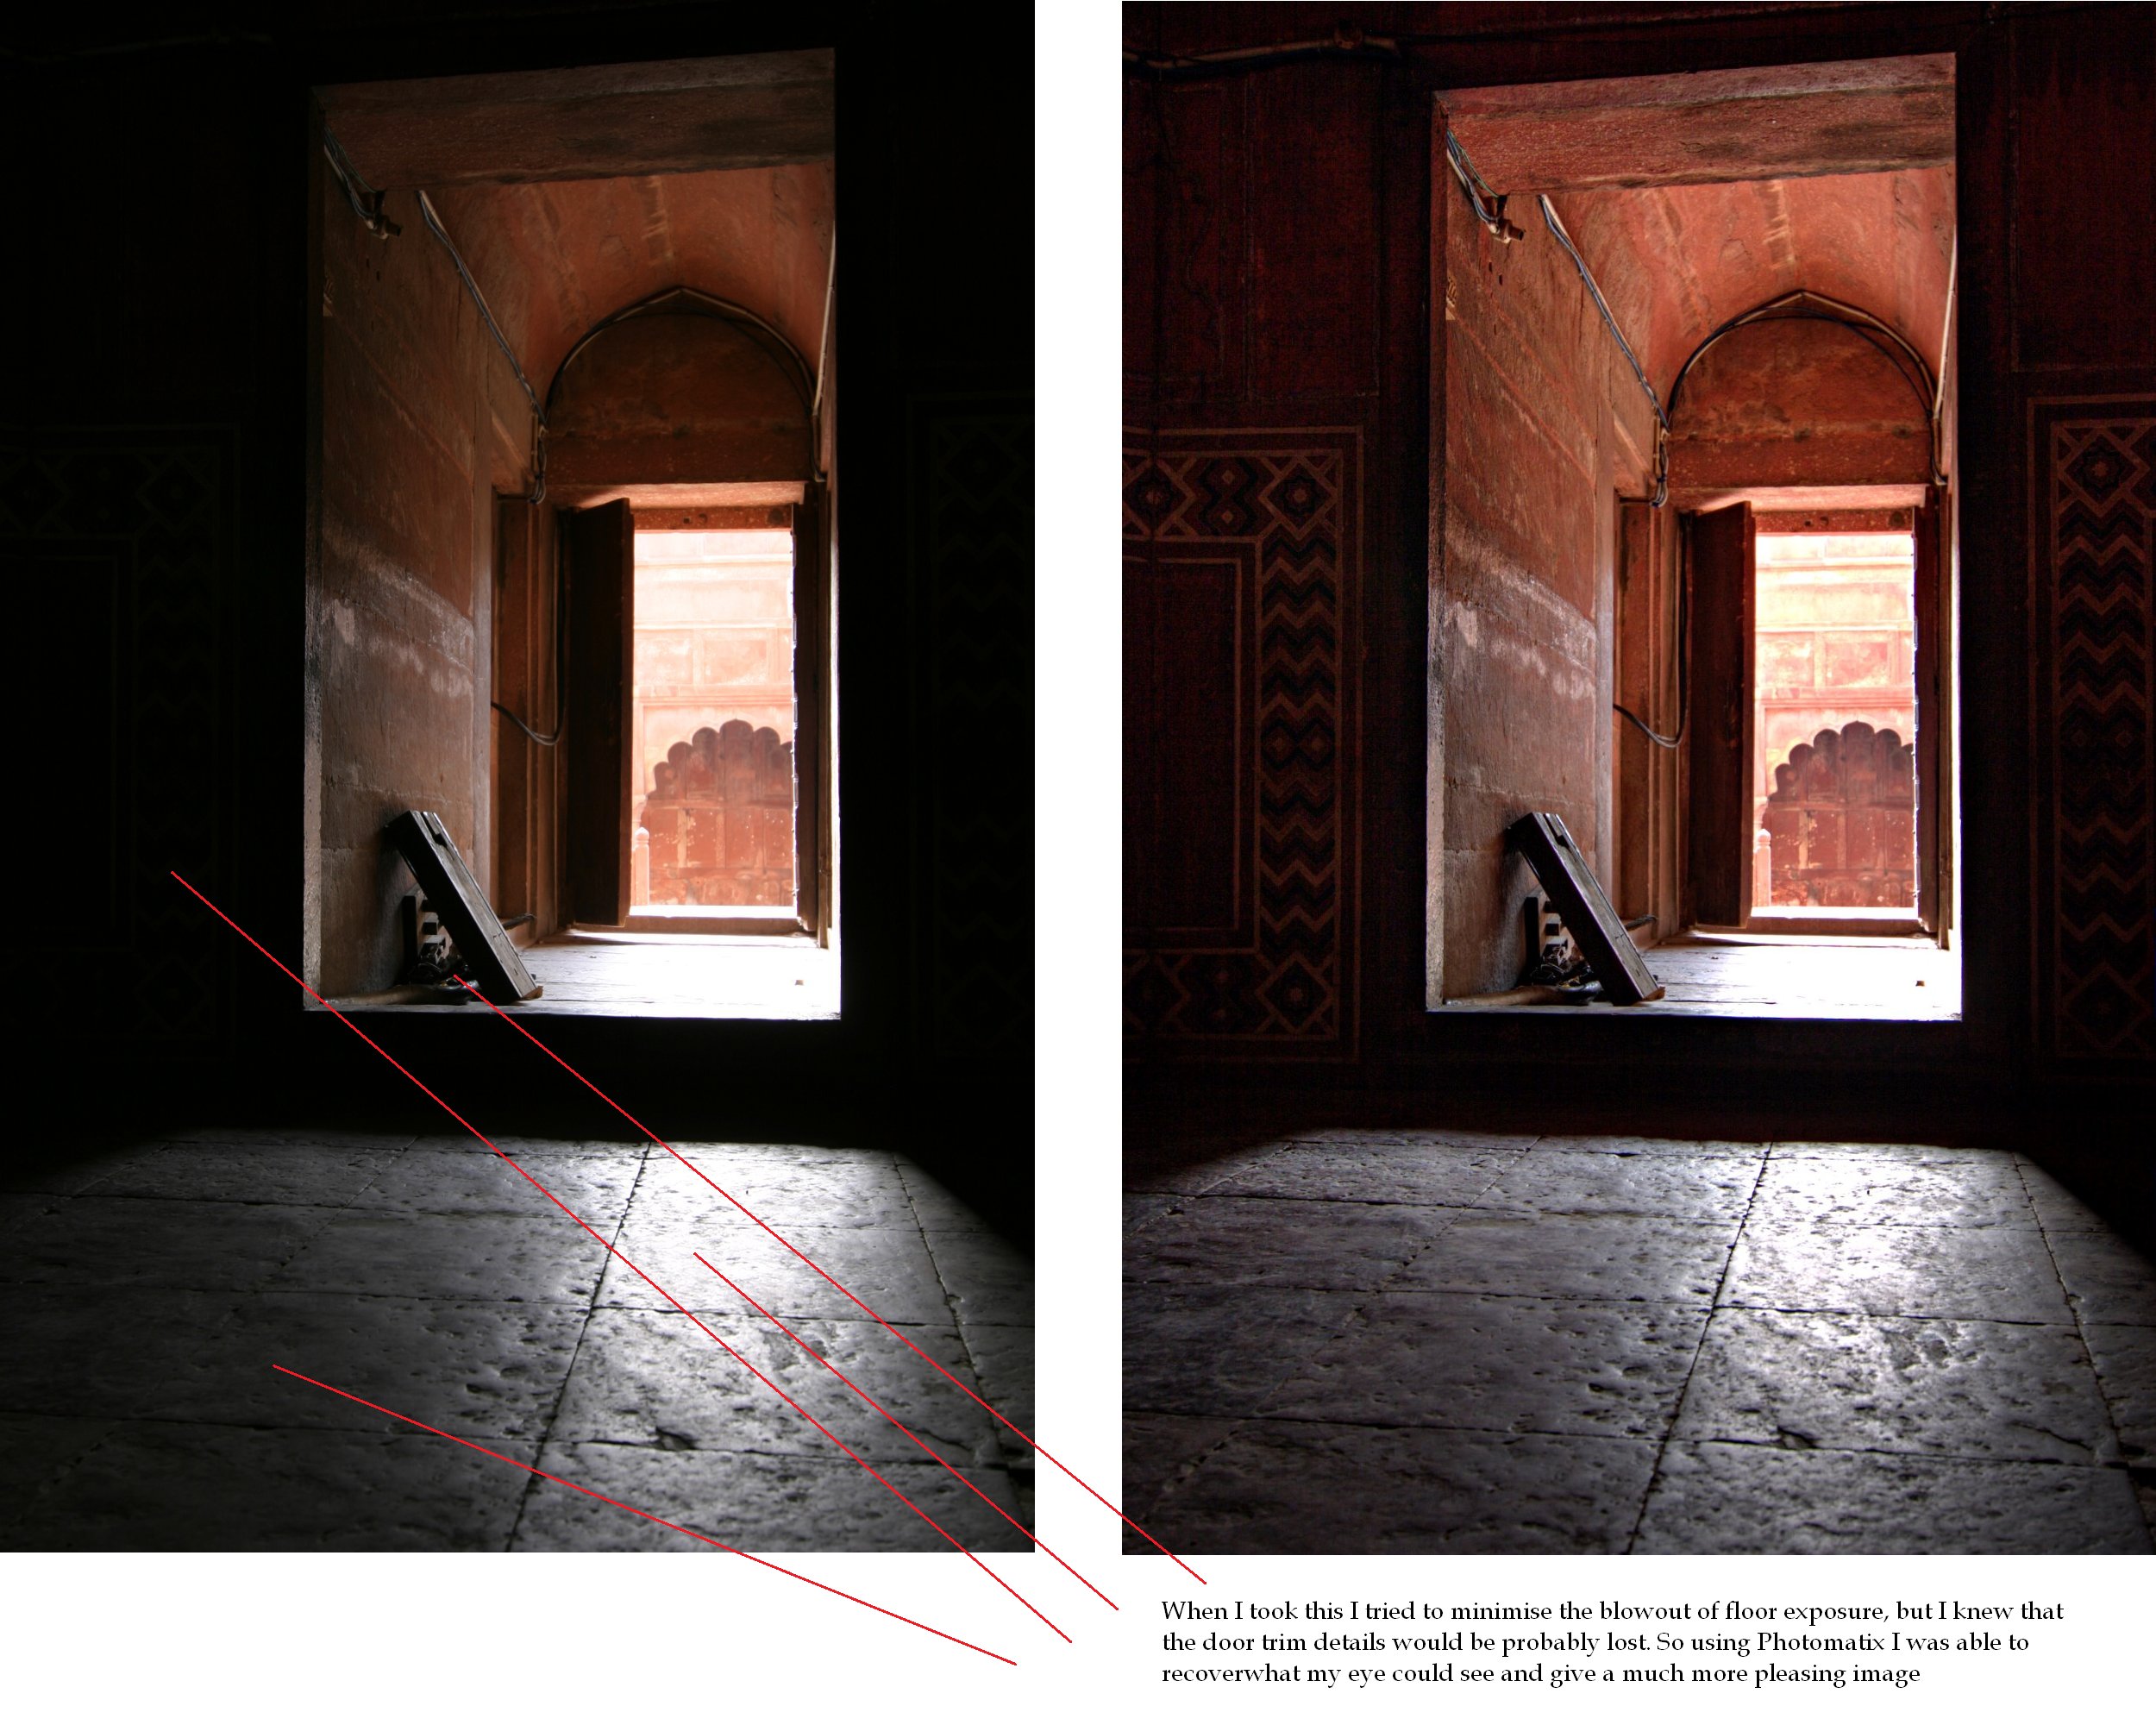
This image (taken with my 10D in India some years back) is a good example of what better software can make of a RAW file, which does not clip the whites and (by dint of being RAW) preserves the entire capture of data including the shadows. Note the better shadow details while maintaining the highlights
This is exactly what good software should do, to properly tonemap the RAW capture (often 12 bits) into the 8 bit space of the JPG ... the HDR mode on the Oppo is doing an acceptable job of this, but needs (it seems) two exposures to do it, while the standard software algorithm in the camera is not doing that very well at all.
The above shot from India was taken with the Canon 10D camera, which was introduced in 2003 ... so its no wonder that by 2009 when I used Photomatix on that same RAW image I was able to pull a "better" shot out of it.
What is less forgivable (or understandable) is why Oppo is shooting their own product in the foot before sending it out.
Clearly they have the HDR mode (because it was shipped with the phone),and clearly it does a better job of rendering a scene into a photograph.
Given that 90% of reviews don't have a clue, and 90% of buyers don't fiddle with settings, I have to ask: why the hell isn't this the standard mode?
Now the question I posed in the "pre post script" at the top combined with these and previous findings raises some interesting questions.
- now that we have established that HDR is taking more than one shot, why is it so bad?
- given that the capacity of the RAW file from a single shot demonstrates that the camerahas enough details and dynamic range (here , here then at the end here) then why is it doing such a bad job of the JPG when in HDR or Standard mode?
Are Oppo wanting to undercut their own product?
Myself I'd want audience reception to be great from day 1 ... not tepid and critical as I read on the web.
outtakes
For those of us who have the F1 and like to use our phones to take photographs I offer you this:set HDR mode every time you take a shot (or if you're a fiddler use RAW as I've already shown how much better that is in the previous post).
Shalom
Tuesday, 21 January 2014
Contrast masking goes phonecam
One of the things I happen to find useful in digital imaging is what variously goes under the names contrast masking or tonemapping.
Since HDRI developed a few years ago it has perhaps put a sour taste in many mouths by the "slap-dash" hyper attenuated HDRI images which people seem to be pumping out there. Stuff which is about as subtle as suddenly screaming in a restaurant "what do you mean you fucked my brother!" Personally I've done stuff like this with it ... when photographing an interior for a business.
... somehow less because its ... artifical (and you know, proper digital photographs look just like the real thing).
So while "proper" fotographers (NB photographers who mainly participate in fora and don't take photographs) argue about if "tonemapped" images are proper the next stage of digital camera evolution is happening outside of the Kingdom of Wang, in the wild, out on the streets, right in the palm of the hand of ordinary folks. Phone cams and software like instagram!
A friend of mine visiting London the other day snapped this on her LG and shared it on FarceBook.
I immediately saw the hallmarks of HDRI and contrast masking and so asked her about it. She said that it was done with Instagram and no it wasn't HDR setting. So she sent me the original, which is below.
I think its pretty clear that the shadows are brought up (footpath beside bike) and there is colour in the ferry over there just 'under' the bridge as well as the red 'fence' over on the left. Not to mention the difference in contrast in the water and even the clouds.
She didn't think they were much different, but I'm willing to bet that she thinks the top shot is the better of the two and that somehow Instagram has done a good job.
Saves me having to fiddle around in Photomatix like this:

into this...

as outlined in this blog post.
For some years I've advocated that people always use RAW and that all the in-camera effects are just there to satisfy the sufferers of the camera disease CFO or Camera Feature Obsession. A basic JPG could be recorded and embedded into the RAW (as it is already actually...) and then when you connect your camera to your PC to download your pictures and can then on the PC side and use (more powerful) processing implement any filter you like by just clicking on a thumbnail preview. This would then save image the to JPG for you. You could then go back and alter it at will to be anything.
Maybe I should just write this myself?
In the mean time, phone cams are killing compacts for all the right evolutionary reasons.
:-)
Since HDRI developed a few years ago it has perhaps put a sour taste in many mouths by the "slap-dash" hyper attenuated HDRI images which people seem to be pumping out there. Stuff which is about as subtle as suddenly screaming in a restaurant "what do you mean you fucked my brother!" Personally I've done stuff like this with it ... when photographing an interior for a business.
Its Artificial?
Humans are dreadfully conservative in the main and Photographers are no different. If its a camera feature then its 'kewl' if you do it on your PC then its some sort of 'artificial processing' and like Dr Tyrells owl...... somehow less because its ... artifical (and you know, proper digital photographs look just like the real thing).
So while "proper" fotographers (NB photographers who mainly participate in fora and don't take photographs) argue about if "tonemapped" images are proper the next stage of digital camera evolution is happening outside of the Kingdom of Wang, in the wild, out on the streets, right in the palm of the hand of ordinary folks. Phone cams and software like instagram!
A friend of mine visiting London the other day snapped this on her LG and shared it on FarceBook.
I immediately saw the hallmarks of HDRI and contrast masking and so asked her about it. She said that it was done with Instagram and no it wasn't HDR setting. So she sent me the original, which is below.
I think its pretty clear that the shadows are brought up (footpath beside bike) and there is colour in the ferry over there just 'under' the bridge as well as the red 'fence' over on the left. Not to mention the difference in contrast in the water and even the clouds.
She didn't think they were much different, but I'm willing to bet that she thinks the top shot is the better of the two and that somehow Instagram has done a good job.
Negative
This will come as a shock to people but this is what has been happening in colour photography for decades before digital with the inbuilt contrast mask provided in colour negative. This is one of the reasons why people (like me) still find value in using Negative film, because it actually does a lot of contrast control straight out of the box for you.Saves me having to fiddle around in Photomatix like this:

into this...

as outlined in this blog post.
Evolutionary paths
Of course no one (least of all a scrooge like me) wants to upgrade their camera bodies anywhere near as much as people upgrade their phones (and I'm not even using an Android or iPhone phone yet). Ask anyone who knows much about it, and they'll tell you that aside from one or two phone companies the majority are loosing money every quater. So this sort of evolution is savage - think creative destruction.For some years I've advocated that people always use RAW and that all the in-camera effects are just there to satisfy the sufferers of the camera disease CFO or Camera Feature Obsession. A basic JPG could be recorded and embedded into the RAW (as it is already actually...) and then when you connect your camera to your PC to download your pictures and can then on the PC side and use (more powerful) processing implement any filter you like by just clicking on a thumbnail preview. This would then save image the to JPG for you. You could then go back and alter it at will to be anything.
- "Natural"
- High Contrast
- Black and White (either panchromatic or monochromatic, or even colour filtered)
- Sepia
Maybe I should just write this myself?
In the mean time, phone cams are killing compacts for all the right evolutionary reasons.
:-)
Friday, 11 November 2011
cunning apps for photographers
As a Palm Pilot user (and photographer) one of the first apps I loaded on my Palm was VadeMecum which helped a large format photographer with a number of handy tools such as calculating bellows draw exposure compensation, as well as DoF calculations.
Many of these functionalities (although not all) have found their way onto phones now (as the new PDA's) as well as some interesting ones.
Today I heard about this one:
Which allows photographers to check out when the shadows will be in a place at at time.

In the past I used one on my palm pilot which simply showed where the sun or moon would be at any given time (it was a star chart) and you could sort it out for yourself.
Its sort of nice that the software systems we have now make it even easier to overlay maps of locations and this information for you, so you don't need to have a map of the area (or a compas with you) when planning things.
But you know, often we don't get the opportunity to plan, and have to make the most of what's there when we're there. So in situations where the sun isn't in exactly the right place ...

you can use a few tools like HDRI to at least make the most of the lighting you have.
Many of these functionalities (although not all) have found their way onto phones now (as the new PDA's) as well as some interesting ones.
Today I heard about this one:
The Photographer's Ephemeris
Which allows photographers to check out when the shadows will be in a place at at time.

In the past I used one on my palm pilot which simply showed where the sun or moon would be at any given time (it was a star chart) and you could sort it out for yourself.
Its sort of nice that the software systems we have now make it even easier to overlay maps of locations and this information for you, so you don't need to have a map of the area (or a compas with you) when planning things.
But you know, often we don't get the opportunity to plan, and have to make the most of what's there when we're there. So in situations where the sun isn't in exactly the right place ...

you can use a few tools like HDRI to at least make the most of the lighting you have.
Wednesday, 3 February 2010
shoot with the sun over your shoulder
My Grandfather (who gave my my first 35mm camera when I was quite a little fella) gave me the advice of
no wonder all our family photo's show people squinting.
While the lighting on that is at least predictable to work out, its not ideal and tends to look un-interesting to me at least. Everything looks a little samie samie, so I like to do things sometimes which go against the rules, like shooting into the sun, which gives me results like this:

now this is a digital and while its a nice picture, I think it looks a bit awful in the sky around the sun ... now if it wasn't for the fact that I've used negative film for years I would not have any other expectation. Note the nasty colour cast shifts around the sun where the clouds go red (as the channels blow out at different rates).
Now, lets look at the same thing photographed using (400ISO negative):

Not bad is it. Actually I often use my digital to make a metering evaluation when I'm using film on my big camera which doesn't have a light meter (though don't bother when using my EOS film camera cos its light meter is something I'm already used to and Negative has so much margin for error), I expose for the shadows and let the high lights fall where they may. Now at the time of taking this, I took some different exposures and focus settings ... so here is a scan of these frames all laid out on the flatbed (this is 6x12 size on 120 roll), being this size they won't fit into holders in pairs of negs, so they get cut into singles.

no matter which exposure you look at (my exposure above came from one of these) the sun isn't blown out among the clouds (meaning you can see where it is).
This really shows how well film does in this sort of high contrast environment.
I was in Tampere yesterday taking some photographs, and having this information up my sleeve I thought I would try something like this with the digital.
This image is a HDR from exposures spaced 2EV either side of "normal".
Looking at this it is interesting, because while the level of blowing of clouds is better than the top pictured digital image, its still not as good at handling the high contrast as the film image in my opinion, and this is HDR.
For gods sake just how much head room do you have in Negative? Well that's not a fair question as one of the characteristics of negative is a built in rolling compression of high lights which approaches infinity : 1 as you get into higher light levels.
This again backs up my previous findings that digital does much better than film when working with low contrast even lighting (like in a carefully setup product shoot or working in the magic minute of evening light), but film just walks all over everything when dealing with high contrasts such as shooting into the sun or typical outdoor light in places like Australia. Shadows don't have to be as black as squid ink folks ...
For example, 35mm colour negative ...

Try that with a digital...
So when you read people saying that film and digital are different media and they can exist side by side this is part of what they mean.
My intention with this article has not been to say film is better than digital, or the other way round. But black and white decisions like that are like saying that a circular saw is better than a hand saw or that a small car is better than a big car, it all depends on what you're doing and what your needs are. Not everything is a nail you know...
In my case the digital does 90% of my photography, but I just won't pass up the film (even 35mm) just yet. It may be that film does nothing for your photography, or it may be that it helps some times ... I know that its annoying to carry both, but sometimes I do that.
If all you do is digital and your finding it occasionally limiting, why not give film a go? It won't make you a better photographer, but it may solve some problems if you happen to have them.
"when you take a picture, put the sun over your shoulder"
no wonder all our family photo's show people squinting.
While the lighting on that is at least predictable to work out, its not ideal and tends to look un-interesting to me at least. Everything looks a little samie samie, so I like to do things sometimes which go against the rules, like shooting into the sun, which gives me results like this:

now this is a digital and while its a nice picture, I think it looks a bit awful in the sky around the sun ... now if it wasn't for the fact that I've used negative film for years I would not have any other expectation. Note the nasty colour cast shifts around the sun where the clouds go red (as the channels blow out at different rates).
Now, lets look at the same thing photographed using (400ISO negative):

Not bad is it. Actually I often use my digital to make a metering evaluation when I'm using film on my big camera which doesn't have a light meter (though don't bother when using my EOS film camera cos its light meter is something I'm already used to and Negative has so much margin for error), I expose for the shadows and let the high lights fall where they may. Now at the time of taking this, I took some different exposures and focus settings ... so here is a scan of these frames all laid out on the flatbed (this is 6x12 size on 120 roll), being this size they won't fit into holders in pairs of negs, so they get cut into singles.

no matter which exposure you look at (my exposure above came from one of these) the sun isn't blown out among the clouds (meaning you can see where it is).
This really shows how well film does in this sort of high contrast environment.
I was in Tampere yesterday taking some photographs, and having this information up my sleeve I thought I would try something like this with the digital.This image is a HDR from exposures spaced 2EV either side of "normal".
Looking at this it is interesting, because while the level of blowing of clouds is better than the top pictured digital image, its still not as good at handling the high contrast as the film image in my opinion, and this is HDR.
For gods sake just how much head room do you have in Negative? Well that's not a fair question as one of the characteristics of negative is a built in rolling compression of high lights which approaches infinity : 1 as you get into higher light levels.
This again backs up my previous findings that digital does much better than film when working with low contrast even lighting (like in a carefully setup product shoot or working in the magic minute of evening light), but film just walks all over everything when dealing with high contrasts such as shooting into the sun or typical outdoor light in places like Australia. Shadows don't have to be as black as squid ink folks ...
For example, 35mm colour negative ...

Try that with a digital...
So when you read people saying that film and digital are different media and they can exist side by side this is part of what they mean.
My intention with this article has not been to say film is better than digital, or the other way round. But black and white decisions like that are like saying that a circular saw is better than a hand saw or that a small car is better than a big car, it all depends on what you're doing and what your needs are. Not everything is a nail you know...
In my case the digital does 90% of my photography, but I just won't pass up the film (even 35mm) just yet. It may be that film does nothing for your photography, or it may be that it helps some times ... I know that its annoying to carry both, but sometimes I do that.
If all you do is digital and your finding it occasionally limiting, why not give film a go? It won't make you a better photographer, but it may solve some problems if you happen to have them.
Friday, 22 January 2010
colour, HDR, monochrome, and negatives
Recently I became aware of a blog on the works of an "unknown" American photographer called Vivian Maier.
Her work as an unknown street photographer is truly interesting to anyone interested in street photography, or in just glimpsing life from that part of time.
This image is one from that blog, and I also think its an excellent gague in how far photography has (or hasn't) come since that time 40 years ago.
This simple image shows how well a simple black and white negative captures interior and exterior light which would be impossible in any current digital camera without resortig to HDRI.
I think it was my second blog post on this blog where I discussed HDRI and negative.
I still feel that negative, especially black and white negative has not only a vast tonal range available to it, but can capture a vast "scene brightness range" which is impossible with digital sensors (though perhaps the Fuji SupperCCD which is used in the S3 and S5 cameras comes close).
Back in my first article however I compared digital to black and white, which I feel made a slightly biased case against HDRI at that time.
Particularly for work in colour.
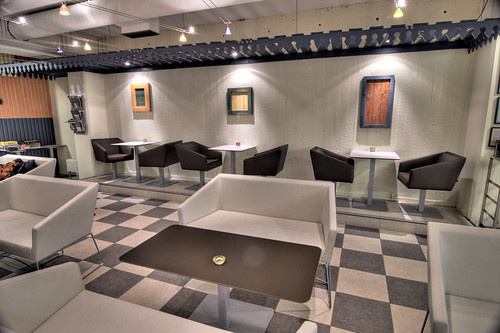
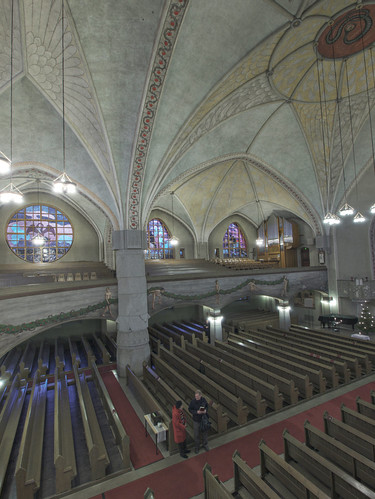
This image is a (good?) example of what one can do with HDRI in a challenging indoor lighting when wanting to stay working with colour and not get horrible casts or noisy shadows.
By taking a full range of the light, HDRI has helped to tame the issues of:
¤ the overhead lamps colour temperature
¤ keep some sense of details in the stained glass
¤ even out the tremendous differences in lighting
¤ keep the shadow noise under control
Just quickly, remember that film records light levels as a density range on the film (with negative its clear for no light and gets progressively darker with more light), with digital its just recording numbers representing the photon count at the sensor.
One of the real weaknesses of digital capture is that the count is linear in nature; unlike film which changes density in a logarithmic response to light.
This is actually how our eyes (and our other nerve system responces) work too. I think that almost everyone who has taken a picture outside knows that a camera can not record things both in the sun and under a tree as neatly as we see them.
Certainly Colour Negative film has a much boarder range of tones available to it than does digital, and this is easy to show. The image below is a montage of the digital (JPG) image and the results
of the 3 exposures (reference standard, +1 EV and +2EV) scanned together on my flatbed scanner (all in the same pass, so no individual optimization yet).

Straight away its pretty darn clear that the exposure blew the clouds out on the digital, but even on the 2 stops over exposed image there remains some texture in the clouds. The colours of each of the film shots are quite different to what the camera picked, but then that can be adjusted for (though as it happens I prefer the film look).
So even with a "regular back yard outdoor garden variety photo" such as this, digital just doesn't have the ability to capture the picture.
Ok ... lets be fair here, this digital image was sourced from a in-camera JPG, not taking a RAW image (say, can your camera even give a raw?). If I had taken a RAW then its quite likely that I could have processed this to be better (hint: read my latest blog post about the merits of RAW processing), but still not as good as the colour negative.
So, why not just use HDRI you say? I mean, I've clearly shown it gives better results right?
Well, as with everything there is a catch. HDRI requires you to capture multiple frames of differing exposures to assemble the brightness range that exists in the scene. It builds on the fact that the sensors are linear in capturing the data of the scene and so by capturing multiple images (and RAW is better for this) that with enough images the entire scene brightness can be compiled into a single image.
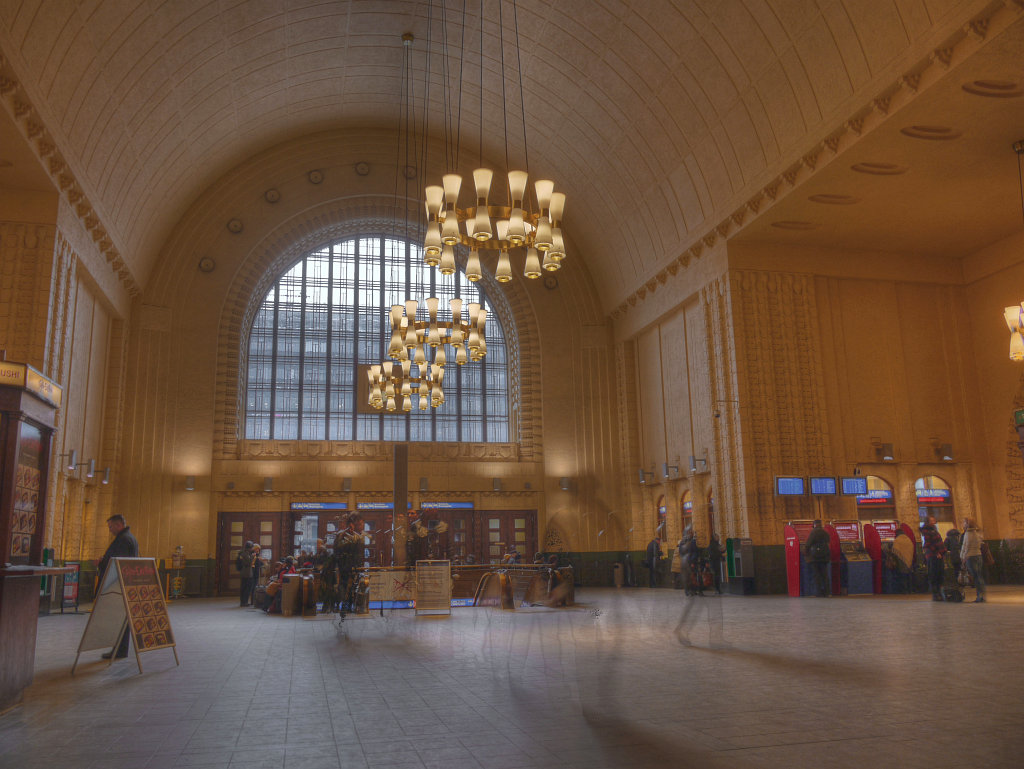
So as you need at least 2 (and I normally use 3 or 5 RAW captures) nothing better move in the image (including the camera) or you'll get nasty impossible to deal with artifacts.
Like this:

Now, if I was using a negative here then those walkers would either be blurs (not captured ghosts) or simply not appear visibly on the image. Far less disturbing than this. Of course there are some tricks, one can use an ND filter and ISO100 to ensure movement is really motion blurred in shots; that helps a lot.
So if I have come across as a recalcitrant in my blog post from long ago about HDRI I don't really mean to be that way; I do after all embrace new technology. I try to understand it, and make the most of it ... its just that I get tired of hearing how one technology has invalidated another.
Its even more striking to see how 40 years ago, a photograph like the one which I opened this post with can take what can only be equaled by a HDR today. Yet it was taken in a single unobtrusive snap and required little more to produce it than a few cents worth of chemistry to develop and simple apparatus to produce a print. Its worth noting also that the Vivian used a 6x6 roll film camera ... so optical elnargements (or scans of that film) today would likely be better prints than images from many of the common DSLR cameras in the shops.
For colour work I feel that digital has many advantages over colour (not least of which is processing) but for black and white ... well to paraphrase Mark Twain "the reports of the death of negative have been greatly exaggerated"
cos when it comes to black and white film there's life in the old girl yet.
Her work as an unknown street photographer is truly interesting to anyone interested in street photography, or in just glimpsing life from that part of time.
This image is one from that blog, and I also think its an excellent gague in how far photography has (or hasn't) come since that time 40 years ago.This simple image shows how well a simple black and white negative captures interior and exterior light which would be impossible in any current digital camera without resortig to HDRI.
I think it was my second blog post on this blog where I discussed HDRI and negative.
I still feel that negative, especially black and white negative has not only a vast tonal range available to it, but can capture a vast "scene brightness range" which is impossible with digital sensors (though perhaps the Fuji SupperCCD which is used in the S3 and S5 cameras comes close).
Back in my first article however I compared digital to black and white, which I feel made a slightly biased case against HDRI at that time.
Particularly for work in colour.
This image is a (good?) example of what one can do with HDRI in a challenging indoor lighting when wanting to stay working with colour and not get horrible casts or noisy shadows.By taking a full range of the light, HDRI has helped to tame the issues of:
¤ the overhead lamps colour temperature
¤ keep some sense of details in the stained glass
¤ even out the tremendous differences in lighting
¤ keep the shadow noise under control
Just quickly, remember that film records light levels as a density range on the film (with negative its clear for no light and gets progressively darker with more light), with digital its just recording numbers representing the photon count at the sensor.
One of the real weaknesses of digital capture is that the count is linear in nature; unlike film which changes density in a logarithmic response to light.
This is actually how our eyes (and our other nerve system responces) work too. I think that almost everyone who has taken a picture outside knows that a camera can not record things both in the sun and under a tree as neatly as we see them.
Certainly Colour Negative film has a much boarder range of tones available to it than does digital, and this is easy to show. The image below is a montage of the digital (JPG) image and the results
of the 3 exposures (reference standard, +1 EV and +2EV) scanned together on my flatbed scanner (all in the same pass, so no individual optimization yet).

Straight away its pretty darn clear that the exposure blew the clouds out on the digital, but even on the 2 stops over exposed image there remains some texture in the clouds. The colours of each of the film shots are quite different to what the camera picked, but then that can be adjusted for (though as it happens I prefer the film look).
So even with a "regular back yard outdoor garden variety photo" such as this, digital just doesn't have the ability to capture the picture.
Ok ... lets be fair here, this digital image was sourced from a in-camera JPG, not taking a RAW image (say, can your camera even give a raw?). If I had taken a RAW then its quite likely that I could have processed this to be better (hint: read my latest blog post about the merits of RAW processing), but still not as good as the colour negative.
So, why not just use HDRI you say? I mean, I've clearly shown it gives better results right?
Well, as with everything there is a catch. HDRI requires you to capture multiple frames of differing exposures to assemble the brightness range that exists in the scene. It builds on the fact that the sensors are linear in capturing the data of the scene and so by capturing multiple images (and RAW is better for this) that with enough images the entire scene brightness can be compiled into a single image.
So as you need at least 2 (and I normally use 3 or 5 RAW captures) nothing better move in the image (including the camera) or you'll get nasty impossible to deal with artifacts.
Like this:

Now, if I was using a negative here then those walkers would either be blurs (not captured ghosts) or simply not appear visibly on the image. Far less disturbing than this. Of course there are some tricks, one can use an ND filter and ISO100 to ensure movement is really motion blurred in shots; that helps a lot.
So if I have come across as a recalcitrant in my blog post from long ago about HDRI I don't really mean to be that way; I do after all embrace new technology. I try to understand it, and make the most of it ... its just that I get tired of hearing how one technology has invalidated another.
Its even more striking to see how 40 years ago, a photograph like the one which I opened this post with can take what can only be equaled by a HDR today. Yet it was taken in a single unobtrusive snap and required little more to produce it than a few cents worth of chemistry to develop and simple apparatus to produce a print. Its worth noting also that the Vivian used a 6x6 roll film camera ... so optical elnargements (or scans of that film) today would likely be better prints than images from many of the common DSLR cameras in the shops.
For colour work I feel that digital has many advantages over colour (not least of which is processing) but for black and white ... well to paraphrase Mark Twain "the reports of the death of negative have been greatly exaggerated"
cos when it comes to black and white film there's life in the old girl yet.
Monday, 2 February 2009
film VS digital capture: revising old work
Setting the Scene
An important thing for learning and discovery is that as you learn more its handy to go back and revisit old works that you've done. Soon after I got a 20D digital SLR I was interested to know how well it compared with my (used for a long time, comfortable with the results) 35mm film. It didn't take long to sus out that the smaller sensor on the 20D (compared to 35mm film).
So, soon after getting my new toy I wanted to test which was better (as clearly I understood which was cheaper to take photographs with ;-)
Initially (we're talking 2005 here) I used only ACR to convert the RAW files and had to process then in Photoshop to make my images.
Since I like to take an image with my camera that looks like what I want (not simply what the lens forces me to) it was not easy to compare the two systems I took an image with each camera using two lenses from the same spot for evaluation.
My first results were as to the left with quite different colours on both systems. Initially I felt that the image from the 20D was more neutral and was impressed with how close they were. The shadows rendered on the digital from the 20D were cleaner than the film and there was over all.
So while I liked the digital image for its clean appearance I thought that the film image had better colours and tones. Note: while it was much clearer the 20D image was much smaller than the film scan.
I've downsized the Epson segment to match the native size of the segment from the 20D and pasted them side by side here to see.
The image from the 20D seems sharper but you can't get it to show as nicely on a print because 1) you can't see 100% view on the paper without a magnifying glass, and 2) if you print it so magnified then the pixels look funny.
So essentially while it has fewer pixels they're 'nicer looking', so you can upsize it about 70% to effectively the same size (as the 20D could tolerate uprezzing to the same print size as I could get from the film). I placed that discussion here on my personal pages which contains all the details.
I didn't have access to a good scanner at the time I did the above mentioned www page, I only had an Epson 4870 scanner and so when I eventually sent the negative to a friend with a Nikon LS-8000 I was surprised how well it did. Below is a sample from each scanner (I've resized both to 4000 dpi) they are closer than I expected.

The Nikon brings the balance back more towards film being a better image than my 20D in both tone and clarity at a large printable size. So now with the background set, lets look at the tone mapping image.
New Tools applied to old RAW files
Recently I've started using Photomatix for making better "goes" of rendering RAW images. I've been pleased with the results (as in that blog entry), so it recently occurred to me to revisit the above tested RAW image and compare it with the film scan.
My first thought when I got it how I wanted it to look in Photomatix was that looks really good. then I thought: I wonder what it would look like compared to the Negative.
So here it is ...
Surpirsed? I was!
The tone mapped RAW image brought out the sorts of contrast enhancement which the natural 'organic' feeling compression (heel and shoulder) that negative film does naturally.
But the now the digital (which does a better job of recording low contrast details than film does) brought out the clouds and textures of the clouds better than my negative and certainly better than my ACR conversion had done.
This scene is quite a low contrast light scene (taken in Finland in late spring) which neatly fits within the range of a single digital capture. Negative on the other hand would be able to cope with a much brighter or contrasty scene because it would be able to still expose for the shadows and the highlights would not clip as the digital would.

For those with an eye (or interest in) the details I've put a 200% magnification of the tone mapped 20D RAW file below to compare with the film scans above.

I think that it shows that tools like tone mapping goes close to bettering what the results from scans of negative film can achieve with far less expense and technical (photoshop and or scanning) skills needed.
So, 7 years into the age of the digital SLR we now have the tools to get the image from a high quality APS sensor digital SLR into the same ball park that supermaket grade film and a good scanner can do.
I've phrased it like this to draw emphasis to what I believe is an important perspective:
But since 2006 that field has changed, with used 20D's and equivalent cameras to be had for less than $500. Its nearly a toss the coin decision.
If you already have a compact point and shoot digital camera I think it comes down to how much you expect to use your camera for serious images and perhaps personal choice.
But still an old 35mm SLR like my 630 has a much bigger and brighter view finder (helpful for critical focus) and with just a 24mm and a 50mm lens makes a much lighter travel companion that my DSLR with the lenses it needs.
An important thing for learning and discovery is that as you learn more its handy to go back and revisit old works that you've done. Soon after I got a 20D digital SLR I was interested to know how well it compared with my (used for a long time, comfortable with the results) 35mm film. It didn't take long to sus out that the smaller sensor on the 20D (compared to 35mm film).
So, soon after getting my new toy I wanted to test which was better (as clearly I understood which was cheaper to take photographs with ;-)Initially (we're talking 2005 here) I used only ACR to convert the RAW files and had to process then in Photoshop to make my images.
Since I like to take an image with my camera that looks like what I want (not simply what the lens forces me to) it was not easy to compare the two systems I took an image with each camera using two lenses from the same spot for evaluation.
- Canon EOS 630 EF 50 f1.8 (@ f8) I used 200ISO negative film.
- Canon EOS 20D EF 18-55 @ 35 (@f8)
My first results were as to the left with quite different colours on both systems. Initially I felt that the image from the 20D was more neutral and was impressed with how close they were. The shadows rendered on the digital from the 20D were cleaner than the film and there was over all.
So while I liked the digital image for its clean appearance I thought that the film image had better colours and tones. Note: while it was much clearer the 20D image was much smaller than the film scan.
I've downsized the Epson segment to match the native size of the segment from the 20D and pasted them side by side here to see.The image from the 20D seems sharper but you can't get it to show as nicely on a print because 1) you can't see 100% view on the paper without a magnifying glass, and 2) if you print it so magnified then the pixels look funny.
So essentially while it has fewer pixels they're 'nicer looking', so you can upsize it about 70% to effectively the same size (as the 20D could tolerate uprezzing to the same print size as I could get from the film). I placed that discussion here on my personal pages which contains all the details.
I didn't have access to a good scanner at the time I did the above mentioned www page, I only had an Epson 4870 scanner and so when I eventually sent the negative to a friend with a Nikon LS-8000 I was surprised how well it did. Below is a sample from each scanner (I've resized both to 4000 dpi) they are closer than I expected.

The Nikon brings the balance back more towards film being a better image than my 20D in both tone and clarity at a large printable size. So now with the background set, lets look at the tone mapping image.
New Tools applied to old RAW files
Recently I've started using Photomatix for making better "goes" of rendering RAW images. I've been pleased with the results (as in that blog entry), so it recently occurred to me to revisit the above tested RAW image and compare it with the film scan.
My first thought when I got it how I wanted it to look in Photomatix was that looks really good. then I thought: I wonder what it would look like compared to the Negative.So here it is ...
Surpirsed? I was!
The tone mapped RAW image brought out the sorts of contrast enhancement which the natural 'organic' feeling compression (heel and shoulder) that negative film does naturally.
But the now the digital (which does a better job of recording low contrast details than film does) brought out the clouds and textures of the clouds better than my negative and certainly better than my ACR conversion had done.
This scene is quite a low contrast light scene (taken in Finland in late spring) which neatly fits within the range of a single digital capture. Negative on the other hand would be able to cope with a much brighter or contrasty scene because it would be able to still expose for the shadows and the highlights would not clip as the digital would.

For those with an eye (or interest in) the details I've put a 200% magnification of the tone mapped 20D RAW file below to compare with the film scans above.

I think that it shows that tools like tone mapping goes close to bettering what the results from scans of negative film can achieve with far less expense and technical (photoshop and or scanning) skills needed.
So, 7 years into the age of the digital SLR we now have the tools to get the image from a high quality APS sensor digital SLR into the same ball park that supermaket grade film and a good scanner can do.
I've phrased it like this to draw emphasis to what I believe is an important perspective:
- that the tools are both very similar in what they can do
- as the digital tool sets continue to develop (with tools like HDRI and Tone mapping Photomatix) we can make better images from our RAW images (another reason to use RAW)
- that as I come to learn more about digital I find how really good the results were from my film images
But since 2006 that field has changed, with used 20D's and equivalent cameras to be had for less than $500. Its nearly a toss the coin decision.
If you already have a compact point and shoot digital camera I think it comes down to how much you expect to use your camera for serious images and perhaps personal choice.
But still an old 35mm SLR like my 630 has a much bigger and brighter view finder (helpful for critical focus) and with just a 24mm and a 50mm lens makes a much lighter travel companion that my DSLR with the lenses it needs.
Sunday, 24 February 2008
while HDRI is all the rage, I'd like to show a view from the negative
I'd like to discuss a new digital process called HDR a little bit and at the same time perhaps explore a part of digital photography people seem to have forgotten about ... film.
Yes, I said film then! You see the face of digital photography is changing so fast that its easy to forget that before there were digital cameras digital photography was really all about scanning film. Its only a few years ago when most people didn't even know what a digital camera was, and barely 10 slim years ago when 1 megapixel cameras were the 'gosh' at photokina. So to me digital is not only digital capture, but the whole process.
People who've only recently moved into digital photography can be found asking about if there are even ways to turn 'film' into digital images on forums like photo.net almost every day. Most people in photography are not so enthusiastic as to have been doing their own scanning of film, and it wasn't until digital cameras started becoming popular that digital photography started to boom. From this perspective its no surprise that many digital camera photographers (even if they were film camera photographers before) have no clear idea how film and digital compare.
Well, I guess that everyone now "knows" that digital cameras are better than film cameras. While this may be so in terms of resolution its definitely not in terms of capturing the brightness levels in a scene. This is where HDR comes in.
What's HDR? Well its High Dynamic Range photography, and is the newest development sweeping around in digital photography and allows photographers to capture more of the range of the scene than before to make a print that more or less looks just like what we've been used to in the last hundred or so years of photography.
Say what? "Ohh must be some kind of old fart who thinks film is better than digital" will be what most people think first up. But consider images like this taken by A Adams well over 50 years ago.
Even on this poor www version of this print, there is detail in the shadows, detail in the sunlight clouds as well as spectral highlights around the river. You can see an enormous range of scene brightness here represented on the page.
One of the weaknesses of digital capture so far is its lack of ability to record a scene with a high brightness range. HDR is a technique to give digital photographers the ability to capture images like the one by Adams here.
Basically HDR (at the moment) requires photographers to take multiple images of the same scene (withoug moving the camera) so that you can then composite these in software, and produce an image which has as much scene brightness range as you can possibly desire. From this, you can then produce an image which compresses the brightness ranges into what can fit onto a paper print, just like what Adams did in the image above back in the 1940's.
Its actually quite time consuming and requires attention to detail to capture an then process multiple images of a scene to produce a single HDRI image. Just as stitching images together can get bigger images than your camera can make, overlaying and tone mapping multiple images can give you a bigger range of scene brightness. Its something most people are perhaps not willing to do, and so Christian Bloch in his book "The HDRI hanbook" has also presented ideas for futures developments in cameras to allow for better capture. One such idea presented in this book is "non linear sensors" or "logarithmic response" sensors.
Friends, wait no more! They are already here! These sensors capture scene brightness ranges over double what most digital camera sensor capture now. Better yet, they are providing image storage as part of their purchase price. No more swearing when your Hard Disk dies! You probably don't need to upgrade your camera, but you'll need to buy a special interface device to transfer the data to your computer (think of it as kind of like a external USB optical drive). Fuji, Kodak, Ilford and many other companies already making this right now.
Yep, its film
Taking pictures of life's scenery is really what most consumer digital cameras are for (as I think the professionals taking images for catalogs and brochures may just use different gear sometimes).
Since 1997 the digital cameras have improved, with every year seeming to get better and better. I've had excellent results from my digital cameras since my first decent digital (a Nikon coolpix 950) that I got in 2000.
With scene's like this one, the brightness range fits neatly into what the sensor can cope with. When you take your picture look at the 'preview' on the back, and most cameras will show you a smaller version of the picture with the "washed out parts" blinking as well as a histogram of the image.
The histogram of the above image looks like this. In case you don't know much about histograms have a look here, but basically a histogram shows a graph of number of pixels which correspond to a particular value. In this case there are a lot of dark blue ones (which is where that peak is) and not much in the very very black, or in the very very white.
This is pretty much a 'good exposure' for a digital camera. No blinking white bits on that image.
But it isn't always so, often there is just too much in the scene for the digital sensor to cope with. This is called "dynamic range" and sites like dpreview are starting to take this more carefully into consideration in their testing. Have a read of this review for their latest version of that.
Digital capture systems (digital cameras) have their limits in how much they can capture in highlight. This is often balanced however by how well they capture the darker range. By carefully exposing to avoid this wash out in the highlights (called clipping) you can often bring up the shadows enough to make the image still look amazingly good. There are of course limits.
These limits are what I want to discuss here. Unlike most film VS digital camera tests where outright resolution has been examined I'd like to show that negative film is your ticket to single click HDR.
I thought I'd take an impossibly difficult image, a lamp in my room with the bare bulb visible.
This image is the linear 'raw' scan of the film. I've included the histogram of the image inserted into the image. You can see that the blackest thing in the image is not at the blackest of the data, and that the whitest thing is not at the whitest of the image.
This means that there is no loss of tonality in the image, and no clipping.
I then took the same scene with a Canon 10D digital camera. From these images you can see that exposure did not avoid clipping. Interestingly I exposed the film image 2EV's brighter than the canon meaning I should have blown it away.
Two things are interesting from this:
The same is true also for the negative. Looking back up at the image from the negative, far more shadow detail is apparent than in the the RAW image from the digital, what's going on here?
Well, this is where film has already achieved the "future" of digital sensors, the response of the film to light is already "non linear" as the HDR people are hoping for in digital.
So after playing with levels and black points to adjust these two images to be reasonably alike I'll present them below
Digital:

shows delicate rendering of the mesh behind the tassels, but notice how the bulb just blows out the scene, and the tassels infront of it even suffer.
Film:

manages to hold the tonal ranges, and still not wipe out the tassels. Something about it just seems to 'glow bright' when you look at it.
So if you're photographing a high scene brightness and you're after something which captures effectively HDR in a single click, perhaps negative is worth a look? Certainly it will require some learning of the tool, but I think you'll see some advantages in negative still there :-)
ADDENDUM
I decided to have a go at this with some HDRI software (Photomatix) and assembled an image from 5 Canon RAW (.crw) images spaced 2EV apart. This is the assembled image, and has excellent rendering of tones even better shadow detail than the Film above.

But its not all perfect here, as looking at the details it seems that there are some left over artifacts from the "higher" EV images which are composted together.

So, it would seem that one will need to spend some significant time post processing this to get it near to what I could with the negative.
I feel that this means that while HDRI is a significant development, and shows the potentials for when digital can in one go capture an image. Until then (or if you simply don't want to spend the money on expensive digital gear) just keep using negative
Yes, I said film then! You see the face of digital photography is changing so fast that its easy to forget that before there were digital cameras digital photography was really all about scanning film. Its only a few years ago when most people didn't even know what a digital camera was, and barely 10 slim years ago when 1 megapixel cameras were the 'gosh' at photokina. So to me digital is not only digital capture, but the whole process.
People who've only recently moved into digital photography can be found asking about if there are even ways to turn 'film' into digital images on forums like photo.net almost every day. Most people in photography are not so enthusiastic as to have been doing their own scanning of film, and it wasn't until digital cameras started becoming popular that digital photography started to boom. From this perspective its no surprise that many digital camera photographers (even if they were film camera photographers before) have no clear idea how film and digital compare.
Well, I guess that everyone now "knows" that digital cameras are better than film cameras. While this may be so in terms of resolution its definitely not in terms of capturing the brightness levels in a scene. This is where HDR comes in.
What's HDR? Well its High Dynamic Range photography, and is the newest development sweeping around in digital photography and allows photographers to capture more of the range of the scene than before to make a print that more or less looks just like what we've been used to in the last hundred or so years of photography.
Say what? "Ohh must be some kind of old fart who thinks film is better than digital" will be what most people think first up. But consider images like this taken by A Adams well over 50 years ago.
One of the weaknesses of digital capture so far is its lack of ability to record a scene with a high brightness range. HDR is a technique to give digital photographers the ability to capture images like the one by Adams here.
Basically HDR (at the moment) requires photographers to take multiple images of the same scene (withoug moving the camera) so that you can then composite these in software, and produce an image which has as much scene brightness range as you can possibly desire. From this, you can then produce an image which compresses the brightness ranges into what can fit onto a paper print, just like what Adams did in the image above back in the 1940's.
Its actually quite time consuming and requires attention to detail to capture an then process multiple images of a scene to produce a single HDRI image. Just as stitching images together can get bigger images than your camera can make, overlaying and tone mapping multiple images can give you a bigger range of scene brightness. Its something most people are perhaps not willing to do, and so Christian Bloch in his book "The HDRI hanbook" has also presented ideas for futures developments in cameras to allow for better capture. One such idea presented in this book is "non linear sensors" or "logarithmic response" sensors.
Friends, wait no more! They are already here! These sensors capture scene brightness ranges over double what most digital camera sensor capture now. Better yet, they are providing image storage as part of their purchase price. No more swearing when your Hard Disk dies! You probably don't need to upgrade your camera, but you'll need to buy a special interface device to transfer the data to your computer (think of it as kind of like a external USB optical drive). Fuji, Kodak, Ilford and many other companies already making this right now.
Yep, its film
Taking pictures of life's scenery is really what most consumer digital cameras are for (as I think the professionals taking images for catalogs and brochures may just use different gear sometimes).Since 1997 the digital cameras have improved, with every year seeming to get better and better. I've had excellent results from my digital cameras since my first decent digital (a Nikon coolpix 950) that I got in 2000.
With scene's like this one, the brightness range fits neatly into what the sensor can cope with. When you take your picture look at the 'preview' on the back, and most cameras will show you a smaller version of the picture with the "washed out parts" blinking as well as a histogram of the image.
The histogram of the above image looks like this. In case you don't know much about histograms have a look here, but basically a histogram shows a graph of number of pixels which correspond to a particular value. In this case there are a lot of dark blue ones (which is where that peak is) and not much in the very very black, or in the very very white.This is pretty much a 'good exposure' for a digital camera. No blinking white bits on that image.
But it isn't always so, often there is just too much in the scene for the digital sensor to cope with. This is called "dynamic range" and sites like dpreview are starting to take this more carefully into consideration in their testing. Have a read of this review for their latest version of that.
Digital capture systems (digital cameras) have their limits in how much they can capture in highlight. This is often balanced however by how well they capture the darker range. By carefully exposing to avoid this wash out in the highlights (called clipping) you can often bring up the shadows enough to make the image still look amazingly good. There are of course limits.
These limits are what I want to discuss here. Unlike most film VS digital camera tests where outright resolution has been examined I'd like to show that negative film is your ticket to single click HDR.
I thought I'd take an impossibly difficult image, a lamp in my room with the bare bulb visible.This image is the linear 'raw' scan of the film. I've included the histogram of the image inserted into the image. You can see that the blackest thing in the image is not at the blackest of the data, and that the whitest thing is not at the whitest of the image.
This means that there is no loss of tonality in the image, and no clipping.
I then took the same scene with a Canon 10D digital camera. From these images you can see that exposure did not avoid clipping. Interestingly I exposed the film image 2EV's brighter than the canon meaning I should have blown it away.
Two things are interesting from this:- the histograms are remarkably simmilar
- the 10D image nearly looses the shadows but definately looses the highlights.
The same is true also for the negative. Looking back up at the image from the negative, far more shadow detail is apparent than in the the RAW image from the digital, what's going on here?
Well, this is where film has already achieved the "future" of digital sensors, the response of the film to light is already "non linear" as the HDR people are hoping for in digital.
So after playing with levels and black points to adjust these two images to be reasonably alike I'll present them below
Digital:

shows delicate rendering of the mesh behind the tassels, but notice how the bulb just blows out the scene, and the tassels infront of it even suffer.
Film:

manages to hold the tonal ranges, and still not wipe out the tassels. Something about it just seems to 'glow bright' when you look at it.
So if you're photographing a high scene brightness and you're after something which captures effectively HDR in a single click, perhaps negative is worth a look? Certainly it will require some learning of the tool, but I think you'll see some advantages in negative still there :-)
ADDENDUM
I decided to have a go at this with some HDRI software (Photomatix) and assembled an image from 5 Canon RAW (.crw) images spaced 2EV apart. This is the assembled image, and has excellent rendering of tones even better shadow detail than the Film above.

But its not all perfect here, as looking at the details it seems that there are some left over artifacts from the "higher" EV images which are composted together.

So, it would seem that one will need to spend some significant time post processing this to get it near to what I could with the negative.
I feel that this means that while HDRI is a significant development, and shows the potentials for when digital can in one go capture an image. Until then (or if you simply don't want to spend the money on expensive digital gear) just keep using negative
Subscribe to:
Posts (Atom)