Showing posts with label om lens. Show all posts

Monday, 28 July 2014

The Panasonic 20mm f1.7 (now I own one)

Why?
Because with a 20mm f1.7 on a GF it may be worth it because of size.

When the Panasonic 20mm f1.7 first came out I owned a G1 and had already had bought a 28mm f2.8 manual focus legacy lens to play with. I wrote a blog post about it at the time having tried one in a shop and gone away to think about it. I wrote a post then subtitled do I really need one. That post could probably also have been subtitled instead: "will I see a benefit"...

Given that it was €400 I was a bit shy with parting with my money I felt at the time that having the kit 14-45 (quite a good lens really) and a OM28mm f2.8 I thought it wasn't worth it.

Later when the Sigma 30mm f2.8 came out I thought I'd try that out to compare with my OM28mm f2.8, expecting them to be quite similar. Which they were (see this link). I initially thought that the Sigma may work well on my GF (which I didn't have back when I first looked at the 20mm) but to be honest its physical size gave me nothing much to love about it over the 14-45. When used on my GH (an SLR-ALIKE camera) there was equally little benefit as the OM28 was optically quite equal at f2.8 and manual focus worked better for me when I was after critical focus anyway.

So how am I looking at this?
Essentially I'm interested in:
  • differences in angle of view between the OM28 and the Pana 20
  • shallow depth of field on the lenses
  • clarity on the lenses
If there is a benefit to me I'll be keeping this lens and re-acquiring a GF1 (and probably the 14mm f2.5 and the GWC1 - 0.79x adaptor for that lens) as a compact and light weight camera system (I'm such a gear yo-yo).

So whats it look like?

I like "normal lenses" for working at "normal" distances and taking "normal" sorts of shots (you know, not particularly wide, not particularly telephoto). With a f1.7 lens working outdoors in full sunlight will challenge the shutter speeds even at ISO 100, so I took a shot of my mate Bob working in his shed.

All images are taken with each lens "wide open"

Firstly the Panasonic 20mm


then the OM 28 taken from exactly the same spot.


I guess its pretty clear that the focal length difference which I identified in my 2010 blog post is still exactly what it was. To make that clearer here it is in this instance again:


the red frame in this shot is about what you get with the 28mm and the whole shot is of course taken with the 20mm.

So, some difference, but nothing which is staggeringly different. In some ways this sort of thing is what can easily be achieved with "zoom with your feet"

So in the shot below I moved back a bit and took the shot again to get a framing with the OM28mm equivalent to that of the 20mm (standing that bit closer)...

Open the images up in different windows and switch between them, I'm sure you'll agree that the character of the 28mm and 20mm are quite similar and the background relationships between them (caused by change of focal length and shifting position) are not specifically drastic.

Of course the background snuggles closer while Bob remains the same in the focal plane. Depth of Field is not significantly altered. So unless you have a specific plan it just may be that for things at "normal distances" the 20mm is a nicer tool in some ways. Like it does give you f1.7 vs f2.8 which could give you 100th of a sec VS 30th of a sec ... or enough to make a hand held shot sharper. These were all taken with a tripod.

Cropping?
So this begs the question of "can I crop the 20mm lens image back to equal the 28mm lens (or maybe just equal to a much more expensive 25mm)?

Well here is the 20mm cropped back to the view of the 28mm


Which is surprisingly similar to the original 28mm lens image.

So, what have we lost in details by cropping? Well that's a good question as the Panasonic 20mm lens should be a much sharper tool than the OM 28mm lens (designed for 35mm so many decades ago now) so lets have a look at the 100% pixels from a cropped 20mm upsized back to 4000pixels wide:


and the original capture of the OM28mm at 100% pixels


which is not too far apart and unless you were doing a very demanding print to put on a gallery (in which case you'd probably plan ahead better).

Also interesting is that the DoF of the 28mm @ f2.8 is almost the same as the DoF of the 20mm @ f1.7 when you factor in the changes in shooting distance.

The 20mm cropped and upsized shows that it does well and would do better if we were only cropping it to equal the Panasonic 25mm f1.4 field of view (of course that lens is bigger, brighter, more desirable and more expensive). I'm not sure I'd want that lens on my GF1 but it would be good on the GH...

As I was writing this
It occured to me that what I should also have done is to take a shot with the 20mm stepping closer to the subject rather than just with the 28 stepping back (to equalise the 28 to the 20). This would give the effect to be seen of the 20mm in closer from where the 28mm was taken from. Luckily we used a tape measure on the floor :-)

As the light had changed I took another set of two shots. So

The 28 taken from the same place as the first 28 shot was taken from:


Then the 20 stepping in a bit closer...

Same sorts of background / foreground perspective changes, but now that we're in closer the DoF from the f1.7 makes the background softer (check out the CH of the top row of the business card behind the screwdrivers).

As long as you're not shoving the camera in his face the facial distortions from trying to capture in too tight with a normal (making a portrait use of it) the differences between 20mm and 28mm are barely apparent.

Conclusion?
To me the last shots clinched it for me, the 20mm with "zoom with your feet" is quite equivalent to the 28mm (and probably the 25mm too) and so I feel I've answered that question.

So, what'll I do ... I'm not sure. I happen to like this little lens, so I think that to do it credit I'll have to take some shots with it for a while and see.

Ultimately I think its not worth it to me on the GH body as it brings little advantage to me in its size. If the AF is not to be relied on for shallow DoF work (and picking focus right exactly where I want it to be) then its of reduced usefulness to me.

To me the question is now this;
will I be better served with a GF1 (still the best GF if you ask me) with this lens + 14mm + 0.79 wide adapter than I will be with selling it on again and just buying the 25mm f1.4?
I could still buy a 14mm and a GF1 for less than the extra required to have bought a 25mm f1.4 over this lens.

Sure its not just a question of the lens and is it good enough as without doubt the Panasonic 20mm f1.7 is a great lens, it also happens to be a compact pancake lens and makes the GF camera actually achieve its potential of being compact.

All of which most of the newer micro43 cameras seem to fail at (with the exception of perhaps the GM).

Hope someone has found it interesting to see the Pana 20mm up against a legacy 28mm lens and also seen that the DoF difference between them is not only what calculations may have revealed.

Wednesday, 31 March 2010

legacy Olympus lens on EOS camera (digital or film)

to Raita ... may your photographic journey be fun

Today I'd like to put a quick tutorial on how to mount and use an Olympus OM lens on an EOS camera.

This is essentially done using a small metal adaptor which mimics the camera side for the lens being used, and then mimics the lens side of an EOS lens so that it can be put on the camera.

Now, EOS lenses are fully electronic, meaning that all of the control of the lens by the camera is done by an electronic interface (you can see this on the camera when you take a lens off as a bunch of little golden buttons).

Since the OM lens is fully mechanical it has no capacity for this sort of thing.

Now, keep in mind that lenses are essentially simple creatures, despite all the mystery that modern lenses seem to have, they focus and they have an aperture iris (which is just like the iris of your eye, and gets smaller to allow less light through to the film / sensor).

Quite simple really.

Ok, firstly lets cover mounting the adaptor onto the lens. Most camera systems have some red dot on the body and on the lens to guide you as to exactly where to hold them to orient them bring them together and lock ... so match the dots, bring the two together and turn till it clicks


So, now the lens is fitted to the adaptor, its ready to be used. You can check that it operates and you can see the iris stop down as you change the aperture control ring on the camera (remember, its not electronic-magic, its mechanical)


Remember, it doesn't just get dark as you stop down, the depth of field (what in and out of focus) gets wider ... so if you stop down with the lens on the camera focused on something you may see this in the viewfinder (I say may, because some people can't get past seeing that it just gets darker)

Now, as we see, adjusting the aperture actually stops down the iris (makes it smaller). On modern cameras (electronic or mechanical) we have a cunning system which would allow the lens to be fully open (making it bright to see, and easier to focus) and stopping it down just as you press the shutter. Of course the EOS camera has no such mechanical control, so the adaptor simply keeps that lever pulled and stops the lens down to exactly what f-stop you've set on the lens.


Now, lets put it onto the EOS camera ...


So because this lens now works in a pre-automated way (you know, things weren't always automatic...) it means that as you stop down the viewfinder will get darker. This will confuse your electronic camera which does not know that
  • it can't control the lens
  • what aperture the lens is set to

so you need to tell the camera that the lens is wide open. This is because the camera will only be able to control the shutter. Sure, you're making it darker by stopping the iris down, but the camera doesn't know that.

Depending on the camera you may need to tell the camera that there the lens attached is out of its control or you may not. You can tell by seeing how the camera reacts to having the lens mounted.

Keep it simple: use Av mode


First, lets keep this simple by putting your camera in Av mode. Now I picked that because in Av the camera does what its told regarding to aperture and picks the right shutter speed (lets assume it gets thing right ;-) for the aperture you have chosen. We will be picking the aperture (set on the lens) only this time the camera just won't know what its going to be.

Now just before you rush off, we need to check something (though if your camera isn't an old EOS you may be in the clear), there are two different behaviors for EOS cameras that are fitted with a mechanical lens:

If the display reads “1.0” (or any number other than “00”) then you have the old stop-down metering style.

If the display reads “00” then you have the new stop-down metering style.

I think its quite likely that you will have "00" showing with the Olympus on your camera. Anyway this is covered at this link on EOS stop down metering. Recommended reading for a rainy day ... when you can't be taking pictures.

Ok, on my EOS camera I need to manually set the aperture in Av mode to 1.0, be sure to check yours.

So, I can only use my camera in Av mode or Manual (but I have to remember not to change the aperture). The newer EOS cameras (and I think all the EOS digital cameras) use the "new method" which allows your camera to work in:
  • P (program),
  • Av (aperture priority) and
  • M (manual).


Check your cameras "stop down" behavior and if you need to set it, set it, but probably you will not need to worry about anything.

So, just set Av and go take some pictures.


Ohh ... and don't forget to focus :-)

One of the reasons AutoFocus cameras have become so common is that most people completely forget to do this ... in the heat of the moment. Manual focus offers you control but with that comes responsibility ... you can't blame the camera for a blurry photo if you didn't focus.

Many cameras have diopter adjustment, which compensates for if you need glasses or not.

So just as it may be difficult to focus your eyes when wearing grandad's glasses, if the diopter adjustment has been knocked off center it maybe impossible for you to see anything clearly in the viewfinder too.

This is normally located on the back of the finder, and you'll see a little wheel with a + and - on it ... as in this figure.

When focusing (if you haven't ever done it before) keep the lens wide open (f1.8 on this lens) for easiest and brightest view. Focus by turning the lens as I did in my above video and when the subject looks sharp then its focused.

Don't forget, those numbers with m and ft on the lens are actually accurate. You can measure (or guess) the distance to your subject and 'prefocus' the lens to that point and just take.

Heaps of photographers who like to "snap on the street" use exactly that technique for their candid photography (when you haven't got time to focus but you want to get it right).

Stuff like this candid from the 1950's by Vivian Maier were undoubtedly done in just this manner.

For example, from Philip Greenspun's pages on photogrpahy we find this advice on zone focusing:

"The classic technique for street photography consists of fitting a wide (20mm on a full-frame camera) or moderately wide-angle (35mm) lens to a camera, setting the ISO to a moderate high speed (400 or 800), and pre-focusing the lens."
Its easier with wide angle lenses of course ... but if the subject is further away (like 5 meters) its not so hard ... either way its something worthwhile to know about

Simple.

To me the greatest benefits of these lenses come between f1.8 and f5.6 ... I prefer to use these lenses at f1.8 through to 2.8. The image may look a little nicer at 2.8 but 1.8 will give you a little more than 1 stop more shutter speed (thus these lenses are called fast lenses). That can make the difference between needing 1/30th of a second and getting 1/90th ... if your subject won't sit still that'll make all the difference.

Its actually still bright enough to focus at f4 on the lens (if you ask me) so you don't need to open and close it all the time, but if you're going to close down to 5.6 or smaller then you may as well use a zoom anyway.

The real advantage of these lenses is how bright (and thus how fast) they are as well as their lovely shallow depth of field, so keep it at 1.8 or 2.8. for maximum benefit :-)

Taken with my 50mm wide open (that means f1.8 ;-)

siiri

Tuesday, 23 February 2010

micro four thirds: four fifties flare

For no apparent reason I decided I would test my lenses for flare. I'm not sure if this method is the most ideal, but I lined up the lenses against my kitchen wall under a fluro tube. I put a black circle with a hole cut in it on the left and a lens bottom cap (with the depth of the bucket facing me) on the right.

Lenses are:
  • Canon FD 50mm f1.4 (top left)
  • Canon FD 50mm f1.8 (top right
  • Pentax 110 50mm f2.8 (bottom left)
  • Olympus OM 50mm f1.8 (bottom right)

Method


all lenses were tested wide open and the camera (Panasonic G1) set to AWB and, camera on a tripod unmoving between each shot. (Note the Pentax 110 lens does not actually have any aperture control, so wide open is all you can pick from)

results

firstly lets look at the overview of each image, then zoom in for details:

overview

I find it interesting the colour renditions are quite different between the lenses. The lens absent from the group confirms which lens is on the camera at the time (to help me remember

the focus point
I used the following lens to confirm focus as best as I could using the magnifier to focus.

what is interesting here is at screen sizes the Pentax 110 looks to have the best contrast and sharpness, but when pixel peeping (click any image to load a full screen snapshot) I would have picked the FD 50 f1.4 ... just goes to show you need to evaluate things at something other than 100% magnification to see other factors than total resolution.

the rubber ring


The lower row seems to show better contrast to me than the top row, but the Pentax 110 lens (lower left) has significant CA purple fringing on the high contrast area, but mainly towards the outer side (away from the lens center). Makes sense.


the base cap

again purple fringing CA on the 110 lens shows up, but with better contrast than the two FD's

outside of the extreme contrast of being against the fluro the CA stops being obvious and you can get some detail in the blacks inside the caps.

Lastly, it was pointed out to me that perhaps my exposure was too short for reliable colour rendition on artificial light. Since its snowing outside and there is plenty of ambient light spill from all the street lights I would try one last thing.

On this I set the colour balance manually to be "cloudy" and manually focused the lenses to infinity. I used an exposure of 2 seconds for all of them and set all to f2.8 This puts the Pentax to a disadvantage as f2.8 is wide open. I then picked up my 3 led ultra-bright headlight so that it shone straight into the lens for the entire 2 seconds of the exposure. I tried to hold the torch in exactly the same spot.

Below are the results


Its interesting looking through the halo of light trying to see my face and how big the halo is. Then there is the secondary flare ... man the FD1.4 is really flaring. Interestingly there is a really large though less obvious purple flare on the 110 lens (lower left)

There are still colour differences, although its really hard to see colours in the outside in that sort of light.

conclusions

Well personally I like the OM and the itty bitty better and the FD's least. The FD 1.4 and 1.8 are almost dead ringers with the 1.8 showing better colour rendition in this situation to my eyes. I know from previous tests however that the FD 1.4 cleans up immensely when stopped down to 1.8 or 2 and shows itself as being much better than the 1.8 in a typical outdoor sunny day.


See my other tests of some of these lenses:


So, hope this was useful to someone (as it was to me). If you have a better suggestion for contrast and flare testing please put a comment in and I'll try to do that if I get time in the future (like I have now)

I think I'll have to try this again on a sunny day ...


Post scriptum (today is sunny) so I thought I would repeat this with better "natural" light.

Please note that the order is:
Top row FD 50 1.4 left and 1.8 right
Bottom row OM50 f1.8 left and Pentax 110 50f2.8 right
(this is also visible on the frame in the names)

some 100% segments from the middle of the frame


and some 50% segments up closer to where the flare is stronger

Again I find myself liking the looks and contrasts of the Pentax 110 lens wide open better than the others.

Next I picked a strongly backlight scene and put the tree trunk to block the direct sun from hitting my lens:

overview


zooming in on the segment on which I focused ...

its clear that the Pentax (lower right) has better contrast (the FD1.4 is softer at 1.4) and the DoF is less (because its a f2.8 lens).

Throwing the Kit zoom into the mix:


which (being 45mm) has a smaller feature size and looks harsher and of course at 5.6 has different DoF ...

Lastly (for what its worth) there are complete image overviews of each of these images linked to a flickr account

P1070418.fd.1.4

P1070420.fd.1.8

P1070421.om.1.8

P1070422.p.2.8

P1070423.fd.1.4

P1070424.fd.1.8

P1070425.om.1.8

P1070426.p.2.8

Sunday, 15 November 2009

micro 4/3 OM adaptors

I thought I would write this review on micro 4/3 to lecacy lens adaptors to being up an issue which seems to be ignored in the literature at present ... that of mount construction. Much is written and discussed in forums about the issue of Infinity Focus, and that can be an issue on some badly designed adaptors (so far I have only heard of significant problems on adaptors for Leica M mounts).

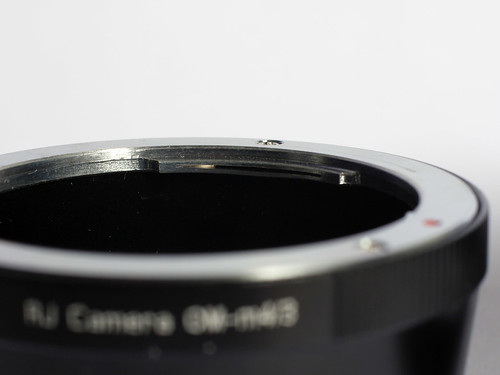
Back a few months ago there was only a few options for adaptors for OM lenses (this is before Olympus brought out their E-P1 camera and OM adaptor) Essentially at that time there was only the adaptor by a fellow in Polland who sells on eBay under the name Ciecio7. Another seller jinfinance who sells the RJ Camera adaptor had some other mounts but if you wanted OM you had to buy a set which was a base micro 4/3 to 4/3 adaptor and then add onto that an adaptor from 4/3 to your mount. This meant you needed to sandwich 2 adaptors between lens and camera which I felt would be 'shakey'

I bought the Ciecio7 adaptor. At that time I wrote this review, and identified a few minor issues with the adaptor.

So, now that I have the RJ camera adaptor (and used it for some time) I thought I would make a quick comparison.

Personally I would like very much to see what he has done with development of this mount but i tseems he no longer sells it. So this review is perhaps better focused on only the RJ Camera adaptor.

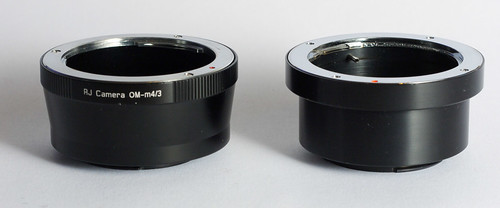
Clearly the first thing which one observes is that the RJ Camera adaptor is bulk made and the Ciecio7 one hand made. If you have been involved with engineering much you'll noitce that some detail things just can't be done effectively unless doing stuff in bulk and using computer lathes with complex layups.

That's interesting as the RJ Camera adaptor is more expensive than the Ciecio7 one despite the amount of hand work done on the Ceicio7 one.

ciecio7+RJOMMounts

Now, its important to remember that an adaptor is just a simple bit of tube designed to:
  • hold the older legacy lens at a distance further away than the mount on the camera would do
  • have a physical design to match the shapes of the legacy system at one end, and the micro 4/3 on the other end.
there can be no electronic couplings as the vast majority of these lenses were not electronic anyway!

Now, most cameras have a little spring to add tension to the mount like this:


this allows some tolerance in the small gap you'll see in the back of the lens mount system and pull it snugly onto the mount.

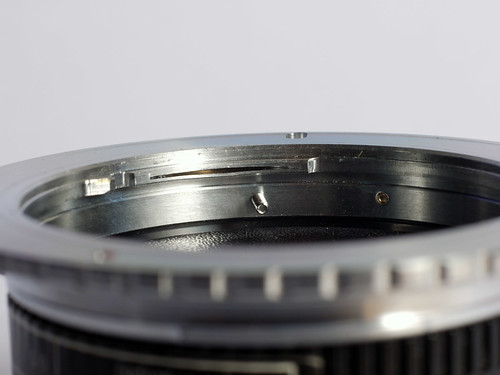
Just how this is solved is an important part of the system. RJ camera solves this by a cunningly placed precision slice being made in the metal and then it butterflied out.


RJ-43-OM-spring

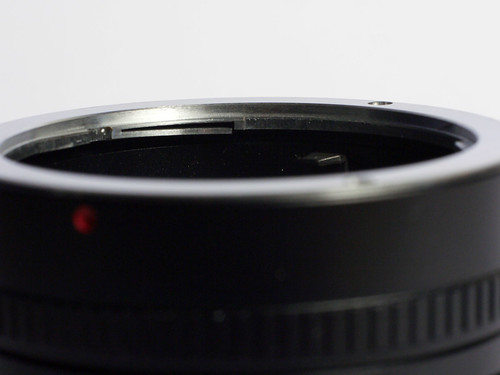
Notice that little slice in the metal up there? Seems this is a common 'strategy' in China, as an OM to EOS mount I have:

RJ-43-EF-OMMount

uses a similar strategy.

RJ-EF-OM-spring


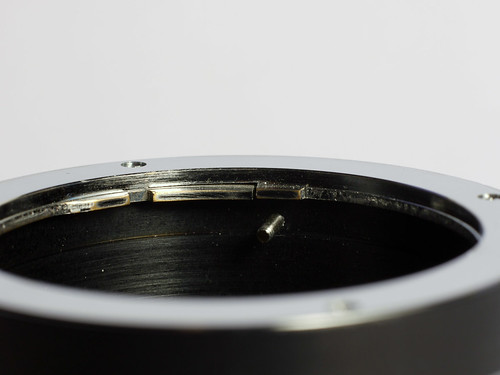
The strategy employed by Ciecio7 is rather different, he makes a nick in the flange and bends the entire flange down as can be seen here.

ciecio7-OM-spring

He has said to me that he used an extension tube (I thought Vivitar) as his template, and looking at my OM mount Vivitar extension tube set I see exactly the same strategy.

vivitarOM-spring

When I first got the Ciecio7 adaptor it had a bend similar to the Vivitar above ...


but yet was so damn tight I could barely move the lens on and off the mount. I've used OM cameras and lenses for many many years ... so this is not simply a case of me not being used to them. In the photo above I had removed the chrome plate from the adaptor and sat it on an up-side-down lens on the mount so I could see carefully the amount of spring tension the bent bit was applying.

I carefully 'polished down' this surface to make the effective tension less...


This worked wonders and with my hand finishing of the hand made adaptor mentioned in the article above the Ciecio7 adaptor worked beautifully.

However the RJ adaptor despite looking nice has some small issues as well, it barely has any tension on the mounted lens. Despite having a similar cunning strategy

Look carefully at the amount of space in the splits:


The lower portion of the image is the adaptor for mounting OM onto EOS cameras. From this image you can see you can see that the gap (which is hand made by inserting a tool into the slit and bending it wider) is larger on the lower one. This makes the "fit" of the OM lens on this adaptor much nicer than that on the other one.

Conclusion?

essentially none of the OM adaptors I have are as good as the system which the OM cameras have natively. I don't know if either of the two methods is "superior" as clearly the Vivitar (system used by Ciecio7) has worked when Vivitar made it, but the issues found with that adaptor demonstrate how there must be issues of manufacture with that method (perhaps materials).

The RJ Camera adaptor is not without fault either, and again the requirement of hand tensioning that gap in the butterflying of the mount metal is crucial ...

Essentially both require a little bit of accomodation and understanding in the users. I think this is actually quite a reasonable expectation, as these things should by nature be appealing to the enthusiast and those who have "some" compentency with their hands.

If reading this has put you off buying one of these adaptors, then perhaps look to the Olympus made one, or the Rayqual one ... both of which are much more expensive but may have better quality (I don't know as I don't have one).

fifties - FD 1.4 compared to OM 1.8

Fifties are nice lenses on micro 4/3. I have a few (as you may know from reading my blog) , for instance the OM 50 f1.8 Its beautiful not only in image quality but in build. Its compact mechanically elegant and a pleasure to use.

Being curious I spent a few bucks and bought an FD 50mm f1.4 to compare to my OM 50mm f1.8 (which I bought after seeing how lousy the FD 1.8 I have is ..)

Essentially I find the FD 1.4 is equal to the OM 1.8 in terms of quality ... both wide open. However the FD has some advantage in reduced DoF. Firslty here is an overview of the image ...


I guess the leaves in focus are about 10 or 20 feet away. Below is a couple of central image segments to get a feel, these link to 100% pixel samples and are about a central portion of the image.

FD 50mm @ f1.4


OM 50 f1.8


notice the difference on the bark?

I don't know if the 1.4 vs 1.8 makes much difference in portraiture or other uses, if it makes things better or worse but I don't expect it'll be hard to stop it down if 1.4 is too shallow for an application ;-)


I ponder if I'll sell either ... but as they only cost me $50 and $12 its hard to see the point. Besides I use the OM lens on my Canon EOS body when I use film.

Sunday, 1 November 2009

why I love my G1

Reading some of my blog posts about the benefits of film it may seem that I am some sort of anti-digital film lover ... but that would only be true in a world where there was only black or white. You see while I still see value in film I really love digital too.

Throughout this blog you'll find many posts about my G1 and what it can do. Below is an example "brochure" style shot of my G1 system ... based around existing FD lenses


my G1 FD system

Now its important to note costs here is what I've spent:

  • FD 300mm f4 = US$200
  • FD 200mm f4 = US$50
  • FD 50 f1.4 = US$50
  • FD 28 f2.8 = US$12
  • Vivitar extension tubes = US$ 11


So what does the macro extension tube look like?

G1 macro setup


If you click on either of the two images above (or any image in this page) it will take you to my flickr site where you can see some of the other options and details in the comments.

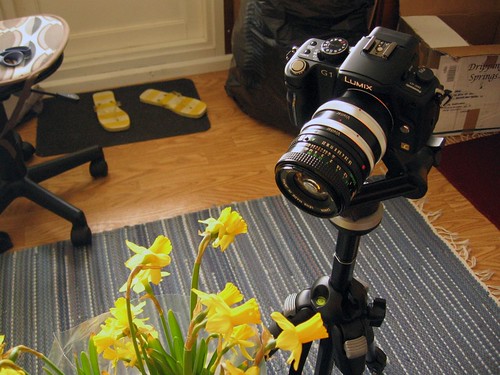
What this translates to in practice is a rig that looks like this:

G1 taking Macro of mini daffodils

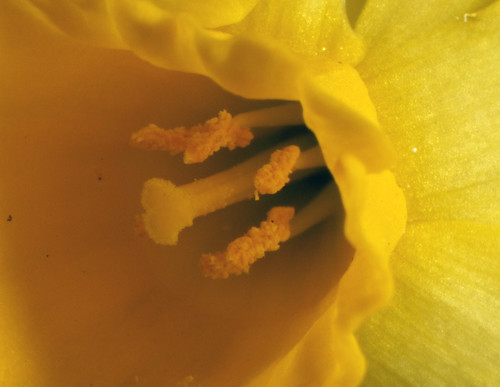
and takes images like this:

macro at 50 % of full res

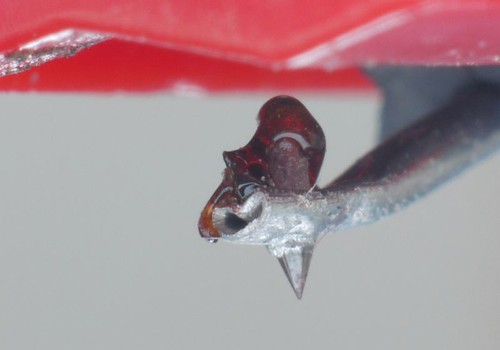
or this (which for the younger crowd is an LP stylus up close)

lp stylus


For instance I also have some Olympus OM lenses one Olympus ZD for 4/3 and of course one native lens for the G1.

bunchOfLenses

The OM lenses mount by adaptor too and also work on my 35mm film cameras (EOS and OM-10). They give beautiful images with a different perspective compared to the G1 of course. The 9-18 in the back left there is my wide angle for the G1, but the 21mm in front of it gives truly beautiful wides on 35mm film (see a few posts down for example).
and even some really compact C mount lenses:

G1 with 12.5mm f1.3 Computar

Compared to almost any other SLR system the G1 may lack the ultra fast USM long telephoto lenses like the EOS system has ... at a price.

If you're a professional you wouldn't bother ... but for my money as a hobby photographer the G1 (and all micro 4/3rds makes unbeatable sence)

Heck, I can even pop a 400g OM 10 in my bag with a roll of film and dual purpose the lenses onto both bodies ... then I can get great wide and great telephoto in a light weight kit!

HAH ... try that with a cheaper camera! (or even a dearer one)

Close readers of this blog will notice that I've also compared the FD 300 with the OM and the FD and OM 50 f1.8

This implies that I have both of these lenses ... well time to come clean ... here's my OM collection


my OM lens system

the most expensive pair in this set was the 300 and the 21mm, all the others were about $50

I love the 100mm f2.8 on both 35mm and G1 systems

I've decided that set one has to go, and as the OM lenses work on both my 35mm camera bodies (EOS 630 and OM-10) as well as the G1 I guess that I'll have to part with the FD set. Although I am thinking of mix-n-matching, but decisions decisions...