Showing posts with label digital photography. Show all posts

Sunday, 21 March 2021

Sony a1

I have an old saying which I developed when determining (many decades ago now) if I needed to upgrade my 35mm outfit to a 6x7 medium format outfit (back in the daze of film): 

How much detail do you want to throw away?

because seldom do you need everything that (even 35mm film) the camera can capture. This is more pronounced in a day when people still wank on about that huge billboard print but then look at pictures on InstaGram on their phone.

Well DPReview have produced the review and (to me, all) important Studio scene comparison (I've got no time for slick wankerTV blabbering on about bullshit which isn't important to me) to allow me to see at a glance what I need to know


The costs of the step up are:

  • MoirĂ© in the fine detail 
  • more than 4 times the RAW file size (still hasn't seemed to sink in that double the detial is 4 times the file size): meaning much more power in desktop processing
  • nearly double the mass
  • insane 30fps drive (and that's a traditional insane not "wow I want that" insane)
  • body only price of around €7,300
So if its the camera you need (I'm guessing only for a number of top level pros) then its great that stuff like this is made to do so well as to challenge the capacity of your lenses (and maybe add another few dozen thousand to your bill). But if you're like me then its really nothing I want.

Interestingly if I did want more than the amount of pixels that the A7 puts out I can try some software which by all accounts is now getting pretty good (if you need those high res road side posters); for example the new offering by Adobe

So it seems I'm still very well served by my:
  • 2009 Panasonic GH-1 (stills but mostly video now) {cost about AU$1000}
  • 2009 Panasonic GF-1 (stills with occasional video {cost about AU$100}
  • 2014 Sony A7 (stills with maybe 1 video made) {cost about AU$500}
  • GoPro Hero 3+ (action video) {kindly donated, but costs around AU$50 now}
  • 2016 Oppo Phone {cost about AU$250}
This outfit allows me to have (as I deem I need for a job) more compact or more competent in a variety of situations, in most cases people can't really tell what took what. Even I need to look at the data to know which took which with what lens


It seems to me that for most people too much is never enough.


Saturday, 6 February 2021

150 million lenses

 I read on DPReview this morning that Canon has now produced 150,000,000 lenses; which does not go back to the FD series, but starts with the EOS.

I must say that the FD series also deserves some credit as some of those designs were fabulous. The FD300f4 for instance is a budget priced lens which (once upon a time before mirrorless made it famous again) was a well priced long reach telephoto. I bought mine back in 2009 for under US$200 and its been a stout performer across 3 cameras


  • Panasonic G1 (pictured)
  • Panasonic GH1
  • Sony A7

This is just one of the many images I've taken with this lens (in this instance taken with the A7)


It of course has an even greater telephoto reach on a camera like my Panasonic (micro43) such as this shot from 2009


Congratulations Canon ... 

Tuesday, 6 October 2020

a reflection on the past

 Back in 2013 I wrote this post when testing a few lenses (old and new) on camera systems old and new. There I pondered the following:

So compared with keeping 35mm neg and micro4/3 (NB going to the Sony A7) I would

    • rationalize bodies and lenses (being able to use the 35mm lenses on both systems)
    • but still need to carry a 35mm film body for high contrast work
and still need to spend a bundle on the A7 (and more or less be only getting a small advantage?).

These words came back to me in recently taking this photograph with my A7 and the Samyang 35mmf2.8 lens:


I took this with my A7 (bought about 2 years back now) which at once shows the beautiful contrast capacity of modern (and well priced) optics and the still difficult limitations for those of us who like to shoot into the sun. 

Difficult because instead of seeing the sun in the sky we see  only a blown out nuclear blast effect where the sun is to our eyes. I'm reminded of this with these photographs which clearly show the disc of the sun without blowout around them:


and


Of course I moved to the A7 because:
  • increasingly colour film development was becoming vexed
  • my excellent Nikon film scanner used a comms technology which was becoming obsolete (and required me to keep ancient hardware going to keep it going (or VMWare))
  • moving around required me to risk getting that system damaged (its pretty sensitive gear after all, with precision moving parts)
So I've had to "join the future" and give up what I once had, pretty much we all have.


Sunday, 5 May 2019

Oppo R11s camera (portrait mode and low light images)

I thought I'd put this here because I find myself referring to these images (which I took as part of the earlier R11s comparison, but didn't include because the post was getting long) in other discussions I've had.

Summary

The camera system on the R11s (which is functionally the same as the OnePlus 5T) employs two cameras to do the job that the F1 does. It makes use of these cameras to give a bokeh effect and to assist in reducing picture noise in low light situations.

It does an impressive job at noise control in low light, but I can't say I'm fond of the "bokeh" effect. The boke effect is patently fake but will pass muster for non photographic people who only give it a quick look on Farcebook, Instacrap or Slapshat. The tons of rave reviews are either showing their utter ignorance or were paid to dribble nonsense.

There is a resoundingly stupid (channeling my inner John Cadogan) way of changing the aspect ratio of the camera (no, really).

Its still an excellent bit of hardware let down by the fools at Oppo in the software section (however given so few have long term (no, not 6 weeks, 3 years) experience with an Oppo as their daily driver I guess no one will know what they were missing (and why so many think McDonalds makes good food)

Poor-trait mode

Its important to state up front that details change when you take a portrait mode shot, the image size changes from 4068 x 3456 pixels to

  • 5184 x 3888 (in the "normal" portrait mode)
  • 3264 x 2448 (in the closer head and shoulder portrait mode)
weird isn't it ... because the only other way you get different dimensions of your image in pixels (and yes, it matters because the victims of marketing only ever seem to waffle on about how many megapixels the camera has, seemingly vacant and devoid of comprehension of what it even means or why its not the only metric) is to change how the phone shows the picture (red arrow).


Which weirdly in Full Screen crops the image down to a wide screen 2:1 aspect while actually keeping exactly the same long dimension (4608). It does not make the image any wider, just narrower (4608 x 2304). Aside from portrait there is no other way to get those extra pixels...

So lets look at a portrait mode image shall we?


Now I've put this red halo around me to highlight my primary beef with this system: it makes mistakes in combination.

Note that the area above my (balding) head is left un-bokeh'd ? I wonder if this is a failure of the algorithm or indeed to account for "big hair" in the typical fluff-head who festers iconic tourist locations to grab a selfie or 2 (x 103).

If we were to recompose to carefully position my face at the edge of the frame I suppose we'd fix that.

Now its one thing for a photograph to be something you'd glance at on Farcebook (on a small screen) but its another to have a picture you took be something you'd want on your desk. So unless you only want a post card sized image (meaning you don't need 20 megapixels) you'l see this level of detail in the image.


which is crappy, pixel smeared (blame that heavy handed JPG processing I've complained about before) and has weird artifacts like my glasses, softening my beard and ear but not the boards behind me. So basically its a crap gimmick ...

Still for a quick glance (on your phone, not a print on your desk) for the "Slapshat generation" who only glance momentarily at your masterpiece,which you probably spent more time taking, trying different filters and generally gazing at yourself than anyone will looking at it, its probably just fine.

Myself I'll stick to  my real camera thanks. Chances are that if you're reading my blog you're a photograper anyway, but in case you aren't, here are some examples of what one can achieve taking a portrait looks like using a real (yet still quite compact) camera with a similar angle of view and a sensor size which brings many advantages to the photographer.


Yes, that's what shallow depth of field is all about ... its a matter of physics and its going to require a lot of AI smarts to replicate it. But why bother doing that when you can actually carry a real camera if you happen to be into photography?

Anyway, while you're obsessing over the question of "is 20 megapixels good enough or do I need more" you can look at the 20 the Oppo R11s produces and ask yourself "is that good enough for me".

Consider that the above camera (a nearly 10 year old Panasonic GF-1) is only 12 megapixels,  will set you back a puny $100 and be a lasting tool that will yield many excellent image especially in lower light. A real camera will show you what Depth of Field effect (note: not bokeh effect) can do. At the very least note the genuine and natural way that focus falls off with distance?

So now lets move onto the advantage (rather than the cheap gimmick) the camera has:

Low Light


This is one area that the dual camera shine at - low light (and wow, I wish it had RAW capacity, but probably that's asking a bit much when the 3 year older half the price F1 has that {right? lol}).

Now lacking OIS you'll need to have a tripod (and I doubt that OIS would be sufficient for these exposures anyway, but still).

Now the F1 does not have portrait mode (no loss IMO)  but it does have long exposure and ISO control in the manual settings as does the R11s, so we can directly compare them here.

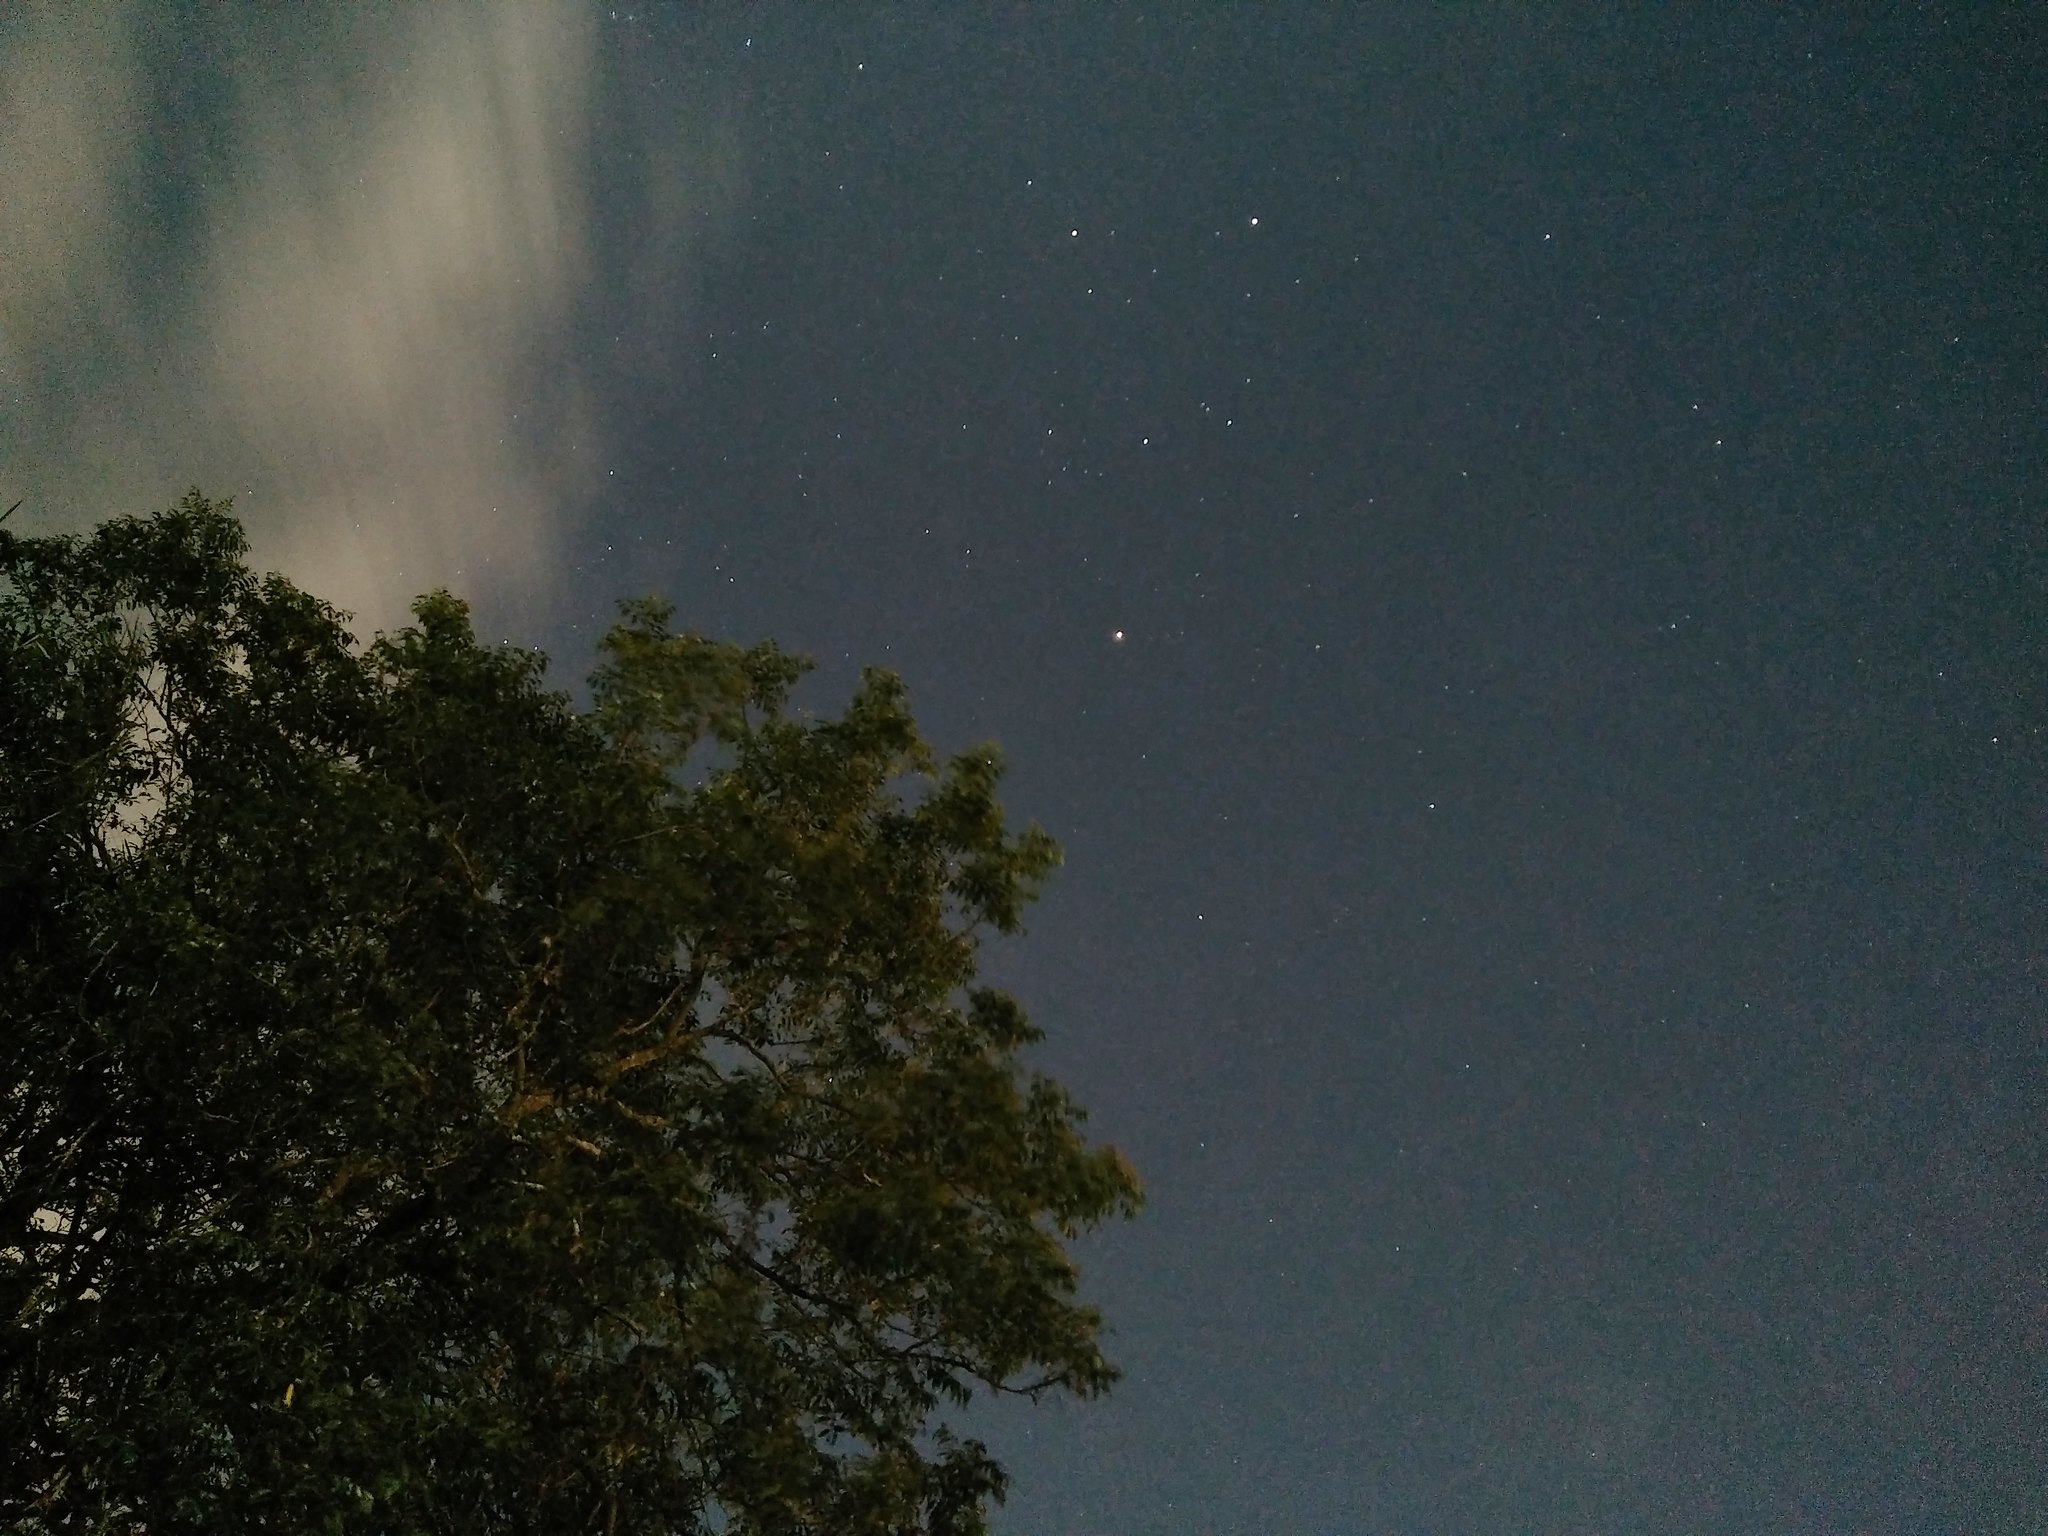
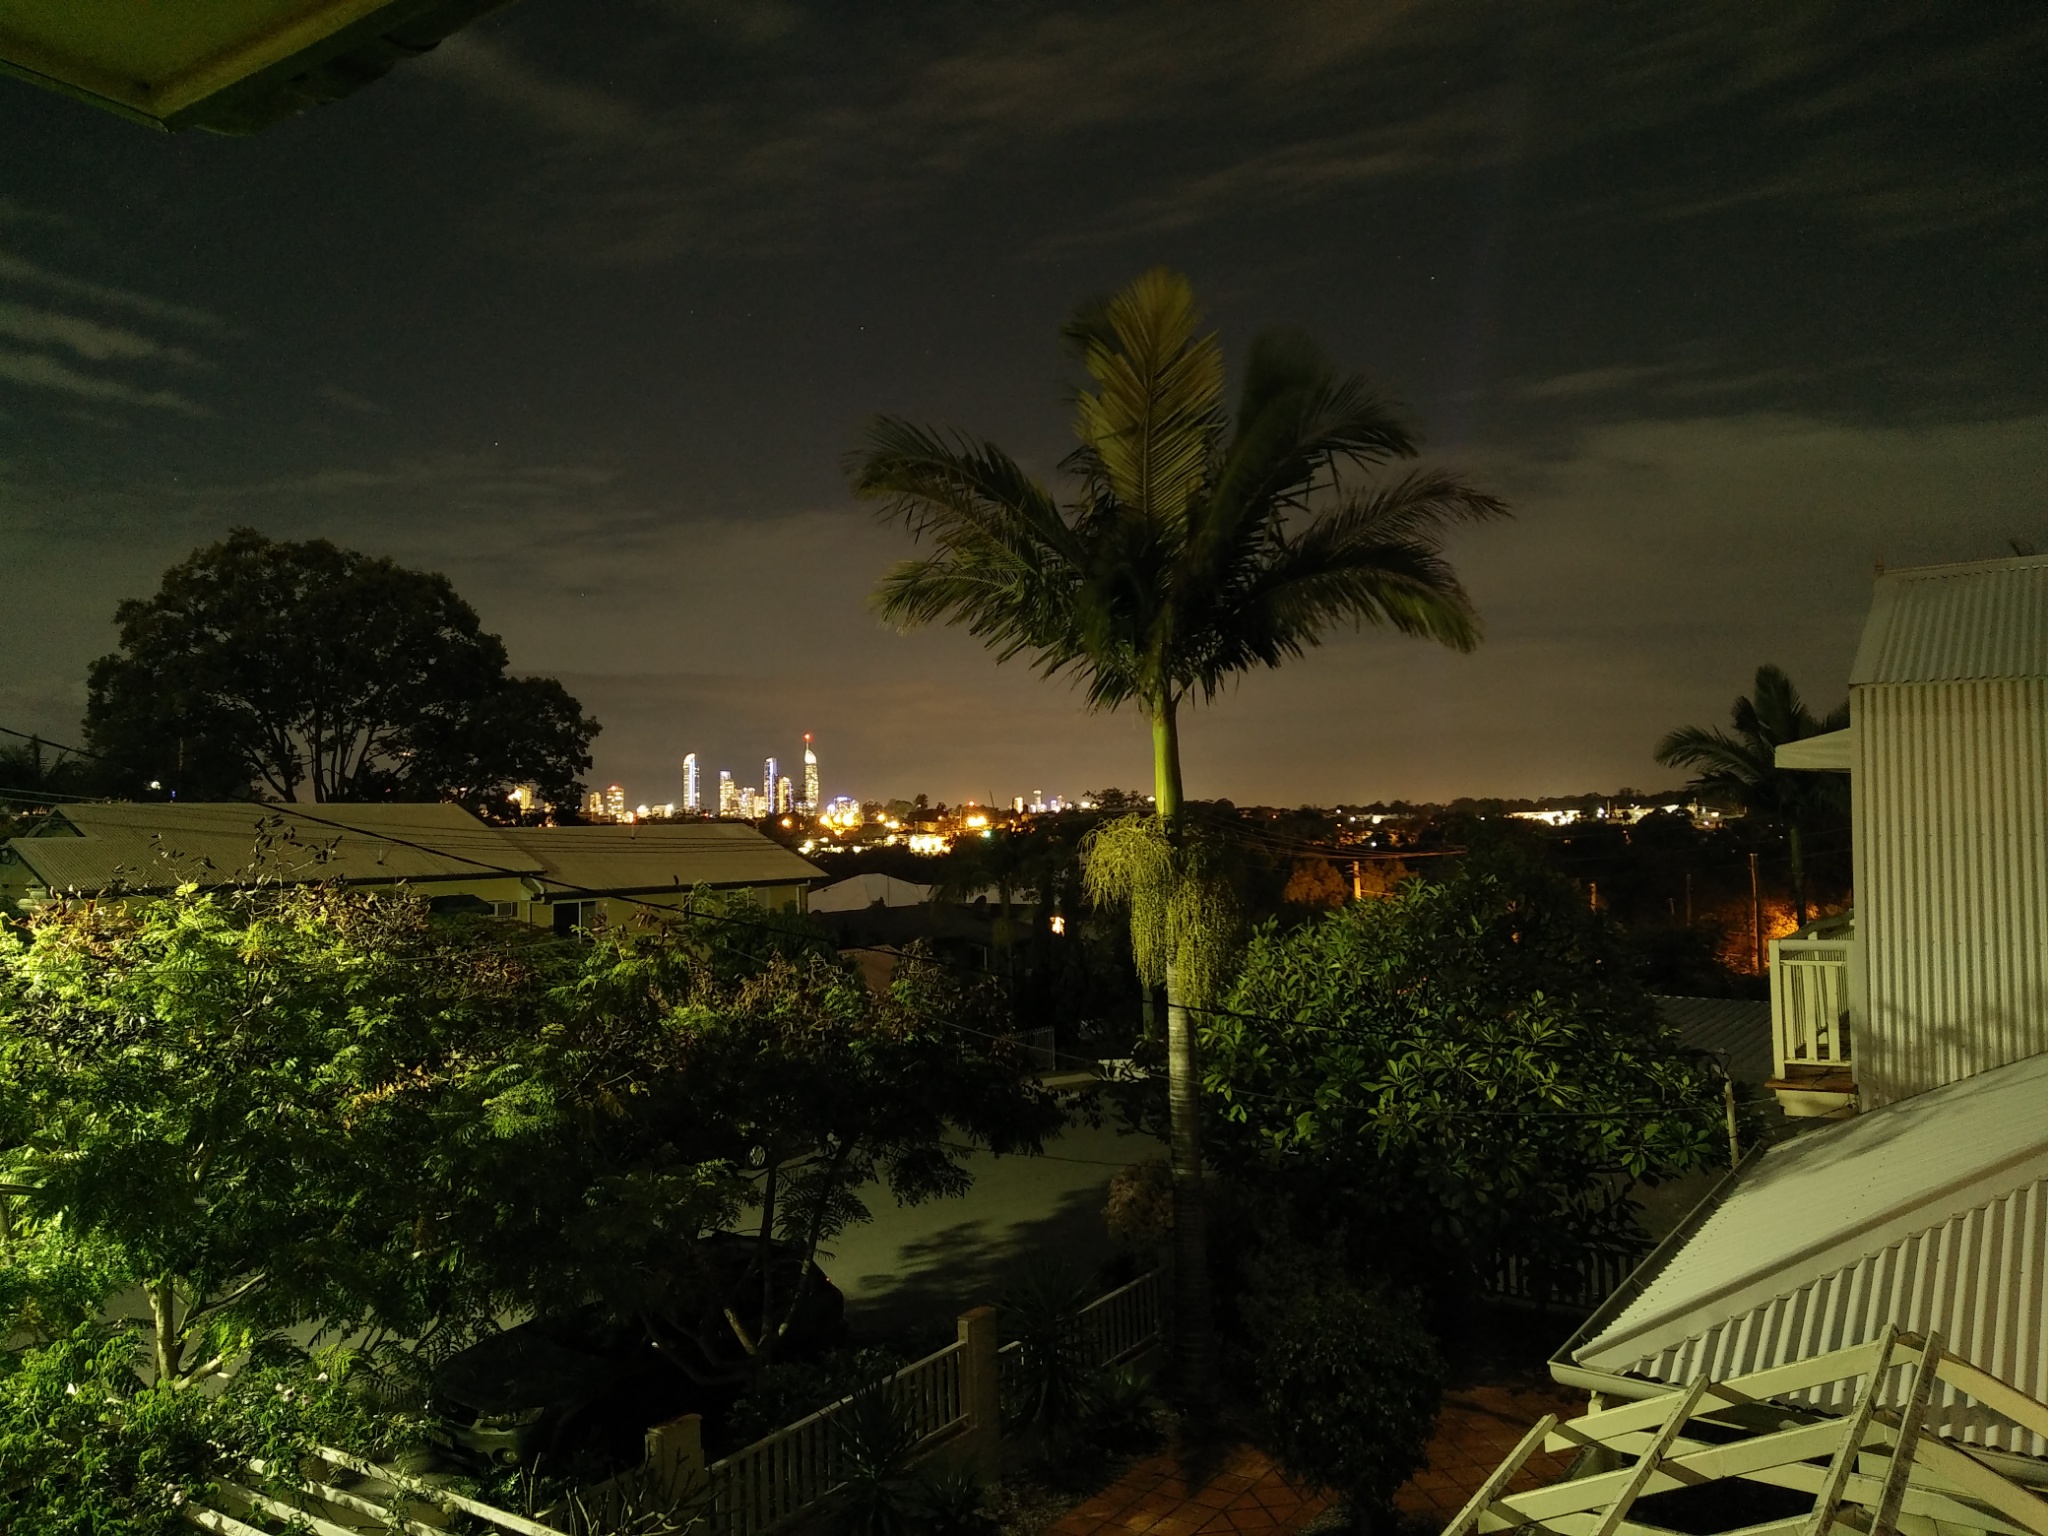
I took this shot (scaled down for overview) with the F1


and  this one with the R11s


Now I gave the R11s an advantage by using its faster F-Stop (f1.7 but f2.2 for the F1) to allow it to use the same shutter speed (important for hand holding). This is an advantage because by using a slower ISO (1600 vs 3200), it can have less noise in the image. Looking at the above shows that:

  • they aren't exactly the same exposure (the F1 is brighter giving more foreground exposure) because f1.7 >> f2.2 is not a full stop, but three quaters of one. None the less this is significantly darker than just that, indeed I'd put it at at least half a stop or maybe even a stop
  • at these sizes the noise and image quality differences don't matter much
But again, if you've gone on a holiday and taken your prize shot of Rome at Night with the only camera you had (the phone), which you want to print big (like A4 or larger, and the R11s will yeild a print as large as 58.5 x 43.9 cm or 23.04 x 17.28 inches) then you'll be interested in the details.

So when peeking at the pixels, this is about the differences you'll see in a print


which is astounding and makes the R11s a superior camera.

Now its worth pointing out that this was a super extreme test, and to my eyes (and I have good night vision) the sky was barely observable as a glow and I could not see details on the ground. To even get sharpness in the shed I critically manually focused (which both will do, in the expert mode), AF shots were not as good in this low light with either camera. Still the amount of detail in the R11s is amazingly good for what it is. I wonder if it had RAW how much more I could get out if (as I know I can with the F1)

Bottom line: If I was travelling I'd be comfortable to have this camera with me for night shots. Yep its that good. Having said that the F1 has advantages in other areas and when I use RAW (which when I'm taking more than a snapshot I always do), so for a person even faintly serious about photography the F1 is still the better outfit.

Discussion

Why do Oppo continue to develop their phone hardware and yet also continue to degrade their phone software?

To me the R11s is a great camera system on a phone (for what one can reasonably expect), its sad to me that they've dropped many of the features from the camera software (like the Expert Mode seperable focus and metering, "Super Macro Mode" and RAW) but as I normally take my regular camera with me I'm not too worried.

The inbuilt HDR does a much better job than the HDR on the F1 (although not as good as the F1 does in RAW and using Snapseed see here), so I don't want to muddy this review up with that complex discussion but just to show how well the R11s does on the HDR mode.

Standard image:


and HDR engaged:


So much better preservation of highlights and shadows. to get that with the F1 I needed to use RAW and touch up in Snapseed;


which as it happens, is to me a more "natural" looking image, preserved highlights and appropriate shadow details, with (as observed in other posts) a slightly wider angle of view (which I appreciate).

But if you're a Pareto Principle sorta person (where you aim to get 80% of the benefits for 20% of the effort then the R11s camera offers much and is a (slightly unclear) development from what was offered 3 years ago in the F1.

Of course if buying new you have no choice (well and soon you probably won't be able to get a new R11s anyway as its last years phone), the R11s is a competent phone camera.

I'm as yet undecided if the R11s will become my daily driver for a number of reasons, these being:
  • the colour rendition of the R11s makes it seem punchier than it is, meaning others will see limp washed out images (which look good to you) (on a positive note, I can say that it has a much better rendition of the rgb gamut than almost any other screen does, so there's that)
  • lack of voice shutter trigger
  • I don't like the bigger phone to hold (and the reduction in bezel size makes for touch errors)
  • less control
  • no RAW
However as I normally also travel with a GF-1 and a couple of lenses some of this is moot.

In its favor the R11s's faster processor means I can process RAW images from my proper camera in much less time. For instance I did a comparison with my Sony A7 cameras raw files and found this for transferring and converting 3 ARW files:

R11s
Transfer speed = 12mbs
3 ARW file conversion = 17.46 sec
Snapseed conversion
Open time = 4sec
Processing = 9.4sec


F1
Transfer speed = 10mbs
3 ARW file conversion = 34 sec
Snapseed conversion
Open time = 4sec
Processing = 32sec

Processing time was less of a "oh my god, I'm getting another beer" event when using my Panasonic GF-1 (because its a 12Megapixel camera and the Sony is 20Megapixels ... and more pixels means a longer time)

Lastly I'll leave you with a shot taken with my GF-1 but not used in the previous comparison (here) of phone and camera cameras


its why I keep using a camera, although its nice to have "much better than nothing" in my Phone.

Monday, 10 December 2018

fence post

I was out wandering with the A7 and found this to be interesting.


As it happens its also a good example of why I like the A7 and my legacy FD series lenses (in this case the FD50mm f1.4). This is not to say that other lenses are not as good, it just happens I've gathered a selection of FD from when I got into micro43 back 10 years ago.

The A7 gives me a dynamic range that I would be unable to get with my m43 cameras (even if I had newer ones) and the larger capture sensor gives me a much more exaggerated DoF experience than I can get with m43 (something I've known since I first started with APS-C, which is almost the same sensor size, some 20 years ago).

35mm used to be the first size (the smaller end) of films which I considered useful for anything other than snapshots (or macro, a place where small digital sensors have been great from my first experiences)

Monday, 15 October 2018

Full Frame (Sony A7) Adventures

For quite some years I shot 35mm film (which nowdays gets called Full Frame (FF)), and there was no digital. Then when the first D-SLR's came out I was abjectly disappointed to find that they were APS-C and none of my EOS lenses (and I had a few) worked well on them (or so I felt), so perhaps its better to say "worked the same".. my beloved 24mm became a sort of slightly wide normal (at effectively 38mm) and was neither wide (like 28mm or less) or "normal" (like 50mm) and wasn't even "fast" being f2.8

Eventually the 5D came out but by then I'd accepted the APS size and by 2009 had sold my EOS system and moved solidly into the Four Thirds (or specifically micro43) sensors with my G1 (and later GH1 and GF1). I have of course written *much* about that on this blog.

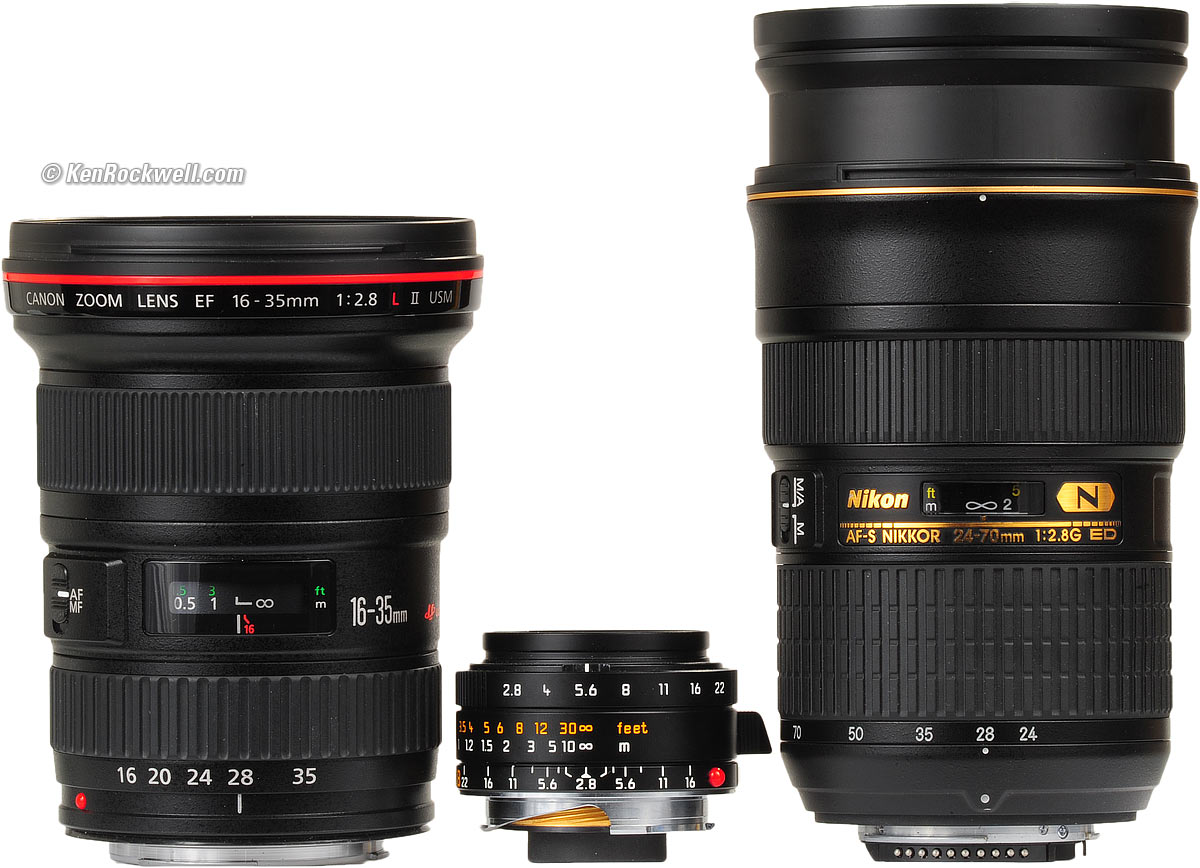
Back in 2014 I was looking with interest at the Sony A7 as being perhaps the perfect platform to use legacy 35mm lenses because "they were designed for that coverage" and in particular in "wide" and "normal" prime lenses were well priced (in a day when everyone wants a 24-105 f4 zoom), and (as the famous Ken Rockwell's discussion on wide angle lenses between digital cameras here observes, primes can be quite the advantage in some ways:

?

Both the above lenses are 28mm (the two zooms variously wider and less wide).

I know some people like to suffer for their art, but that's not me, I'd pick the middle one. Thus I've always preferred a selection of compact primes to a couple of huge zooms ... it brings other advantages with it too ... like DoF control. With a 28 - 70 f3.5~5.6 zoom you don't ever get "shallow DoF" ... thus you have abdicated control.

So knowing that I like shallow normals (which has been a kind of quest for me since I've been into m43) where the absence (at first, then dearth) them in m43 has been a problem. Over time this was solved with both the 20f1.7 and 25f1.7 (and yes I know I can spend big and buy the 25f1.4 or 24f.12 even) which were good and I was glad of but still somehow something was missing for me - low light performance of m43. Sure, f1.7 helped give better shutter speeds, but not enough, not if you wanted higher quality detail (IE: more than facebook or other social media image making demands).

Now just the other day I compared the Panasonic 25f1.7 on my GH1 with the Pentax SMC thread mount 50f1.4 on my A7 (photographing a packet of noodles) but found that test both "wanting" (I'm not really into noodle packets) and limiting. Not least because photographing at that distance isn't quite what I'm into with "normals". Plus I've wanted to use my Canon FD50f1.4 which I have used and tested before on my G1 (which of course using only the center portion) turns it into a crisp and sharp 100mm. Yet it was designed as a normal and I wanted to see how it "looked" ...

Today FD adapter arrived (from my favorite maker of FD adapters, I strongly recommend his products) so I could put my FD50f1.4 onto the Sony and have a look at photographing a person in a "normal" context. I took two shots, one at f1.4 (cos like why not) and the other at f2.8 (or maybe f2?) and they looked like this:


F1.4

and at f2.8


Which to me look (unsurprisingly) exactly like what I'm after, in contrast the P25f1.7 gave this wide open at f1.7


Its not as distinct from the background as the 2.8 (and indeed it should be closer if we assume the 2stops that exists between FF and m43). Its also a bit "wider aspect ratio because its 4:3 not 3:2 .. none the less its nice, but still, the books behind John are clearer and attract (unwanted) attention.

Overall (especially at this size) there is little rendering difference between this and a phone (less if you've got one of those that does the background Out Of Focus (OOF) in software now.

So what else is different?

Well for a starter I wanted to keep "shutter speed" above a minimum to reduce the possibility of subject blur (and yes I know IBIS will help with that, but won't help it if the subject moves ... as people are prone to). I also wanted to compare noise (which I also expected to show a 2 stop advantage to the bigger sensor, so I put the GH1 at 1600 ISO and the A7 at 6400 ISO (2 stops). This resulted in

  • the GH1 giving 1/250th at f1.7 (so yes its a dim room on a rainy day)
  • the A7 1/400th at f2.8 (and just over 1/1000th at f1.4 which really will freeze motion)
I don't want to pixel peep the shitter out of this because quite frankly it doesn't need that to show the differences, nor is anything more than 50% needed to replicate what a print looks like.  However the sheer amount of extra pixels captured by the A7 (6000 vs 4000 high) makes it hard to present them similarly. So I've chosen to present half size images for the A7 and full size GH1.
So lets dive in...


Straight away, just like with the noodle packet (in the earlier above mentioned post usig the Pentax lens on the A7) we see that the amount of detail available in the A7 just outright exceeds that of the GH1, and also contrast is better. What surprised me was how much more the noise was intrusive in the dark areas and even on the sides of Johns glasses. To me I'd expected that 2 Stops would see them on more equal footing than this. That the noise is larger in size (because its pixels are effectively bigger in the picture) makes it harder to apply Noise Reduction to without destroying detail.

To make the noise clearer (and highlight why colour channel noise is the big culprit here), lets look at just the Red channel.


The A7 noise looks more like "random noise" and the GH1 shows that its on the ragged edge of electrical read (sensor) noise.

This has a very detrimental effect on fine detail, which becomes clear when we look at the shot below.


So you can see the stripes clearly in the cushion, but the pattern in the covering of the chair is simply missing in the GH1 image (buried in noise). Click that image (indeed you should all of them) and look at the larger size ... the details vanished because the "feature size" of the image was about the same as the size of the noise ... so... gone.

Conclusions / discussion

Throughout this discussion I've used the names of the two cameras (the A7 and the GH1) however what really is significant is that one is FF (the A7) and one is m43 (the GH1). This is really the most significant point. All of the observations I've made are consistent with the expectations of the understanding of what is different between these two systems.

Big ticket items first, the FF camera gives better handling of noise and (via lower magnification) better contrast if not higher details. While its true that m43 can resolve as much as FF can its also true that things can erode that in practice, which we see here.


This experiment has shown to me that FF does indeed have benefits that extend beyond megapixel count, that even scaling the FF image down to a smaller than what the m43 camera still has greater details.

The smaller pixel size (relative to detail) allows greater use of post processing NR without destroying what RAW file posses.

So if you (like me) don't mind using manual focus (which requires a better skill set as a photographer) then you can take advantage of some great optics and get great images. Looking at the "native lens" options (meaning with AF and electronic control) available in a "normal" I see:
  • Sigma 50mm f1.4 for US$950
  • Sony E 50mm f1.8 with OSS (an advantage) US$300
  • Sony FE 50mm f1.4 US$1500
  • Panasonic 25mm f1.7 $150 
  • Olympus 25mm f1.8 $350
  • Panasonic 25mm f1.4 $600
Given that the FD50f1.4 costs about $100 it means that for a photographer, you have access to quality optics (but without the "bells and whistles") for a lot less. Yet still it on this camera the system outperforms the m43 option in terms of image quality and noise when in challenging light. Even if the P25f1.4 above could resolve more it would be eroded by the sensor noise. Perhaps its possible that some of the newer sensors (like the G80/85 I wrote about recently would come close to improving that situation, but  I doubt it would equal it let alone improve it.

So in conclusion (as I've expected) the m43 system will in good light give results in sharpness and detail that are well and truly "good enough". FF only pulls ahead when low light shooting is called for.

I'm in no way intending as a result of these findings to move away from m43 ... it offers so many things that FF does not (especially without having AF lenses). I will however be (now that I have a FF system {or at least not a film one}) rationalising my m43 lenses to be more in keeping to what I believe that basis of m43 has been right from the get go ... a compact and light weight flexible and system capable of excellent results as long as you don't have to contend with low light / high ISO.

Some random examples


Sunday, 26 November 2017

Camera Related Illness

In a previous post I'd identified a number of Camera  Related Illnesses.

Recent conversations have put me in the position to recognise another;

Gollum Syndrome:

This affliction causes a pathological fear that using the camera exactly as it was designed to be used will cause harm to the camera. In particular people freak out when they have to change lenses (when it is an interchangeable lens camera) or that mounting a lens for which the camera was designed (such as a 300mm lens) will cause the camera to spontaneously break.


TREATMENT: I believe this illness to be untreatable in the context of modern city living, perhaps being conscripted as an army photographer may assist.

DISCUSSION: this illness is exacerbated by (or perhaps dependent upon) being a sheltered city person without the faintest clue. Anyone who actually uses their cameras for nature photography (not visits to the Zoo) quickly discovers "shit happens" (like field changing a lens, or a mild sprinkle of rain) and the camera still works. If the photographer request trauma counselling :- slap them.


Wednesday, 31 May 2017

the camera you have with you ...

despite my overwhelming urge to pound my phone into a rock every time I try to type on the fucking thing (only those who can't type, have never used a decent QWERTY keyboard and can tolerate so many spelling errors and interpretation errors could confess they like on screen keyboards) the phone makes a good camera. Not least because its always  with you. Like today, I was out wandering around and enjoying the beautiful weather when I looked back (in anticipation of some good backlighting) and found just that:


These days I reflexively put the camera into RAW and then I've got that too. I've earlier found that this combination is about 85% of the quality my GF1 (with the 14mm f2.5 lens) gives.

The camera app did a pretty decent job of this challenging lighting situation (I'd tapped on the brightest cluster of leaves over there mid lower right) but RAW and Snapseed enabled me to pull the highlights down in development and sharpen up a good image.

Here is a full segment


Based on my experience with printing I reckon this'll be good for 52.6 x 71.1 cm (20.69 x 27.97 inches).

I reckon this'll go nicely on a wall back in Australia (to remind me of here when I'm there).

Thursday, 27 October 2016

on-phone photo editing

For a long time (since about 1999) photo editing has been the domain of my PC and its (relatively) only recently that my phone has even been a photographic tool for me let alone an editing platform.

Things have changed recently with:

  1. me getting a tablet
  2. me getting a more powerful quad core phone that has a good screen size

To me it wasn't that long ago that I used a 1024 x 768 monitor and only much more recently went to 1600 x 1200 screens (like a couple of years back). Lots of things have changed recently and to my mind there has been a confluence of software as well as hardware that has made it not only actually possible but in some specific cases preferable to edit on my phone / tablet.

Photo Editor & Snapseed

These two apps on my (Android) device give me great capacity to edit and in some ways even make some tasks easier than (say) Photoshop on my PC

Photo Editor has the "usual" range of things I like to use in editing:
  • levels & curves
  • full unsharp masking (no, not just "sharpening")
  • perspective adjustment
  • cropping and resizing (I'm still inclined to resize smaller when sending by email or posting to FB)
  • a bunch of other stuff
that set pretty much gets me by to enable me to send out an image that I'm happy with (because its pretty common that an image needs something to make it how I saw it), but as my phone supports RAW (as a DNG file) I needed to add something to get that. 

Of course that is: Snapseed

Snapseed (which is also free and better yet is not Adware) is my go to tool for "demosiacing" a RAW file on my phone (processing it) and while my old PC fav of DCRAW exists the interface on Snapseed is simply stunning. If you're a PC based editor it may at first seem strange, but with a screen only interface I believe their design is just top notch.

As well as RAW processing Snapseed has its own editing system which is complimentary to (with some overlap) what you can do in Photo Editor. As well as adjustments used in "tuning" your picture there are so called "Art Filters" which normally I don't like much (very Instagram). Having said that the layer approach to Snapseed is fantastic (you can go back in your workflow and tune something or remove it), and its HDR system gives me the ability to apply HDR sorts of tone mapping to a JPG image (which can really help).

This post isn't intended to be a tutorial (as plenty good ones exist on youtube on the Snapseed channel already), more just a quick post of the sorts of things I can get done.

So, some examples:

The classic sort of look that a digital camera will give you on an overcast and dull day:


despite how it looks to our eyes (which automatically contrast mask in our brains) the sky looks washed out and the colours dull. So (in a rock and roll sort of manner) I wanted to see what I could do quickly in Snapseed:


so a slighly heavy handed HDR-esque tone map brought a great brooding image, and then a bit more with a heavy application of "grunge filter" 


Just to see what that looked like.

I did this to see rather what the processing looked like in so much as to produce "great works" ... love it or hate it its quite powerful.

So I'll leave you with some other before / after images, but if this has tweaked your interests / opened your eyes to tools you didn't know existed then that's great (and exactly my intention).


:-)

Sunday, 25 September 2016

Oppo F1 - expert mode (more details)


well most people don't seem to dig through the details of the workings of their (phones) cameras, and as the "selfie expert" is probably aimed at people who are "selfie-ists" (handing it to themselves?) few will realise just how good the native camera app actually is ...

So (having already dug into advantages of using RAW over here, here and  here) lets have a look at what else (as a photographer) I love about this tool.

First, getting there. Open the camera then click the little bunch of circles which are on the right of the shutter button. That takes you to the settings. From there pick "Expert Mode"


annoyingly (like most phones) the orientation does not switch fully (or even switch at all) despite the phone being oriented ... so you'll have to live with that.

Once in Expert Mode you'll find some interesting features:


You will see that you're in expert mode by the display note (and you can restore "default" by just tapping the X beside Expert Mode) and the new controls and a new focus point picker.

First the most useful control sets are innocuously hidden under the EV  The astute will also observe that the "focus point" box has changed shape a little ... more on that in a tic.


Because this screen does not rotate well (I've rotated it a little to make it easier to read. The key adjustment areas are:

  • Shutter control (auto and pick your own up to 16 seconds)
  • ISO control (auto or pick your own)
  • Exposure Compensation (sort of pointless and I'll explain why in a tic)

This is an enormously powerful feature set and liberates the phone from being frustrating for photographers doing low light work to making it a fully functional camera that any photographer will find handy. Lets look at them one at a time

Shutter control

Having control over the shutter is an enormous benefit, especially when you fix the ISO. In the modern age of digital cameras that Auto ISO things it leaves people confused as to what is happening. For a film user, once you loaded the film in the camera it was decided ... you were using (say) 200 ISO and that's that. Film users were intimately aware of how change in ISO was a give and take affair. Sure it gave you the ability to have faster shutter speeds in low light, but it took from you the clarity and sweetness of 100ISO images. The same is also true in digital.

So if you want to get the sweetest images (from a noise perspective) from your camera, always bias towards the lowest ISO you can get your hands on and then lengthen the shutter speed to give the right / desired exposure . Which leads me to:

ISO

So being able to pick your own ISO means you can make images where adjusting the shutter (sorry, no aperture control on phones for "diffraction limit" reasons) will show you exactly the changes you are making to shutter as brightness changes in the picture. So when its really dark, and you've already set the longest shutter you can then start increasing ISO in steps that you're happy with..

Exposure Compensation

So this leads us to Exposure Compensation which (when you have ISO and Shutter locked to your preferences) is sort of a a spare foot ... maybe handy but for what? Its about the least useful component to one who wants to be in control. I suspect its only use is when you've locked the ISO to your pref (say 100) and left the shutter on Auto (because there isn't a choice for anything less than 1/4 of a second which isn't any good in daylight)

But rather than muff about with Exposure Compensation the Oppo F1 camera offers you a more potent tool ... that of Spot Metering.

Watch this spot

So, looking at the screen in Expert mode again we see that "changed" focus point when you go into Expert Mode. This is how it works.

So lets say you move the "focus point" in the usual way (by tapping on the screen somewhere) to over there on the wall (default is center)


because you don't want the foreground in focus ... now the astute will also see that doing such has also altered the exposure, because (for most cameras) the chosen point is also where exposure is biased towards. But that could be too bright or too dark resulting in a dark or light photograph. 

This is where you drag the circle out  of the square and place that where you want the exposure spot to be metered from ... voilla .. Spot Metering


You can then move the spot to other places (drag it) and find the exposure you like ... thus there is little need for Exposure Compensation (but its not heavy to carry right).

(I'm adding this in 2019 as since I posted this page its been in my top 10 weekly posts, I've recently bought an R11s and found that its actually got less features than the F1, but none the less here's a video I made for that post showing perhaps more clearly how well the "expert mode" actually works)


Pretty handy stuff isn't it. So go out and be creative with your camera phone...