Sometimes things go as they should, and sometimes they don't; when they don't it can be an opportunity to learn more.
I recently did an oil change and it seemed a good opportunity to check my SR500's timing chain tension. Its actually incredibly simple to do and quite accessible right there on the right hand side of the bike.
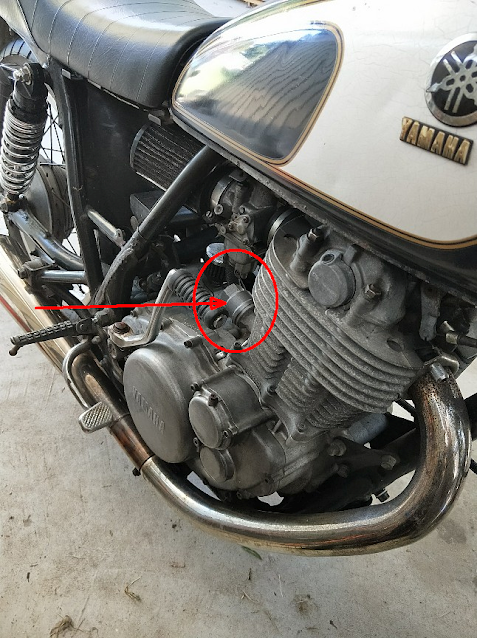
I usually call it Cam chain and my old manual does too.

So normally one just undoes the (27mm, and the standard toolkit has exactly the right spanner for this task - yeah \o/ ) cover cap (the thing visible here)


However a quick look at the cap revealed the issue:

yep, the locknut had come 'loose' from the body and simply unscrewed with the cap ... (facepalm).
It undid with just my finger.

Note carefully that O-Ring that's in the cap ... it can fall out unnoticed and must be in there when the cap is put back on ...
So, with the adjuster bare (no need to do this yourself) its a good time to talk about what we are doing.

Our goal here is to adjust that so that the inner pin is flush with the outter surface of the adnuster nut so, you need to use a 10mm spanner (also in the kit) and (probably) screw it in.
The process of determining this I used is to turn the motor over (with the ignition turned off and the decompression lever pulled in) using the kick starter by hand while looking at that (apparently a screw) in the center. You want to turn the motor over looking at it in various positions (perhaps starting from Top Dead Center, for which I just used the white mark visible through the window) as well as other places.

Here you can see its actually lower than the outer part of the nut (and I watched it during the turn over). So in my case I adjusted that in.
Screw the nut in untill the surfaces are flush (which is actually a cast piece of a longer component that looks like this):

its perhaps not clear in that where the adjuster is, but careful thinking about it will reveal it all. This is from an SR400 manual btw.
Perhaps turn it over again observing that it moves in and out a little. So then with that done just put it all back together, tighten to specified torques (or just firm but don't try to strip threads) and you're done.
Below is the advice I got from a friend before doing this (*thanks Stu)
Dead simple... all I do is
* put the engine in TDC on compression
* remove the spark plug
* take it a bit past the T mark then roll it back to the T mark again
* undo the tensioner cap (angle the cap down as you remove it to catch the oil, stick a rag under the area anyway)
* loosen the big lock nut a bit so you can adjust the 10mm centre nut
* carefully screw the centre adjuster in 'till the slotted plunger comes almost level with the end of the adjuster (it's not a screw and don't try to force the adjuster with the 10mm)
* then rotate the flywheel back and forward a bit to ensure the centre plunger moves in and out slightly
* screw the lock nut back up then holding the adjuster with a 10mm spanner lightly, tighten the big lock nut.
* Change the O ring if you feel so inclined, tighten the cap a bit then all done!
I hope this demystifies the process for any "wrenching beginners".
Best of luck with what seems harder (before you've done it) than it is.


.jpg)
