Showing posts with label testing. Show all posts

Friday, 27 December 2019

charging, discharging data and usage

Having now done a few explorations with my scoot I can say that the Mercane does indeed (at least in my case) come with good batteries. However what I wanted to talk about here was the interesting observations borne out of yesterdays run.

What I did and why

I decided that a nice run up my favorite (and nearby) mountain road would be in order on a quiet boxing day. I anticipated from experience that I could make it from my house all the way to the top of the mountain and back on a single charge. While I've done similar distance runs before it has not been with such a gruelling non stop slope as this. As you see its steep countryside.

The trip out to the mountain, up and down the mountain and then back home is about 20km and while its steep up there, it means that I need no power at all to get back (and because I enjoy the speed on the way down, I wouldn't really benefit from regen brakes for this or 99% of my trips). Just to be safe I used the "Economy" setting for the trip out, but satisfied when I got to the bottom I'd have enough to get home I put it back on "Power" setting. As it turns out for the part up the hill speeds were not dissimilar to my previous runs with "Power", just about 2kmh lower (which benefits power consumption).

I was satisfied at the top of the hill where it showed 48.7V, which works out to be 3.7V per cell, which is not much below the rating for the batterys "normal" level.

So on return I charged it back up and noted that it (after a minute or so to allow it to settle) was showing a battery level of 47.6V

How much of my energy did I use?

One thing for sure, is that because of the very shallow discharge curve of Lithium batteries, and slight variences in chemistry and even perhaps discharge levels within my 13S6P pack (bundles of 6 cells in Parallel in a string of 13 bundles in Series) it is hard to know the state of discharge. Like did I discharge it to half, nearly empty ... what?

I figured that the best way to determine this was to again use my 150A power monitor (featured in other articles such as here) to actually know this.

However I decided to go a step further and look to see if 1) how long the change took before the Amps going in backed off, 2) what was the exact relationship to Volts duing that constant current phase and 3) look to see how long the balancing phase took to complete.

Here is a graph of my data, you'll notice that at first I was not sampling every 10 minutes.


so basically the voltage crept up a a small amount (starting at 48.08 as soon as I plugged it in) and moving finally to 54.9 (which dropped to 54.6 shown on the bikes volt meter as soon as I unplugged the charger). Finally the charge indicator went Green just after the 4:30 interval (I happend to be there writing down the data) ... so the BMS is doing a great job IMO.

The next thing you may notice (if you read graphs not just look at the pretty picture) is that it took a little over FIVE HOURS to charge. Now this is unsurprising with the piddly little 2A charger provided. Why "piddly" well the cells in the parallel bundles are 2.2Ah, and so since there are 6 cells in a bundle that means 13.2Ah, most makers suggest that charging at 0.5C (where C is capacity) is quite ok. Thus 0.5 x 13.2 = 6.6A thus being fine and which would have charged it in 2.5 hours.

Two guesses what I'm buying next ...

Measured Values

Now what's also interesting in the data presented by the 150A (which saves me doing the maths) is the Wh supplied to the battery. This was 410Wh.

Now this is interesting because as the battery is rated to 633Wh that's actually quite a bit over half discharge. Indeed its probably the ideal discharge to take it to to maximize battery life. As previously discussed (here) discharging the battery to about 60% (regularly, not as a one off) still results in a good 600 charge cycles before the battery is degraded to any significance.


which means that the battery should last me a good couple of years (all things being equal). That's very encouraging.

What can I do with this?

Well knowing that charge and discharge of Lithium batterys is in the high 90's efficient (nearly 99%) I thought it would be interesting to see if I can (like a Tesla onboard system does) use this to estimate range. As I've already established good models of how my energy demands are on my scooter with this bicycle computational tool (my parameters) over on this blog post, and that I have access to some good data on the steepness of things (via google as well as my own measurements) I can do some estimations if my calculations are right.

So having this data I used it to feed into my GPS log of the trip and make some basic ball park figures. This is the trip data from my phone GPS app;


Note, there is a flat spot on elevation because I got a phone call mid test and stopped to answer it. Then using that simulator (mentioned) I was able to roughly (ball park) divide the trip power demands up thus:


into different power level demands based on plugging that data for slope and speed into that simulator. Making some simple assumptions and measuring scale off the graph I got:

60 min = 532 pixels
1 min = 9pixels

High power period @650W = 148px + 90px = 238 = 26min = 281Wh
Standard power period @300W = 72px + 84 px = 156px = 17min = 85Wh
Only 43min in the hour was powered (because "gravity")
281+85 = 366Wh

Which when you consider that as reported above that charging required 410Wh that's pretty darn accurate.

Next, when you factor in the distance covered (as a challenging drive condition) I used 410Wh to cover 20.83km. Alternatively this works out to be 1.96kWh / 100km ... This is something we can now use to compare to many EV's such as (say) a Nissan Leaf which is something over 13kWh/100km

That's pretty darn good.

Outcomes?

this serves to verify a few things to me:

  1. the battery pack rating is good for real world expectation (I don't think I'll do a "till fail" test, because walking in the heat is not attractive)
  2. the battery pack is good quality
  3. my empirical observation derived Coefficient of Rolling Resistance (Crr) seems to hold well in many circumstances
Pretty darn good I'd say


Wednesday, 25 December 2019

When is it charged?

Discussion on a forum yielded the idea that charging can continue (at least on some systems) after the charging lamp changes from Red to Green. This blog post serves to show that it can and probably does.


As it happens I have an inline meter which measures this sort of thing (as well as accumulates a bit of data such as peaks and averages) and is sensitive to 0.01Amps over quite a voltage range. I bought it for working with Solar charging systems (and its appeared in a few videos before). I'd adapted it to plug inline with my Mercane charger and allow me to monitor the charge.

It charges quite solidly at about 2 Amps, then towards the end falls off. Like this:


You can see a small taper off in voltage and it still draws an amount until it eventually falls to 0.00V

So lets look at the phases of charging (meaning what happens over time) for a normal lithium cell. Its divided into constant current (where the cell soaks up all the amps its given) and then a drop in current signals that the battery is filling up (as the cell starts to fill up like a baby not wanting more) and that amps going into the battery represents the charging (which it does see here).


You can see that there are only small changes in V note my red annotation lines up until the battery starts to slow down accepting more electrons (and Charge current drops). Yet it takes nearly another 2 hours before the battery is at 100% capacity. Its at this time that the BMS starts distributing incoming power to the other cells.

Having some understanding about how many BMS work, this is consistent with the "distribution phase" where power is distributed to the lower cells (often from adjacent cells also being topped up by the BMS) until (*I assume) the cells are all at 4.2V or the BMS gives up and declares there is not enough current moving and the cells are as balanced as they're going to get.

In the video (segment) of my charging below you can see the moment when the light went to green, and then the 150A reported a drop in amps being drawn to under 0.3A


Which shows that it may not actually be finished charging when the light has gone green, as current is still being drawn for some time. Without a meter (like this one) there is really no way to know (unless your scooter has some fancy firmware that monitors charge) what your batterys behaviour is.

I believe that this implies that the green light on the charger is switched from Red to Green when the amps drawn from the charger falls below a threshold, however balance charging is still taking place.

So for those who are "worried" about the battery being "killed" on the charger, I recommend strongly that you consider giving it a full on the charger overnight charge at least now and then (perhaps every second charge). I think its silly to worry about this, because its only the leaving of the battery at over 4.2V for significant durations that causes any (minor) harm to the battery. I'd say that mine only stays at 4.2V for the small amount of time between full charge and usage commencement 

... may as well go out for a ride eh?


Friday, 25 January 2019

still gnawing on that

Some criticism of my "method" led me to go out and reshoot a test between the Pansonic 25f1.7 on my GH1 and the FD50f1.4 on my A7

Taken on its own the Panasonic yeilds good results:


and allows a very nice rendering of concentration on a subject with sufficient DoF control to make the background a visible background while creating the effect of focus on the subject.

To me that is precisely what a "shallow normal" is for ... normal shooting distances (not 30cm away shots of you SuperMarioBros pencil decoration model on your keyboard in the office and dribbling about shallow DoF ... my phone does that). Distances where (say) your friend could have been standing beside that fence post and you want the background to be observable as a background, but attention to your friend.

In this role the little Panasonic is a champion, indeed it or the Panasonic 20mm f1.7 are excellent choices but I digress.

It however becomes apparent when you compare it to larger formats (even with 1970's lenses like the FD50f1.4) that sharpness is not up to it. It first strikes you when you are attempting to use manual focus (in the above that was on the wire at the top of the post) magnification and it just doesn't look "sharp". Its like that old saying about Volvo not wanting you to drive a BMW in case you don't come back to Volvo.

So while for general picture taking I find the m43 perfectly suited, when I am specifically going out to shoot a landscape and both wanting and needing that extra detail, the Sony A7 just allows me to get that.

Method

Now all the following shots were on a tripod (of course I needed to change the camera, so alignment is not perfect). All shots were developed from RAW using DCRAW to equalize the parameters and avoid sharpening in-camera (or post processing) effects (which Adobe does by default if you don't watch out).

Results

For instance lets look at what the Panasonic 25mm got, and lets give it the beneift of being stopped down a bit (f2) to put it at its optimum sharpness.


it is in fact almost indistinguishable from the f1.7 shot (and a small amount of thought would confirm that 2/3rds of a stop won't really impact on DoF control but will on cleaning up a lens)

So in keeping with my 50% pixel view of an image reveals close to what you see with a fine print at maximum size:

So this is the central portion scaled to 50%


Now ... lets have a look at what we could get from the A7 to be "fair" I've scaled it down to the same width as the GH1 image first for the overview (which blogger will also scale a tiny bit more)


and now a central segment


They are fairly close, however my nod goes to the A7 as being a smidge sharper (and there has been no software sharpening done).

For any print except "at the maximum" this isn't even going to factor for anything more than the most carefully inspected print. I would comfortably say "99% of people just won't pick any difference even side to side.

Ok, but I've hamstrung the A7 by scaling it back to what the GH1 could yeild, and its important to keep in mind that we're talking about a big print here: 70 x 46 cm

But should one want for some reason to go out and plan a photograph that will be printed bigger then what difference does the 6000x4000 pixels (vs 4144 x 2768 of the GH1) make?


so a bit more again. Are you able to see the bit of lichen on the left side near the top of the post in the m43 shot? Not really, and the fine details in the lichen on the fence are missing too.

Perhaps with a better lens (than a 1977 model) I may do better, but perhaps not by much. Thus for the $50 I paid for the FD50f1.4 (and they sell for about $150 now, which is still less than a new AF lens by nearly a factor of ten times) its hard to get better value.

Discussion

So is this worth it to you? To me its totally worth it (I paid less for the used A7 than I would for a later model perhaps better m43 camera), bang for buck I get something which isn't far from the results I could get with my 4x5 camera. Sure, that's better (typically good for 10,000 x 8000 quality scanned pixels) but I'm having a hard time getting colour negative anymore and processing other than my own black and white is hard to come by, plus that camera works out at $15 per image and this is ... well digital.

I have not touched on the other advantages the A7 brings, such as

  • good access to high quality legacy 35mm lenses (and used as they were designed, not halving the apparent contrast by the x2 crop)
  • better high ISO results
  • better bit depth at any given ISO
I know that someone will probably say "oh, but you could shoot the m43 camera at f1.7 and not at f4 ... well that's true ... but I could also shoot the FD50f1.4 at f1.7 and get a lovely result too ... so in summary here is that image for your consideration


as always I recommend viewing this on a good PC with a good screen and loading the images (center click on a windows machine) and viewing as big as Blogger will deliver.

I always enjoy being out in the forest and hanging around (and walking to this place) makes testing as much fun as anything else ... besides one of these is going on my wall ;-)

Thursday, 8 March 2018

Panasonic 20mm f1.7 (thoughts on focus speed & testing)

one of those issues which "just won't go away" is the views expressed by camera "enthusiasts" on internet forum that X or Y is junk. Well today I'd like to discuss an old favouite among Wangers that just won't go away (even with a double tap).

The Panasonic 20mm f1.7: when they first came out I was attracted, as here I wondered about them and if one would give me something I wanted out of a lens which would cost me €399 (back then). As the price came down it got to the point of "well why the hell not just try it, and so back in 2014 I finally bought a Panasonic 20mm f1.7 because it was the only way to actually see. If you read that post I've got a few more details on how well the lens works and while I didn't go into the lens testing for sharpness (many others have done that so well...) I did comment on the difference between similar focal lengths.

So as you can see its an attractively compact lens on a compact micro43 camera body. Making not just a good lens, but making your micro43 mirrorless compact camera experience be ... well actually compact.

I've written a lot about this lens over time and indeed taken quite a many shots with the lens which have quietly featured on this blog. I'd say especially with modern phones being as good as my camera with the 14mm lens, it has resulted in this lens as being my default fitment lens to the GF1 - becoming more or less a budget Sony RX1 (which even still sells used for $1500 or over, way more than both a GF-1 {about $100} and the 20f1.7 {about $150} by a big margin).

Anyway, like I said much ado is made about how horrible the AF is on this lens , so this morning I decided to whack the phone and camera on a mount to actually test it. Below are the results.


Basically if this AF speed is not sufficient for you then you're a formula 1 track photographer (oh, wait, they'd use a longer lens anyway) or a totally incompetent photographer who blames their poor performance in getting images on the lens (you know, like bad workmen tend to do).

Generally I noted that it focused with less delay when your subject distance didn't change much. I had this set on a small single focus point to force the camera to make greater focus adjustments, but if you were shooting with the camera in face recognition (and the people were just at the table with you), or multi zone and let the camera pick it (suitable for scenery or cityscapes) then really its hard to go past this lens as a compact fast (and folks fast lenses means an aperture which results in a faster shutter for the same everything else ... ok).

There are of course many many other videos out there demonstrating just what I've done. Usually the Wangers don't actually provide evidence to support their claim (which is what Wangers or Zombies of Moronity do), but go on regurgitating someone elses cud.

So if you are contemplating this lens then I suggest that you try it. You may need to make some changes to your camera focus settings (like you'll notice I didn't use AFC (or C-AF I think on Olympus), but used the single shot. Combined with shutter release only on focus confirm that will help your keeper rate.

So is it only me? Well lets look on youtube a bit more (where people have taken the time to post more well produced material). This guy has a review on his OM-D and finds that they are close in AF speeds (as you can tell by the beeps in his video).


He suggests its slower but really, its perhaps the difference between 0.5 seconds and 0.25 seconds.  Hardly Glacial.

Another reviewer says good things about both stills and video:


Anyway, having covered that point, I hope you get as many rewarding shots out of yours as I have out of mine...


taken in dim light with no IBIS hand held at 1/30th of a sec

Sunday, 6 December 2015

Panasonic 25mm f1.7 (the m43 Shallow Normal I've been waiting for)

well recently a bargain of epic unmissable proportions came across my vision and I bought the Panasonic 25mm f1.7 for US$99 (plus shipping) which I just clicked "buy" on it immediately.

So this is my quick review of how the lens performs for me and how it fits with my equipment , style and needs.

Readers of my blog will know that I've long wished for a shallow normal, for example read these links dating back to 2010:
here
here
here
and here

When the Olympus 25f1.8 was released I was tempted, but just felt that it wasn't worth that much to me (they weren't cheap. Then the Panasonic 25mm f1.4 was even dearer (and bigger).

So now with the Panasonic 25mm f1.7 in hand I can say for me I've found the Graile.

Like Goldilocks pronounced, its not too dear, its not too heavy and its just about perfect.

Summary

This lens is great to use, it feels very natural for an old school 35mm SLR camera guy and feels great on my GH1, where it operates perfectly.
It feels less perfect on a compact camera, but my view is that such a camera makes subject "engagement" through the viewfinder (what view finder) impossible and when dealing with shallow DoF you'll really need to take care with placement (or take pot luck with results).
There is no substitute for faster apertures in low light, but its a killer outdoors.

The meat

I use a normal lens as (in my view) it was intended. A lens to take general purpose shots: shots which aren't too macro, aren't too telephoto, aren't too wide ... just "normal". I don't use it to take pictures of Mr Potato Head on my keyboard, nor sweeping wide scenery shots (well I suppose if I was stitching then of course).

So for me "normal" is also not infinity shots (implies scenery) and not in tight facial portraits (implies telephoto, if you respect your subjects facial features).

My first shot was off my balcony with my camera at 100ISO, and on a sunny day the brightness washed out with my max shutter of 4000th of a sec.


There is no one in this shot, but if someone was standing beside that pole it would be a "normal" sort of shot of them in front of the scene ... and man, is there great details in that pole, both in sharpness and in subtle textures. That's a camera JPG, but here is a dcraw development of that image at 100%:


This serves to show a few things:
  1. how much better dcraw is over in camera JPEGs (which I've mentioned many times here) and
  2. there are obvious colour differences between the camera selection and the RAW processors selection.
  3. there is better tonal handling (note clouds in background) in RAW
  4. CA is almost non-existant

I've read a few Wangers (term explained here) mention the lens has significant CA ... well just like I expect from Zombies of Moronity (from King Wang) they either haven't got a clue what CA looks like, or they don't even know what it means (probably both).

ePhotozine have done a review on the lens (here) and they rated it as Low CA ... have a read of their tech analysis.

Before looking at more images, I wanted to show the lens in perspective (as Foghorn Leghorn would say "I say, that's a pun boy"). So here are my three native m43 lenses which cover "normal".


The 20mm is perhaps a little wide (but I love it as general lens too, and its fast), then there is the 25, and then my faithful 14-45 that came with my G1 so many years ago. This is a great general purpose lens and (of course) covers normal.

Now I love the 20 on my GF1 because it is it more compact and fits in with the compact design philosophy:


But the new 25mm is (to me) a bit unweildy on it.


So to me the 25f1.7 is more suited to an SLRalike body such as my GH1 or an OM-D


Where the size feels natural, neither too small (which I sometimes feel about the Oly45mm f1.8) nor obtrusive. And while the 20mm isn't in the way, its sort of a bit pointless in terms of saving space ... when the rest of the camera doesn't really feel minimalist


So in my view the Panasonic 25mm f1.7 is really designed for the mindset of a camera like GH series or the OM-D series.

So with a contemplative engaging type camera we can use the 25mm to have some good renderings indoor in low light, using natural light not needing (yuck) on camera flash.

I took this set to compare the 25mm to my 14-45 set to 25mm (and interestingly the zoom markings are pretty spot on too). I wanted to see what I'd see.

https://c1.staticflickr.com/1/650/23240100290_866c41f1e7_o.jpg

If you click it you can load a full sized image and pixel peep around the place, but here is the center at 100%:


Notice how quickly the DoF falls off? Her locks are sharp on her forehead and the weave of the cotton visible, but by the back of her neck its really softening.

Now, lets look at another shot taken with the 14-45 zoom at 25mm wide open (which BTW is f4.9)


DoF is now no longer shallow, and there is that "phone cam" look about it starting to appear. Also, if it looks soft ... well here's why:


Motion blur ... so while a Wanger will tell you how good their IBIS is at allowing an extra 2 stops of shutter, its pointless when the subject moves ... and folks, if you didn't already know it, kids move ...


IBIS or OIS just ain't helping here is it ... Shutter speed is your best friend on this sort of work.

So the Panasonic 25mm f1.7 gives you something that the Zoom just can't ... shutter speed! So maybe you can find at f2.8 zoom that covers that range, but to me, even f2.8 isn't the same as f1.7 in neither DoF nor Shutter Speed. Plus such a zoom will be expensive and heavy, while the Panasonic 25mm f1.7 was well priced and light. So to me the 25mm f1.7 is perfect to toss in the bag (adding almost nothing to weight) and bringing to the table something wonderful, when your 14-45 is your main versatile picture taker (and outdoors it will be ideal).

Lastly on the little girl is this segment of a shot, a pixelpeeper who isn't skilled will probably whinge on a forum that the lens isn't sharp ...


But the fact is that if you look at the shirt pattern and the locks of hair over her ear the answer is that the focus was on them. In these shots I relied on the Face Detect AF to give me capture quickly as manual focus would have been a bit tricky with a fast moving subject who doesn't sit still ... when there is no 'recognisable face' (meaning two eyes and a smile) then the camera defaults to picking a focus point it wants ... and may miss.

Here's another shot from the day, of my wonderful host, in this I used manual focus and got the focus on his face exactly where I wanted it (click image for a full size version).

https://c1.staticflickr.com/1/587/23453403261_cb0bd493ff_o.jpg


Its a hand held shot perhaps a little tighter than is ideal for a portrait (I'd prefer to have stepped back and used my 45mm f1.8) but it just goes to show how well the 25mm can do as a portrait lens ... in a pinch. Certainly better than the even wider 20mm f1.7. This shot also shows how well the lens handles flare and CA in what is a challenging shot for lighting.

Miles even took a shot of "Yours Truly" with the camera and found the MF (which auto enlarges the viewfinder) to be easy and accurate.


Conclusion

The little Panasonic 25mm f1.7 is a fantastic buy. It comes with a hood (if you could be bothered with such) and gives the photographer who knows what he's doing a great tool with which to make great shots.

I now no longer look wistfully at my 35mm or full frame gear as the shallow normal I want is here in my hands now.

Better than the "nifty fifty" of my EOS days, this lens is good corner to corner at f1.7 while the 50mmf1.7 normally needed stopping down to avoid softness, corner softness and vignetting. While there is some of that on this lens, it really is so minor that you probably won't even notice it unless you go looking for it.

If you take photographs that are of the nature shown here, then I'm sure that you'll be really glad you got one.

Sunday, 16 October 2011

Olympus 21mm f3.5 on full frame digital

My first SLR was an OM1 and so my early years in 35mm photography were shaped by the compact systems that Olympus once made.

The subject of this blog post is the Olympus 21mm f3.5 lens. At 21mm it is a very desirable focal length for landscape wides, architecture interiors and indeed quite a number of photographic uses. Both it and the 21mm f2 are still famed for their sharpness within that focal length.

background

But the 21mm is not just a great tool for making images, its a great tool to use. Smooth to operate and light on the camera it feels as nice to use as the images you can make with it.

Pictured here beside my EOS 24mm f2.8 it is snug enough to slip into a pocket. The EOS lens operates nicely in AF mode, but if you want to operate manually that focus ring is just dreadful.

When it came to digital I was perhaps on of the early adopters. Digital cameras such as the Coolpix and IXUS cameras gave me better versatility and snapshots than any of the compact 35mm cameras could produce. At the time I never really thought I'd replace my 35mm camera with one of these digital things. Not because of any "better or worse" concepts, but simply because they did different things.

For me full frame digital has been one of the destinations of digital cameras since the first DSLR was introduced. For one reason of another I've never made the "commitment" and bought a full frame camera. The steep price tag however has always kept me at bay. So as a result I have never been able to answer an important question.

Is full frame worth the commitment?

I happen to like wide angle lenses, and as it happens shallow depth of field is something I like to take advantage of to make my subjects stand out from the background.

This image of the tree on the sand dune was taken with 35mm film and a 24mm lens at f2.8

I know from experience that had I used an APS DSLR for this image (such as my 20D) then the background would not be as distinct from the subject and everything would be more or less in focus.

So while I've had wide lenses such as my Tokina 12-24mm lens on my EOS 10 and 20D cameras there was always something missing for me.

Since getting my 21mm Oly I have not had a chance to use it on a full frame camera such as the Canon 5D. So this weekend I got to borrow a 5D from a mate (thanks Al) to allow me to think this through more and to also give me the opportunity to do some image testing on the Olympus 21mm f3.5, something which it seems there is not much of on the internet.

I took a few images in the back yard getting a feel for the lens and found that it was staggeringly soft in the corners. I only took one image at f3.5 and so I wanted to do something a little more through for a blog entry. So today we had fine weather (and I had some time) so I took my tripod off to the park and took some shots. So, lets look at the overviews of the two scenes I took today (at about midday) with the 21 on the 5D.

All images were taken with manual exposure, using exposure determined by my Gossen lightmeter. Naturally as I stepped aperture I also stepped shutter to compensate.

Image 1
In this image I focused on the building in the background. Below is a contact sheet made from the exposures starting with f3.5 on the LHS and moving to f16 on the RHS.

its pretty clear that at f3.5 there is some significant vignetting.


Image 2
where I tried to focus carefully on that middle green tree. Clearly with a 21mm lens once you focus on anything more than 3 meters from you its more or less the same as infinity.

The contact sheet.

The vignetting is (of course) strongest at the corners, but even at the middle edge of the frame its enough to be annoying at less than f5.6


Vignetting
As I mentioned above the vignetting at f3.5 was significant, so from Image 2 I've taken the left hand edge to show this. Not only is the image significantly darker but colour and contrast suffers somewhat too. Click on this image to load a 100% screen grab.


Sharpness
The middle of the image is unaffected, these are some from the center of image 1


so even at f3.5 if your subject is in the middle (as in my dune tree above) then it may not be a strong problem for you.

Corners predictably fall off badly, this is the lower left corner ...

and this is the upper right corner.


Click on this image and have a careful look at not only the sky density but also the definition of the building (well not that its not clear even at this size).

All of which leaves me feeling a little out to sea. I know from previous testing of this exact lens on 35mm film (both neg and slide) that I didn't see such stark and obvious vignetting or sharpness fall off. For example on this blog post where checked out this lens (using film) against the 9-18mm zoom on my 4/3 sensor digital camera. And again here.

So for those of you who may have been interested in obtaining one of these lenses (the Olympus 21mm f3.5) for use on full frame digital I can say it does an excellent job at f5.6 and smaller aperture, but just be prepared for some softness at f3.5 ... with foreground detail it can be quite a strong effect too. Click this image for a larger version to see what I mean (look in the branches of the tree in the right foreground).


This is the image which started me off checking the lens in more detail. If you look at the grass in the lower left of the image above, that's essentially in the out of focus foreground. So, if you like that look, then great, but you should be aware of if before you go get one.

conclusions?


Well now I feel stuck. This now has me thinking that for ultra wide lenses I'm actually going to be better served in staying with 4/3 (or in my case micro 4/3) while my previous experience with the larger full frame (on film) had me feeling that this lens gives better shallow renderings and being able to work at f3.5 higher effective shutter speeds (at a given ISO) than the Olympus f4~5.6 which is designed for 4/3 (and which is my other contender as a wide lens for my digital setup)

Right now I'm feeling more shakey about buying a Canon 5D than I have ever been.

The lens on film makes great images ...


its just that I don't normally use 35mm film much these days.

Perhaps I should?

Thursday, 21 October 2010

G1 vs *ist: noise and focus issues

Good images can mean many things, sometimes noise makes an image better and sometimes some blur makes images better. However depending on the situation one may detract more than another. In this blog post I thought I'd compare a Pentax *ist with a Panasonic G1.

Regular readers of my blog may know that I use a Panasonic G1 digital camera.

So why would I do this comparison?


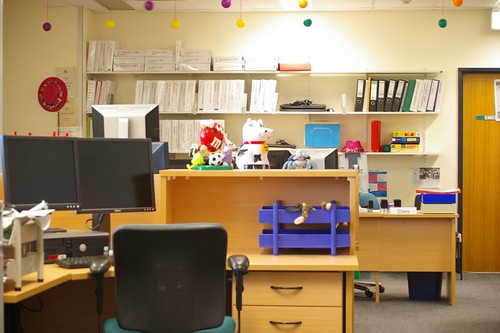
We happen to have a Pentax *ist camera in the office, which I've used a few times and generally thought it was a "vanilla" sort of DSLR. I had always thought it was more or less the equal of my older Canon 10D. However after recently taking a picture of the plover chick with it ...


I stunned how badly it took photographs.

The only day that I didn't have my G1 at work (all the other plover shots are taken with it) and I get to see the chick just after it has hatched and I had this miserable image. My initial view of the image left me shocked how bad it was (I took a few and they all sucked), after all this camera should be more or less similar spec to my 10D (which was quite acceptable).

I looked around the image and realized that it had back focused.

I was reminded of the problems I regularly faced with my Canon 10D and 20D and having used the G1 for so long had more or less forgotten about this issue. The AF on the G1 (particularly with the kit zoom but any other AF lens) is fantastic and has been spot on each and every time.

Then after a recent conversation with a workmate about him not wanting a G1 but "proper SLR" camera (and he mentioned the Pentax) I thought that it might be interesting to see what was what with these two cameras.

I'm not mad about megapixels, and other image qualites (such as noise) can make a better image, so I thought that it might be valuable to see if the Pentax could do a better job of a shot than the G1.

With that in mind I thought I'd do a few quick test shots in the office with the aim in mind of just examining the images for noise. I intended to test at:
  • 200 ISO
  • 400 ISO
  • 800 ISO
  • 1600 ISO
  • 3200 ISO

The office Pentax has a Sigma 18-55mm zoom on it while my Panasonic had the 14-45 standard kit zoom on it. I took my shots and when I got home and loaded them on the computer I was quite stunned.

I thought (using generalizations like x1.6 and x2) that the lenses would be quite close to each other at the long end (88mm vs 90mm), but that was the first surprise

The overviews:

Pentax ist

pentax-scene-overview

Panasonic G1

G1-scene-overview


As you can see above the horizontal capture is really quite wider on the Pentax (with its APS-C 23.5 x 15.7mm sized sensor) than the G1 (slightly smaller 18 x 13.5mm sensor), making this format a much better choice for Landscape style shooting ... this is a slightly unexpected outcome from my perspective. While I had the 10D right up until I bought the G1 I didn't make exactly this sort of comparison.

The next thing which stood out to me was the fact that the Pentax images seemed quite soft and blurry t me. Closer examination shows some interesting things ...

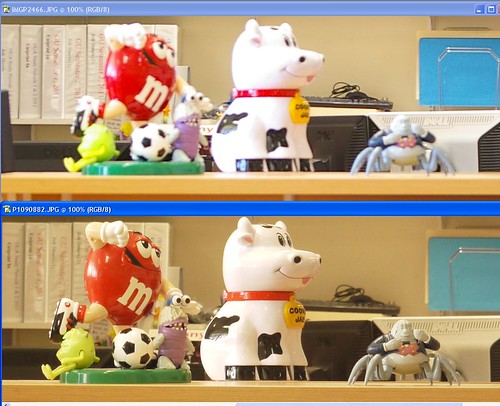
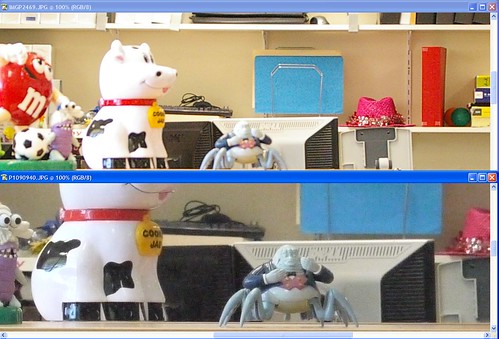
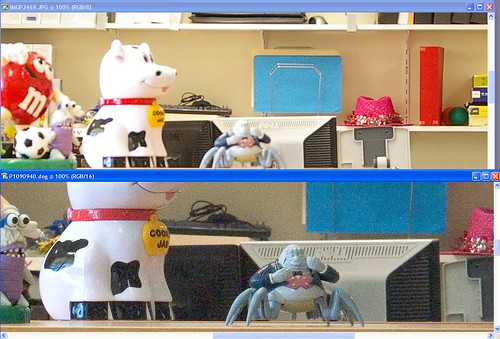
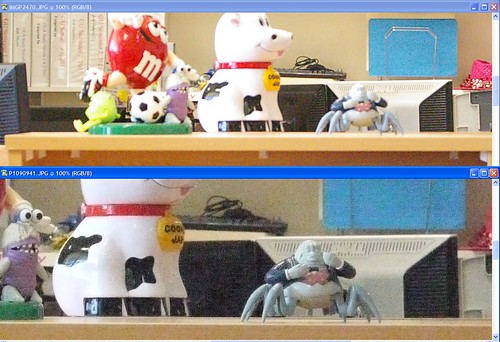
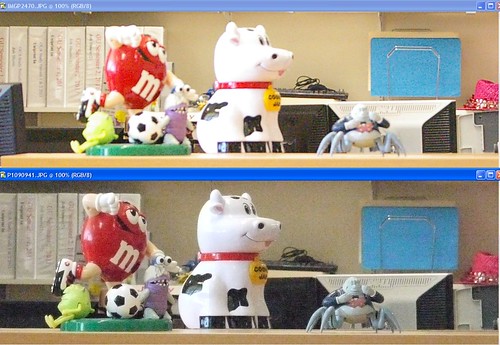
My focal point was the toys on the desk, and they were so much sharper on the G1 image than on the Pentax image. To make this comparison easier, I resized the image from the G1 back to being 2000 pixels high: the same as the Pentax.

Pentax-back-focus-issue

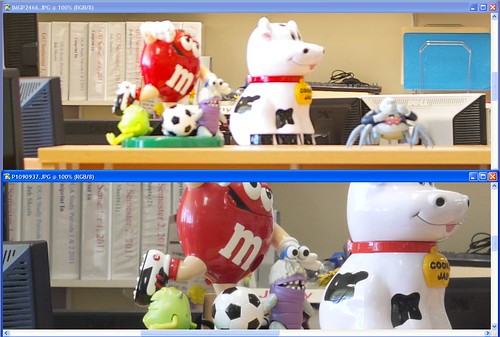
The G1 focus is perfect on the toys (look at the face of the crab man on the right). The answer is I believe that the Pentax was back focusing. Looking at the Dell monitor in the mid background and the mouse and keyboard shows that indeed the focus of the Pentax is back focused.

Just to iterate this point, here is one that the G1 image not scaled down:

istvsG1focus

I repeated these shots a number of times, not only for each of the above ISO steps but I also tried again deliberately after seeing these results and every time I got exactly this result.

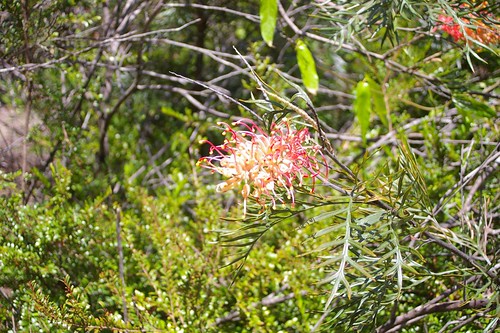
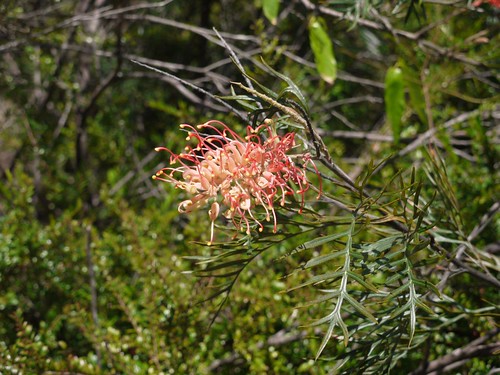
In fact I went outside the next day (after finding these results) and took these shots of this flower to see if the focus was still back focused.

Pentax:
pentax-flower

G1:
G1-flower

Look carefully at the Pentax image, the focus seems to be at the back of the flower at the stem. The G1 focused just where the focus point was.

I left both cameras on Av at f5.6 and found not only that the G1 focused better on this clear easy central target, but that the G1 picked exposure better too!

wow ...

This is quite significant, forgetting all other factors (lens, sensor noise, number of pixels ...) if the camera can't focus for you properly then no matter what : it will be a poor image.

Ok ... lets get back to the noise:

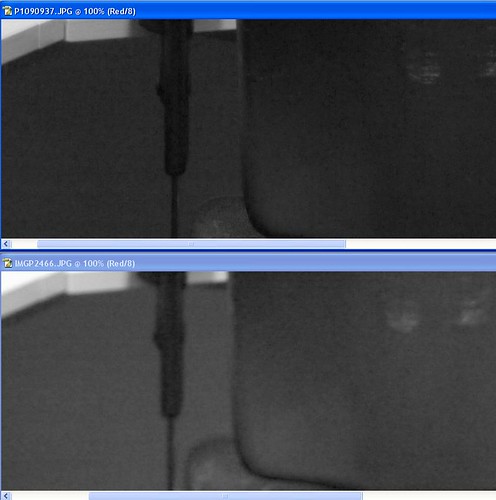
I picked the chair back and the red channel (as it and blue are the noisiest ones) to examine.

200:
200-red-noise

However when I started to examine the other higher ISO images I found that it starts to get a bit less clear. I'll show you what I mean.

400noise-details

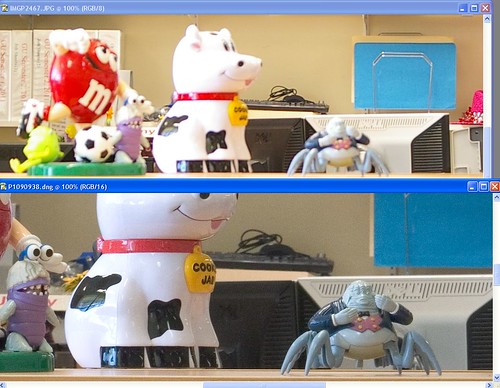
The Pentax image (the top one) seems to be blurrier than the G1 image, with the details in the back focused crab man clearly favoring the G1, but notice how the writing of DELL in the black monitor really drops in detail compared to the Pentax?

I don't know exactly where critical focus was on the Pentax (if it was anywhere) but even at 400ISO it seems that the Pentax is holding together better than the G1 is.

Any difference in noise is hardly visible but to me the side effect of noise control - the destruction of detail is becoming evident. This for instance is the comparison between the Pentax JPG and the G1 RAW file (converted in PhotoShop)

400-raw-noise-details

The Dell in the black is little less washy but the noise is ramping up, yet we are only at 400 ISO. Lets step this up by moving to 1600ISO.

1600-noise-details

Here I see that the loss of detail in the G1 image is marked, the Pentax is showing some chrominance noise in the black areas but holding details better. Something I started to notice however was the saturation of channels in the Pentax is higher than in the G1. This would be an interesting thing to test for: does the Pentax control signal to noise with sacrificing of dynamic range? When we look at the G1 Raw vs Pentax we can see though that the Panasonic is doing some amazing processing to dress down noise:

1600-raw-noise-details

This makes me wish I'd taken shots with the Pentax in RAW to make comparisons between them too. Perhaps another time.

So moving along to 3200 we see this:

3200-noise-details

Noise is quite horrid on the G1 however other image aspects (like exposure and dynamics) seem to hold up better. If I scale the G1 image down to be 2000 pixels high, what effect will that have on this noise?

3200-scaled-noise-details

Well it starts to look less "in your face" than it did before (which is good) ; which suggests to me that if you were doing 8x10 prints from each that the G1 image would look better than the Pentax image in areas like:
  • Focus
  • Exoposure
  • Noise
while it may loose out a little in subtle contrasts (as you can't see anything in the black of that monitor back).

conclusions?

While I'm not as clear as I hoped I would be about the older larger sensor having any noise advantage (by having "bigger pixels") I have confirmed a few things about the G1 which do help me make sure I get better images.

In particular focus, and the ability to be sure of what I focus on. In the hit and miss world of "grab it" shots maybe either would be equal, but when I have a moment to take a photograph (say some scenery, or a family gathering portrait) I know that the G1 will give me a better image.

I have not discussed it yet, but when I started taking the pictures with the Pentax I used manual focus on my first set of pictures (not used here), these were clear in the view finder (piddly little thing that it is) yet the images were as we see here ... poor.

I then re-shot the images and used AF paying attention to the focus points and double and triple half pressing to allow the camera to settle AF and be as certain as possible of AF. There was no discernible difference between the AF and the Manually focused images, yet in all cases the image looked "clear" in the viewfinder.

Perhaps the explanation of this focus issue is poor alignment of the focusing screen (which leads to errors in focus). What ever the cause is the fact that the G1 shows you the image that focuses on the sensor and not something reflected by mirrors onto a focusing screen gives you the advantage of what you see is what you get.

So I'm still happy with my G1