As it happens I have quite come to like Photomatix as my processing tool for my RAW files.
A classic tool for stuff like HDRI and even tone mapping.
Back in 2009 I wrote a blog post on how to use tonemapping to try to make the best from problematic images (I recommend you have a quick flash over there and have a gander at that post). The other weekend I was out and we stumbled across a young Kookaburra who was just on his first flight. Being a bit stupid he let me get close to him while making worried sounds and I was able to take this shot with my FD 300 f4 lens mounted on my G1 Panasonic.

It was OK, but the exposure was a little dark for my liking. It was under shade and backlit but I didn't really compensate enough to get the best results. So I plonked the RAW into Photomatix and got a much better result ....

Like the old ad used to say "try that with a cheaper foil". I genuinely don't think that this is even possible to do with Photoshop curves and layers with doge and burn and all manner of tricks.
 Instead of laboring for hours I spent some 5 minutes with it on Photomatix. Compared to the previous version the new version is even easier to drive and supports my G1 files directly.
The first step was to just pick "reduce noise" and not pick "reduce chromatic aberrations". I think noise reduction is helpful and since its a legacy lens the software will have totally zero idea as to which lens it needs to correct for ... not that the FD needs much CA work.
I also make sure to pick a white balance which most closely represents the shooting situation ... after all its RAW so you can do that again no matter how you shot it.
Next it opens as a proper image in 16 bits in Photomatix and I can make some quick choices to alter it

I have found that I like either the enhancer smooth or enhancer default (not being into the garish) and then just wind a little onto the strength and saturation to suite my tastes (nothing severe). Click process and voilla ... get a 16 bit TIFF or JPG if you prefer. Don't get too anal about the colour as Photomatix is not able (as far as I know) to work with managed colour and calibrated displays, so just get the look more or less right and process.
too easy
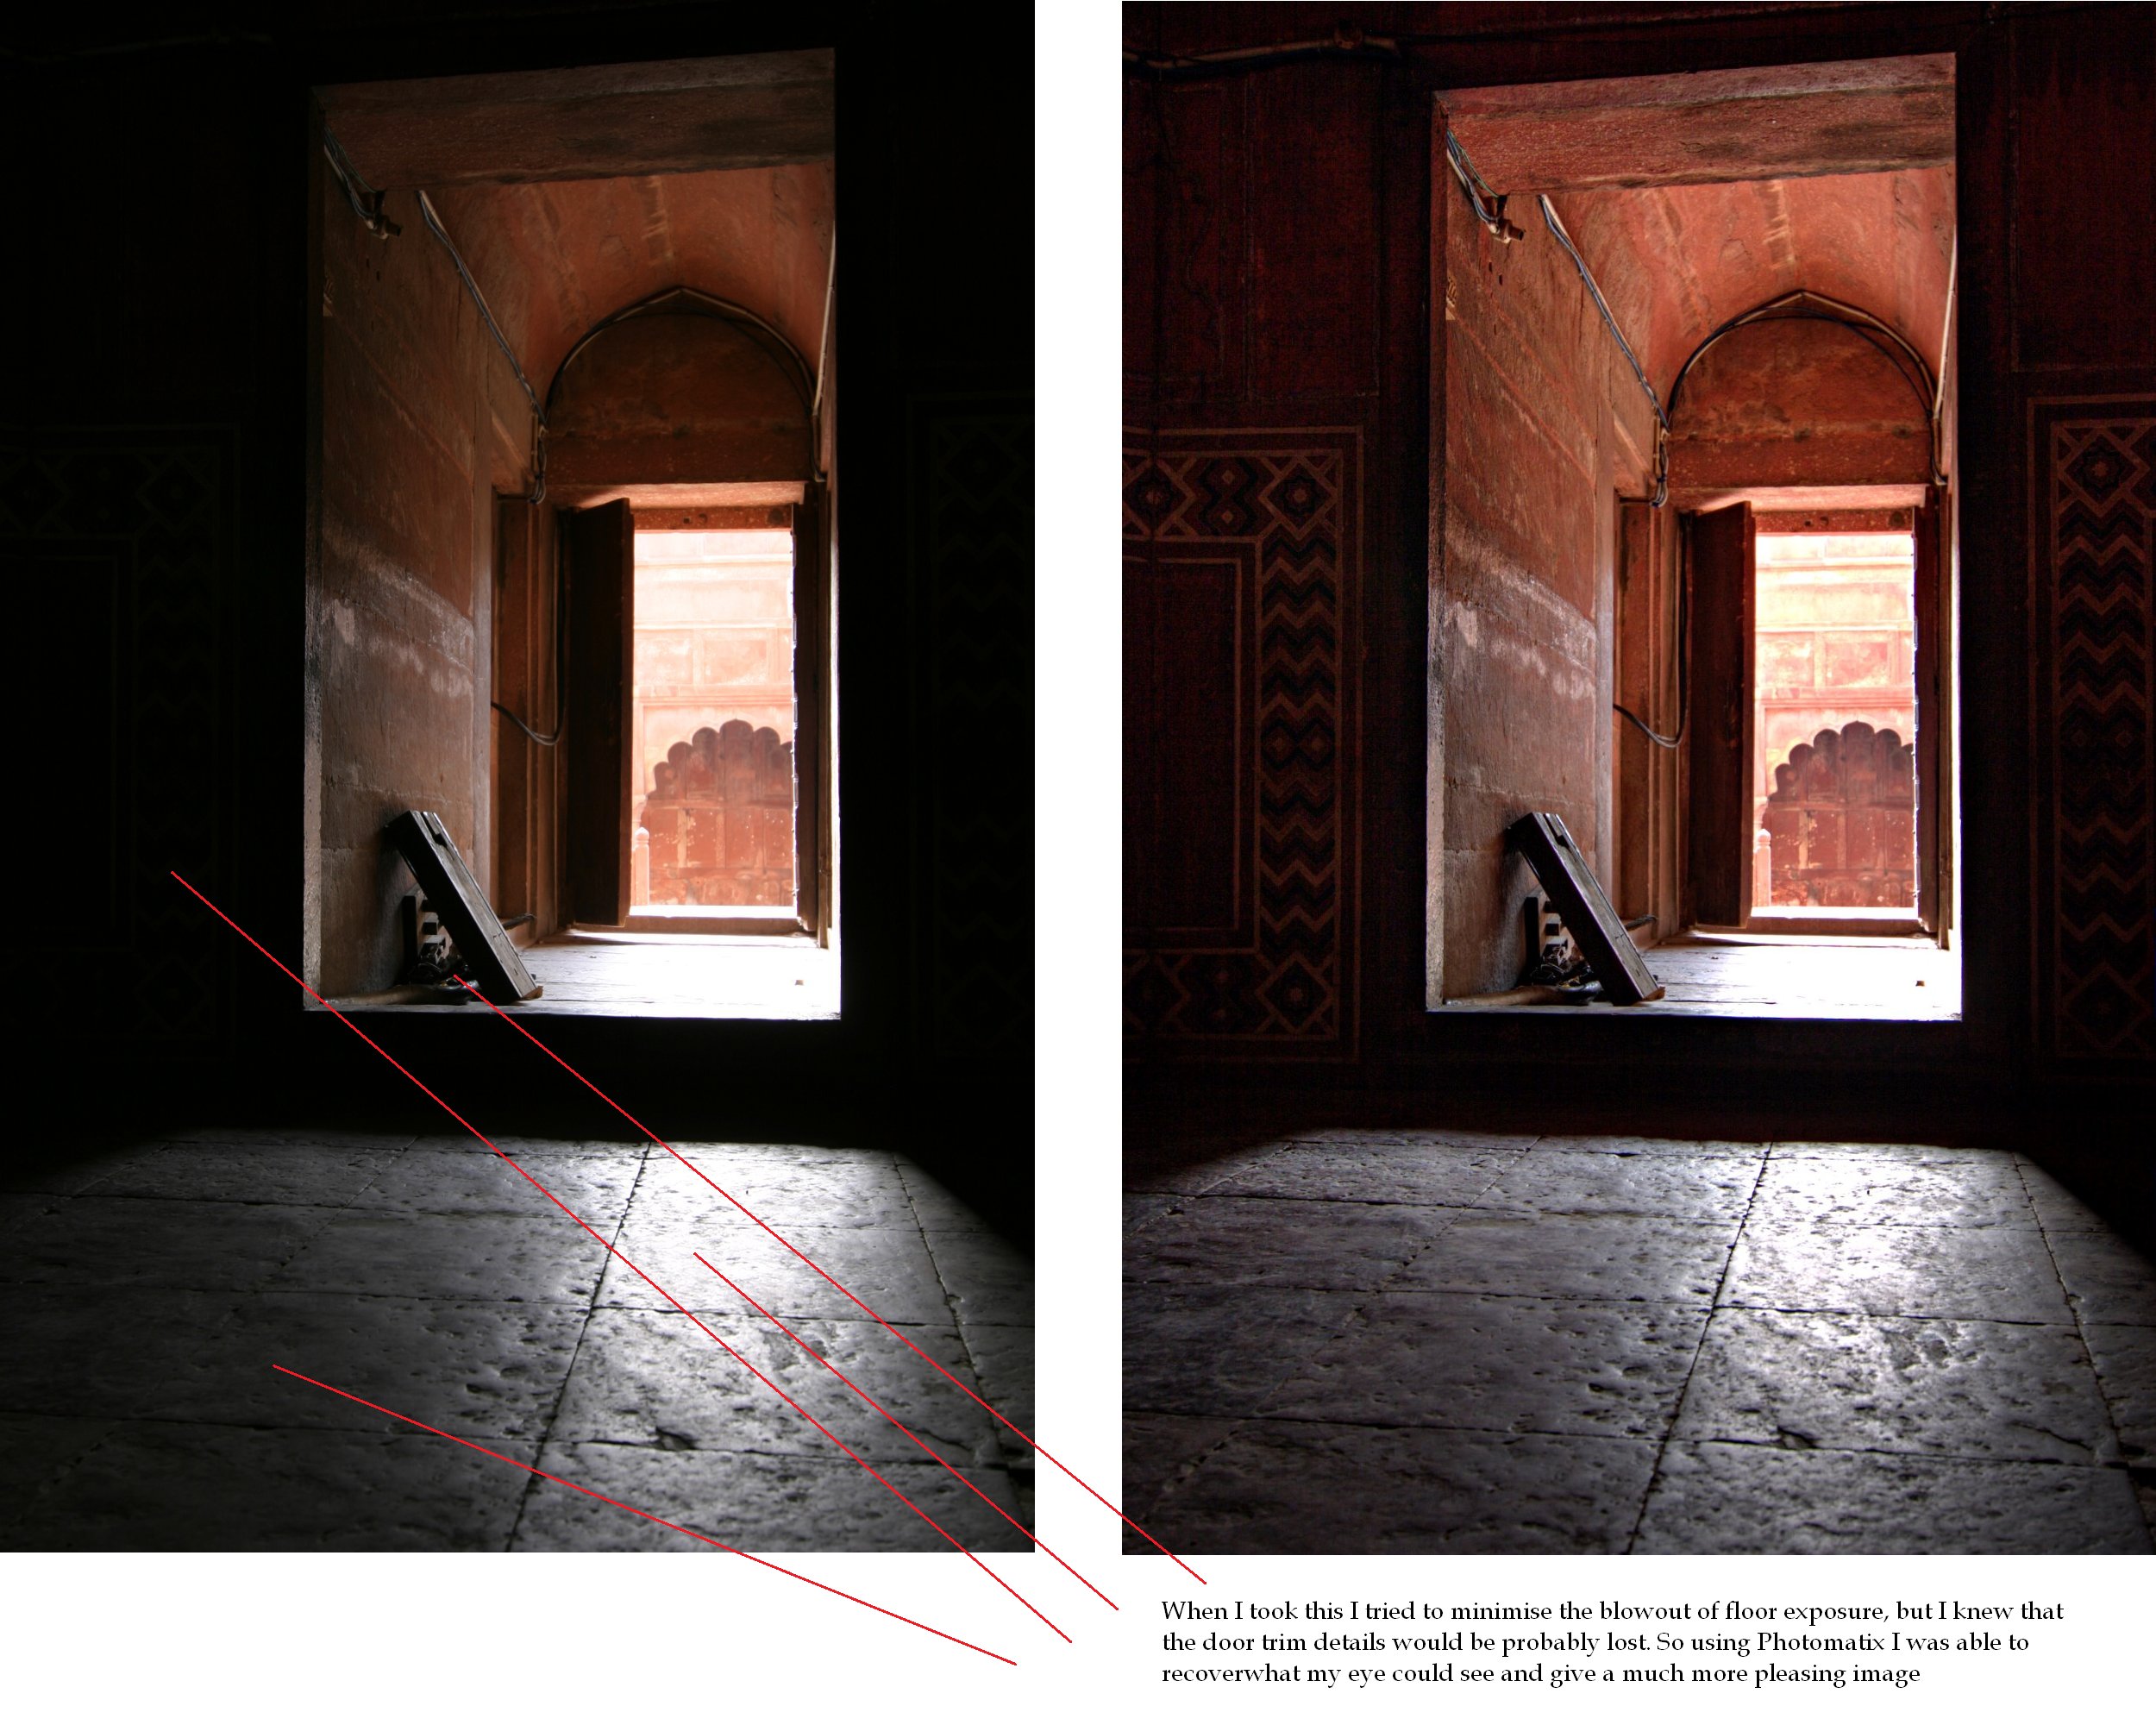
I recommend you load those two images in different tabs so you can switch between them and see the difference.
This image (taken with my 10D in India some years back) is a good example of what better software can make of a RAW file, which does not clip the whites and (by dint of being RAW) preserves the entire capture of data including the shadows. Note the better shadow details while maintaining the highlights
See how you go.


1 comment:
This looks pretty amazing. Thanks for the great info. It's worth looking into.
Post a Comment