Tuesday, 6 May 2008

tunturi climbing

A trip up Kesänki Tunturi (pictured below) which is right next to Ylläs (which for non Finnish speakers is pronounced more like oolas).

A group of us decided to spend Vappu in Lapland. Despite being a bit north of the Arctic circle, snow melts there by mid spring.

I'm not so much into down hill skiing, so we decided to try to climb this hill . These hills are called Tunturi in Finnish or a Fell in English. As it happens the Fell in that link is where everyone was going down hill skiing, and across the gorge from where we were climbing).

Snow conditions were 'trying' as there had been well over a meter of snow remaining on the ground by the end of winter, and with daytime temperatures now in the 12 ~ 17°C range we were barely supported on our skis and it was way too tedious trying to take steps through groin deep wet snow. So, we did our trip in 3 stages
  1. track skis on the tracks to the lake
  2. off track into the deep stuff as far up the mountain as we could
  3. leave our skis, and climb the loose rocky surface to the sumit (520 meters)
We carried a change of boots, as neither of us fancied climbing in ski boots.

The trip up was slow, with the snow seeming to support your weight, then giving way suddenly and your foot sinking down to your knee. If you've skied in this sort of stuff you'll know what I mean, but falling over is a pain in the ass big time.

I managed to make it all the way to the top without falling once (which amazed me) while Anita fell through between her skis a couple of times. Since she's without a doubt the more experienced skier, she was carrying the pack (making balance harder) and cutting the trail too.

By the time we got to the place where there was no snow for skiing (without really damaging our skis), it was already pretty steep and quite warm thank you very much.

Slopes changed to about 45° at about this point, with some sections feeling quite steeper. There was lots of loose rock, making it quite tricky climbing. Much of the upper part of the Tunturi is without tree, so if you you slip here you've got a few meters to tumble along the rubble before you hit trees ...

The slope certainly looks steeper from where I was sitting.

Of course part of the problem is that I'm getting a bit old and fat for doing this sort of thing. I can do something (perhaps) about the fat, but the old is a challenge we all face.

Anyway, a quick bite of food and some berry juice and we started our way up to the summit. At about ½ way up to the top from where the trees end, I took this picture of Yllas tunturi (like all images, click on it to enalrge it).

There are no trees on the summit, and as you get closer to the top, the become more like shrubs than trees.


Naturally the view from the summit was excellent, and well worth the trip up!


On the way back down from summit we took a less steep route rather than go down across the steep and loose rocks. We figured that going groin deep in snow was easier on the way down than the way up.


Still you had to walk carefully, as you could check the snow carefully to see if it supported you, then after you'd put your weight on it, it would suddenly give way and you'd sink down.

Cos the snow melts from underneath, you can then find loose rocks which then move and you can twist an ankle just as easily.

But all in all we had the best day of our 4 day trip to Yulläs doing this ski / walk / climb. The scenery was worth it as was the view from the summit.

Thursday, 24 April 2008

old cameras still work

Just spent a little time with my first roll of colour 120 film in my Bessa (listed elsewhere on this blog, just search for bessa). I can only say that it has passed with flying colours. The image below links to a rather bigger 3832 x 2628 pixel image (which is about 10 MPixels), Yet this is only from a 1200dpi scan of the film. For people used to working with 35mm, that minature format requires 2700 dpi (and preferably 4000 dpi) to get substantial images. Scanning this at even 2400 dpi would give 7864 x 5256 or 41 megapixels.


Dang it all, blogspot resizes it to 1600! Oh well...


Now, this is a 1950's camera. It has no mod cons of any type (no metering, no focus assist, primitive film advance).

Used right, this goes close to giving the sort of detail that you can get with a 1Ds MkIII. Certainly its not as fast to use, or have any features that would make it popular to people photographing Wimbledon or Pro golf, but for an amateur photographer who has a 5 or 6 megapixel compact digital and is seeking better 'landscape' images ... well look seriously at a 6x9 film camera!

I personally like the the Bessa as its a folder, meaning it folds down to a little bit smaller than a video cassette and slips into a side pocket of my backpack. For those who don't feel like an old folder like this you should seriously consider a Fuji GS690 as these are superior optically and have range finders (for focusing the camera).

Size maters (for film that is ;-)

I thought I'd put a few more samples from my flickr account

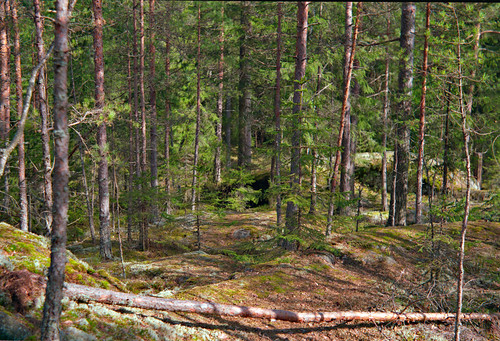
forest floor

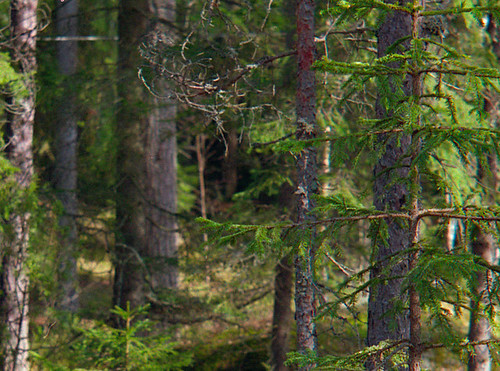
and a detail segment

center segment

click here for full size

notice how the tree I chose for focus stands out? This short depth of field can be an asset that you just don't get with smaller formats (like 35mm or digital).

Wednesday, 23 April 2008

bog footy

Here in Finland there aren't too many flat places which aren't rocky, and those that are are often swamps. So just where do you go to to play footy in summer? Well, the sign points the way :-)


Yep, that right, the bog


Now, it might look just like a grassy field in that picture up there, but this is a full on peat bog, and you'll sink to your ankles even stepping onto the tufts of grass out here where its 'un-trodden' ground. Walk with caution and better still, bring the gum boots!

I've found that there's a reason that everyone here likes to wear gore-tex boots!

As you can see even though I'm treading carefully, there's water oozing out of the ground around my foot, and a puddle already waiting there on the left.

These wetlands are very rich, moist environments by the way, generating heaps of biomass and helping to keep the water pure (well, where they don't get churned up by fellas runnin around in in em that is).

You can see from the field though that there isn't much 'untrodden' moss over there.

Just in case you happen to think that's a dry looking field over there, I took this from the back line.

That' ain't grass there laddy.

There was (sadly) noone there on the day we were there, so I didn't get to see a match, but heck, these fellas must be fit as if you started running in this place you'd just sink deeper.

I started to sink in one place, and found that you just can't push down with the other foot to pull the stuck one out or it just pulls you in deeper.

Its all good clean muck though, so its not hard to get off your jeans later on.

Say, if you've ever been to a wetland in summer, you might have noticed the mosquitoes?

That'd keep you running ;-)

Monday, 21 April 2008

humidity and cameras

Most people don't realise that Fungus grows on camera lenses. For example this page explains this a little. Fungus attacks camera lenses in storage, and its growth is related to humidity. So people who are a little more in the know often speak of removing humidity with Silica Gel. I've found this is not a sound practice for anything longer term than a few weeks. Given the regularity of this discussion I thought I'd put a blog entry here about it.

Background

If it remains below 50% then fungal spores will not germinate (as far as I've read). Keeping it below 30% risks dammage to your camera as the lubricants and foams will start to 'dry' ... yes, even salt crystals have water in their stucture and you can get anhydrous salt powder.

I lived in a semi tropical area, I had already lost a lens to fungus (a 50mm Zukio macro) from my Olympus from fungus (I often visit rainforest in the rain). I had started a business and bought some lenses worth quite some thousands of dollars (IE: TS-E 24, 90, and some large format lenses). I thought it prudent to conduct investigations.

I have a friend in the army who is a munitions specialist and he has reported to me that for their purposes silica gel was insufficient to maintain correct humidity. So wondering what this translated to in a quantitative manner I did the following experiment (if you google this on google groups this you'll find the results published back in the late 2000 on rec.photo):

Humidity Experiment with Silica Gel

Materials
  • ~20g/100cc of Purple indicating silica gel
  • heavy duty "zip seal" plastic bag (1 liter capacity)
  • glass vegemite jar
  • electronic hygrometer

Method

I thought I would test using a common zip seal bag, since cameras are often placed in these for protection. Since the camera in the bag occupies some space in the bag (and prevent the bag from being slim or vacuum sealed (if they indeed can be), I placed my sample of silica gel into a (lidless) glass jar with an electronic hygrometer hopefully replicating storing a 35mm camera lens in the bag.

The bag was only containing air from the room, no other gases were placed into the bag (such as gas from cylinder of nitrogen).

The bag was then zip sealed. The jar was put on its side, so that the top was not blocked further by the plastic and the hygrometer was visible with out disturbing the setup for making observations.

Note: The hygrometer displays LL% when out of range at the low end of humidity (which was cited as ~30%RH by the maker) and HH% when over 90%.
raw data

23-Mar-00 68% 6:38:00 PM experiment started
23-Mar-00 41% 8:52 PM
24-Mar-00 LL % {very rapid absorption depletion of humidity in bat}
25-Mar-00 LL% {already seems to be loosing the colour in the crystals, some are pink]
26-Mar-00 LL% {more of the crystals seem to be pale pink}
27-Mar-00 LL% {more of the crystals seem to be pale}
29-Mar-00 32% {most of the crystals are pink}
31-Mar-00 39% {more seem pale, a few are still dark}
02-Apr-00 43% {no apparent change in the crystals}
03-Apr-00 45%
04-Apr-00 45%
05-Apr-00 48%
06-Apr-00 50%
09-Apr-00 52%
10-Apr-00 52%
11-Apr-00 54%
13-Apr-00 57% {almost all crystals are depleted, about 9 remain as pale purple}
15-Apr-00 60%
17-Apr-00 64%
18-Apr-00 66%
24-Apr-00 64%
27-Apr-00 73%
29-Apr-00 76%
experiment concluded duration = 22 days.

graphically:


Figure 1: humidity measurements

Conslusion

As you can see, even in a small zip sealed bag the humidity rose to a point where the silica gel was failing to cope with humidity migration across the membrane of the plastic, and simply maintaining a constant level in the bags environment. Since silica gel can also release the humidity it then becomes a 'buffer' keeping the humidity reasonably constant (perfect for those fungii and molds) when the outside ambient humidity goes high. Typically this goes high in the night (as the air cools) and low in the day (as the air heats up).

Storing stuff inside your house (often cooler than outside) in a tropical area will ensure a nice humid atmosphere for your fungi. Meaning camera bags placed in cupboards are the worst locations.

Based on this I constructed my own humidity cabinet from a peliter effect device (commonly used in electric 'car fridge' systems) to condense the air and drain it out of the cabinet.


My power supply is a $15 cheapie 8 amp 12V car battery charger and a $20 12V GEL cell (to even it all out). I then ran a simple 24 hour timer circuit (like used to turn lamps on and off) to shut off the entire thing at different times of the day (used a relay to kick in on the 12V side of the car battery charger to shut off the power from battery to Peltier too). I made the back wall of the cabinet 5mm ply and cut out a shape to take the peltier in the middle. This puts one side of the heat sink inside (that'll be the cold side) and the other outside.

You'll need to fiddle with heat sinks to get the right efficiency, but I settled on this pair:
inside and outside

Then I made a simple catch tray (for the drips) out of a cut down plastic milk container and ran a bit of aquarium pipe out of the cabinet to drain it. Careful with this as in my summers I get about 500ml a day on a good humid day!

Naturally you need to be a bit handy, and have some electronics knowledge too. Of course you could buy one of the pre made ones.

hope this helps