Wednesday 22 April 2009

G1 adapters and infinity focus (or much ado about not much)

I observed when testing my FD 50 f1.8 on my G1 that Infinity did not seem as sharply focused as it could be. Being a manual focus lens the FD 50 has a definite "clunk" stop at infinity so you just can't rotate the focus ring on the lens any more.

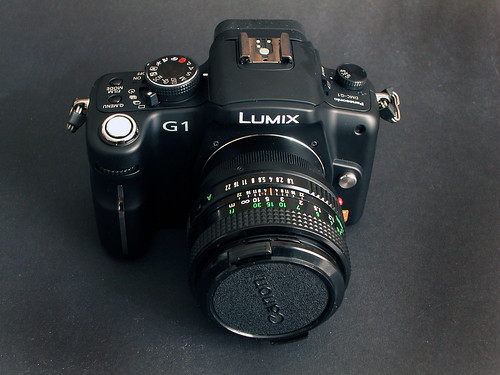
In communication with the fellow who manufacturers the FD series Adaptor I am using for my G1 he reports that some users have said that focus is perfect, others have said focus is past infinity and still others experience not being able to get infinity. Applying f8 seems to clear this up to become non existent an issue.

It is sort of a non-issue, but as there has been some discussion on this issue (including some customer queries for the adapter maker) I thought I would put up this page in case it helps clear anyhing up for anyone else (and essentially I was curious too).


I have a couple of working theories on this but I think that the evidence points to one of them more strongly. Here are my theories

My theory ... aahem (is not about dinosaurs)

The Lens tolerance theory:
Fundamentally this goes on the lines that lenses were not properly 'set' to have their infinity stop critically perfect.

The lenses being adapted were designed to work with 35mm film cameras (well, mainly as people are adapting all manner of lenses). Given that in the pre-1980's it was rare and even a little exotic to enlarge 35mm film images much more than x10 (giving a 36 x 24 cm print assuming no cropping). Add to this that:
  • few enlargements were made with the best possible optics
  • super critical folks used Medium Format or larger which gave better results
  • focus was typically on people slightly foreground of infinity (so why not bias it there?)
  • only astrophotographers were interested in infinity focus (and they didn't use 50mm lenses and hand calibrated what they had on their ground glass with microscopes anyway)
  • people may have been less critical
its possible that this is how the lenses have always performed and we've not really noticed it untill we put the lenses onto trully stunning recording quality systems that todays DSLR cameras are (notice that I count the G1 as a DSLR ... well that's because its using the same big sensor that the Olympus four thirds systems use and the only difference is that the viewfinder is 'live by wire' not optical reflex).

As I said in an earlier post to put a perspective on it if this sort of image density was being pulled from a piece of 35mm film, it would be similar to a 4600dpi scan (since the image density is about 182 pixels per mm).

Added to this is the point that if you focus slightly 'past' infinity (bring the lens a little too close) absolutely nothing in the picture will be clearly focused. Now if I was a camera maker the last thing I'd want to happen in my cost cutting production exersizes is to make my company lenses look less than perfect. So I'd bias my 'near enough' settings on my cheaper lenses to be erring on the better side.


The Camera tolerance theory:

Panasonic makes the G1 to work with electronically activated lenses. Even "manual focus" is acheived by electronic movement of the lens in responce to moving a 'focus ring' at the front of the lens body. As such there is no need for any mechanical optical precision as in the days of Leica coupled range finder mechanisms. This would vastly simplify construction and reduce costs with tolerances around 0.2mm being quite acceptable in terms of the placement of the CCD (and which would not be tolerable in a mechano-optically orinted system).


Evidence:

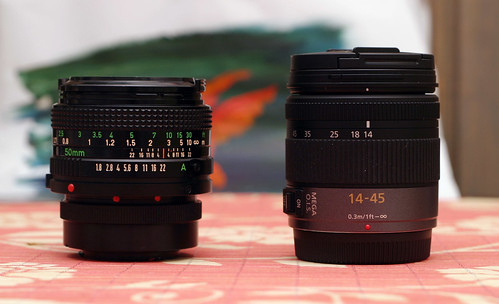
I happen to have 2 50mm lenses: a New FD 50mm f1.8 and an EF 50 f1.8 series one lens. These lenses are (as far as I know) the same optical design and only placed in different housings. So, to aquire some information to examine my theory I put the EF on my 10D and the FD onto my G1 and took some images from my balcony. I set both lenses at f1.8 to exaggerate the effects of focus by minimizing the depth of field. Shutter speed at ISO 100 was 4000th of a second and camera was mounted on a tripod for both shots.

Both images were taken with the camera set to record as RAW and converted using dcraw with the command parameters of: dcraw -4 -T -f

This should equalise as many things as possible. Clearly one issue is that the differing sensor sizes will make clear comparisons more problematic, but as you'll see I have some strategy for that.

Just as a reminder the diagram to the left gives a scale representation of the physical size difference between APS (22.7x15.1mm) and Four Thirds (18x13.5mm). Its close on the verticle axis but less wide.

My view of this is that neither is a match for 35mm (considerably larger again) but if we take a 100% sample from the middle (for example say a 5mm square area) then we can compare each to see if the focus is different there.

Firstly here's an overview of the image as taken by each camera.


I've tried to focus on the same location in the middle floor on the right hand side. Ther eis a flagpole about 10 meters away, and a birch tree about 20 meters. The building is about 100 meters and the forest in the distance is about 400 or so meters.

First I thought I would scale down the G1 image to be the same sensor resolution as the 10D. So I took the image and resized it to 2488 pixels wide (this is what the dimensions of a similar sized four thirds 'cut' from a larger APS sensor would be). This is then shown at 100% view and a screen snapshot taken.

If you click on the image (or any of the following ones) it will load a full sized version to make it clearer to examine. While both images look pretty grubby (with the FD 50 on the G1 seeming to be a little sharper) it seems that neither are focused on Infinity. Its a hard call with the 10D image though as its muddy enough all the way back there to make it difficult to say.

Moving over to the left where you can see the forest perhaps makes it easier to call:


There might be more detail over there in the forest in the 10D (lower) but heck not really. Now (for something different) I'd like to present the non scaled version of the images. This is from the central portion of the image and 100% view for each G1 and 10D


Its here that we see that focus on the G1 adapted lens really is better at the birch tree and contains substantially more information than the one on the 10D.

Keep in mind, these are more or less the same optical lens (of course different examples) but short of making an EF mount adaptor and putting the EF lens onto the G1 this is as close as it gets (because FD lenses will not focus to infinity on EF mounts without an optical adapter which will effect sharpness).

Looking at the corner from above with the G1 at 100% gives this:

to me it shows that its not focused on the background on either (but the 10D is really too mushy to be able to go out on a limb on this one).

So with my evidence (two lenses, one adaptor one G1) it could easily be the Lens tolerance theory that is perhaps the right one, but more testing with other cameras would be needed to be sure. Given that ciecio7 has reported that his customers have discovered all three situations (right on, behind infinity, before infinity) it could easily be the Camera tolerance one.

Me? I'm leaning to the Lens tolerance theory, as my FD 300 has a "zone" of infinity which it will go past. Some of my EF zooms (my 28-105 comes to mind) had exactly this also built into the design (discussions in rec.photo at the time suggested it was to account for temperature causing variablity expansion of the plastic parts).

What would I prefer to do?

well given that I can't easilly adjust my lenses for infinity focus I'd rather have the adaptors set to allow focus slightly past infinity. Sure it would mean that 'bang the ring around' set infinity focus by feel would be out of the question but we do have good focus confirmation on our G1's.

Its a hard call though cos sometimes I'll take images in the near total dark and being able to set focus this way with wide angle lenses is handy (and you can point the camera more or less in the right direction anyway. Images like the one below was taken with manual focus and I just couldn't see a bloody thing in the view finder. It was a dark Finnish winter evening with the glow of a town in the overcast sky in the distance. Exposure time was 60 seconds.


so its a hard as if I had to bring forward a little from Infinity I might forget to do it.

Perhaps the "lens tolerance" design theory is right ... and its by design (those cunning engineers in at Canon) after all?


I have a solution to this particular problem here

FD lens adapter on Panasonic G1

One of the great things about the Panasonic G1 (and probably all Micro 4/3rds if anyone else makes one) is the abiltiy to access lenses from almost any camera and mount it to the G1 by an adapter.

two G1 LensesShown to the left is my Canon FD 50 f1.8 which is essentially the same "nifty fifty" so popular among EOS camera users.

Actually while it lacks a few features that the nifty fifty (AKA the EF 50 f1.8 series one) it has a few advantages such as price (I paid US$6.00 for this one) and smooth manual focusing.

As you can see in the above image its more or less the same size as the G Vario 14-45 lens and infact weighs quite a bit less. In fact its 186g with the adapter vs 227g for the G Vario.

The neat thing is that you don't actually need more than one adapter if you stay with one series of lenses (and well ,the adapters aren't heavy or dear anyway).

For the green and newbie photographers (or simply those who cut their teeth in the age of automated every-bloody-thing) the lenses will loose all automation, meaning that they work in stop down mode only. I bought mine on eBay from a seller called ciecio7 (check him out on Toolhaus, personally I rate him very highly and I've been on eBay for nine years).

This is the pair sitting together. In the case of the FD lens mount (unlike say Pentax K mount or simple screw mounts) there FD lens is a little complex (to allow the camera to get aperture information and also to open and close the aperture to give 'wide open' focusing not stop down focusing).

The mount has to insert into the lens and then rotate part of the interior of the lens *(unlike most modern mounts, and people actually bitched when the EF mount came out ... folks it was worth the pain).

With the lens mounted to the adapter its now ready to pop onto your G1


I have friends who do machining work for a living, and I have to say that this is a top quality bit of work. Attention to smooth surface, beveled edges for good grasping ... its a quality bit of gear.

Have a closer look at this here in this close up:


You can see the nice job done on all things (even the polishing).
{by the way, these images are taken with my little trusty Coolpix 5000 ... a fantastic little digital camera and seemingly lost to obscurity of time. If you want an amazing value for money table top small product photography camera look no further}
This view shows up the only issue I have with this adaptor, and its as much related to the design of the FD lens and mount as anything. Because the lens is now not mating flush with a camera body that stainless steel mount is open to the air (as you can see) and will allow any dust / grit / whatever to get in there and gradually damage the mechanism.

Is this a problem? Heck it all depends on where you use the camera and how. I significantly doubt it would be a problem for water entry (like the rest of the camera would be a bigger problem ...) but it does look inviting for sand if you go to the beach.

Anyway I've passed this information on to the maker, so perhaps he will make iterative changes as time goes by.

FD 50mm On CameraSo, this is what it looks like on the camera.

Attention to detail in manufacturing has meant that the focus markers and aperture reference points are right in the center on the top (where they should be) and (if you start with the lens mounted on the adapter) even the red dot on the FD lens works nicely as a line up indicator when mounting the lens. Just as in normal Canon mounting you start with the red dot to the top and turn clockwise.

The lens works nicely on the camera although I would say I'd prefer to have it easily fully open for focus then stop down for taking. Not because the view finder is brighter that way (unlike optical SLR's) but because the focusing works better.

The only problem I have encountered is that Infinity is just a teensy bit forward of infinity (meaning that I can't get to infinity). I've included an image below taken at f2.8 to demonstrate what I mean.


Keep in mind when viewing it that this is a 100% crop from a section of a 4000 pixel wide image from a sensor which is 22mm wide. The lens was originally used for 35mm photography (like in the 1970's) where the film is 36mm wide. So the magnifications of any failure in tolerance in lens build quality are very high. To put a perspective on it if this sort of image density was being pulled from a piece of 35mm film, it would be similar to a 4600dpi scan (since the image density is about 182 pixels per mm). Personally I think this is WAY BEYOND what anyone would have ever expected out of a (even at the time) cheap lens.

Bottom line

This is fantastic and gets me a better result than my 10D with the EF 50f1.8. Since I'm now using this adaptor with a FD 300 f4 (and soon an FD 28 f2.8) then its cost is divided across multiple cheap high quality lenses and puts it well into the bargain category.


Addendum

After getting some extension tubes which were a very snug fit onto my adaptor (read I can barely get them on), I've just decided to have a go at making a small modification to the adaptor to make it more compatible with my lenses - shorten it.

I got some P320 wet and dry paper, and using a very flat laminex table top carefully lapped down the lens side of the adaptor. If you have no experience with manual arts working I don't recommend you to try this (but as I'm quite a tinkerer I thought I'd give it a whirl)

I worked in a careful circular motion (a mini version of the Karate kid's wax on - wax off) holding the adaptor evenly so as to not put uneven pressure on any part of the surface. I then changed grip every few circles to avoid unintentional uneven-ness.

After all traces of the front surface's anodization layer was removed I tried it on my 28mm lens at f2.8. There was a noticeable improvement in infinity focus.

I repeated this a few times (checking again after a minute or so of careful lapping) and its now so bloody close as to be totally satisfactory.

So, this seems to work in the case of the FD mount.

Monday 20 April 2009

Negative film scans on Nikon Coolscans

Scanning negative film is (apparently) not a straight forward thing, and perhaps its hindered by the (lack of) understanding of the media as much as the software that is supplied.

For quite some time people have debated back and forward about which way is the best to remove the orange mask in Negative film and which software works best. After around 10 years of scanning my own films I've come to the conclusion that working with negative is not as hard as it seems and that all the 'automation' and funky converters just get in the way of doing a straightforward job simply.

The key point here in this article is why you should never send a machine to do a humans job.


After working with negative in the darkroom for some time (as well as working with things like densitometers) I'm familiar with the sorts of ranges of light that a Negative can actually capture. I know that scanners can capture this density range (because slides have a greater one), but for some reason when I use my scanner supplied software to scan a negative it always washes out areas which I know it shouldn't (based on the negative).

The figure to the left is a comparison of the results obtainable from a very contrasty negative using two slightly different workflows.

Both are scanned using the software supplied (in this case Nikon Scan 4.0.2), however in the top image the software was set to be scanning a negative, while the bottom one is obtained with the software told that I am scanning a positive.

I don't know about you, but aside from the areas in shadow (where I biased my exposure towards) I think that the software has done a shitty job. To me what's wrong with the to image is:

  • the sky is washed out
  • the buildings are colour cast and not showing their true colours
  • image looks muddy
  • rooftops blowout
  • shadows block up


So how do I do it?

Surprisingly its not hard, so here goes my attempt at conferring a trade secret to you guys. It all comes down to understanding your tools. In this case the tools are:
  • negative film
  • scanner operation

Firstly, negative film is not some sort of mythically complex thing and there is much dribble written about the "orange mask" (insert feelings of fear and confusion related to ignorance). Lets ignore almost everything about negative film apart from two things:
  1. its a negative - this means that dark things will appear light and light things will appear dark
  2. for various reasons each of the layers of Red Green and Blue sensitive material have different density levels (meaning are of unequal darkenss when you hold them up and look at them)
This brings us to the first problem that you will encounter, when using the SA-21 the software trying to scan Negative as Positive the stupid software will not properly sense the boundaries between the negatives. This can happen anyway with particularly dark strips of slides anyway (like shots of the night sky) so its well to know this trick anyway.

Under Scanner Extras you you will find the boundary offset adjustment slider. Just give this a tweak one way or another to align the border.

Ok, now that problems solved ... lets move on.

So lets load a negative into our film holder and take a look at it.

Now if you set your scanner to positive and preview I'm sure that it'll look just like the image to the left.

Now heres where we do the important thing, go to your histogram control and select (as a start) the blue channel. Notice how much of the selected preview image is bunched up over to the left? Well that's because the blue channel has the shortest range in ability to record the scene. Now that doesn't mean that it records less information, just that it records it over a smaller range of density changes. If I cycle through the Red Green and Blue for this particular negative I get the following:

histogram animatin

You might notice that there are quite similar shapes to each of them and all three have a similar peak at the brightest end. This actually represents the full amount of information recorded on the film for each channel. They are not the same because its Negative and not Positive (or Slide film). So each channel has by the nature of the film a different appearance. So lets adjust each of them (meaning each of Red Green and Blue) and have a look at what that does.

To do this, grab the sliders and move the dark and light levels to more neatly encompass the 'hump' in the exposure. Don't go too far and start to clip off the ends because even if there is nothing useful there this will be better dealt with using curves later.

Take a look at the image to the left here to get a guide on how far to take that. Now repeat this for the Green and Red channel (although the red will be less important as it has the widest range and is already spread fairly widely).

So notice in the figure to the left that the scanning range is now much tighter around the blue area and also that the image now looks much more like a simple negative of what you'd expect an image to look like? When you are not sure how much data to encompass in this try leaving a little more of the boundarys in so that you will see at what level that is in the histogram. This will appear as a new 'peak' in the graph at the lighter end and will show you the level of the deepest shadows. This will require a little learning and intuition which is something that machines seem not smart enough to do at the moment.

From here its all down hill, as back in photoshop you simply (note: order is reasonably important here):
  1. assign the colour profile which matches the settings in Nikonscan (in my case I set it to Bruce RGB, but assign don't convert)
  2. invert image (it will now start looking really close)
  3. next, either trim up the levels by hand or use Auto Color Balance to get the image 90% right straight away. (Note: tricky images with lots of irregular colours will fool many Auto Colour Balance systems so you may need to then balance with careful levels and curves adjustment).
  4. lastly you can choose to tweak Hue and Saturation levels for (typically) Red, Yellow, Cyan and Blue. This last step is often only by a small margin and subject to taste. I often apply only a few increments of change in red and yellow and blue.
That's it ... job done!

PS: since this post comes up in my top 10 now and then, here is some links to other posts which may be helpful to a scanner: You might find these quick notes interesting too:


Naturally, as always, feedback and comments are welcome

Friday 17 April 2009

Testing LS-4000 with Stouffer Stepwedge

Now that I have a LS-4000 in my home I thought I would apply some of the same testing that I have previously used on my Epson flatbed scanners. I used the FH-3 holder to hold a Stouffer Stepwedge and scanned it in sections to see how the scanner responded to levels of denisty.

I was stunned how it ran out of grunt in ability to penetrate the dark areas. I noticed how sensitive to the 'clear' area of the wedge it was so I popped a little bit of analog gain into the scan (0.8 actually). I did this to hopefully extend the dynamic range into the dark areas and bring the white areas up to begin clipping at "film base".

Cutting straight to the results it is not only not good, its actually surprisingly not good.

This is the result of a scan with 0.8 of analog gain applied to the master gain.

I have plotted a Log10 graph of the results in red (as this is how scanner responce needs to be measured for photographic purposes).

It seems to have made a strange change to the "linearity" of the scanner with a marked step occurring at about step 13.

Its strange that both parts remain more or less straight with a deviation in the middle.

Further, the 'blooming' of the scanner is apparent in the darker areas (note the small intrusion of one of the "frame" supports in the FH-3, this shows that the depth of black is not fully reached even though the ability to discern graduations is substantially impaired).


out of interest this is the result from my Epson 3200, and no blooming is evident in this.


so ... this makes the result from the Nikon particularly scary. Feel free to compare this to the results from my Epson 4990 scanner here.

Note: this effect of blooming is also apparent with x8 oversampling, so it is not just a digital noise issue.

I also thought it was worth mentioning that not only is there substantial bloom (clearly visible here) but that altering the analog gain disturbed the levels of RGB too. Looking at the RHS of this graph you can see three peaks, this is the places where Red Green and Blue have moved up towards 255 but clearly unevenly.

So, without careful profiling using the analog gain on this scanner to 'punch into dark areas' will result in strange colour shifts. I advise use with caution.

I left this section 'zoomed in' to show just how much blooming results in the transition from dark area to light area, it is significant.


Addendum

I was asked some additional quesitons about this so I have repeated the tests and included results for 0 analog gain.

NOTE: rather than wait over the weekend I've disassembled the scanner and sure enough the mirror was rather filthy. So a quick clean with windex and a cotton bud (removing the mirror of course) later and its now performing well


My method was to scan with the scale set as linear from 0 to 255, the scanner software is set to put the data into Bruce RGB, so after scanning this profile was assigned to the data to ensure that the results are correct. As the wedge is so long, I had to scan it in 3 sections. To perform this I needed to
  • insert the wedge strip into the FH-3 holder
  • disable any preview or focus on insert
  • scan each step without prescan or preview
some overlap was possible in scanning (as it is manually fed) so I can confirm that (for instance) the values of step 4 (and the clear part of the step number) were consistent from scan to scan.


The results (data first) include the stand deviation of the values in the selection swatch. Standard error is calculated as the percentage of standard deviation to the median value (not, I use median in this testing not mean).


It seems to indicate that the error is getting quite high as the values go above 13 on the stepwedge. This needs to be taken into account when assessing how effective alteration of the image with curves will effect colour accuracy or noise in shadow details. Now the graphical view


seems that the linearity step at about 13 is still there

Tuesday 7 April 2009

digital camera batterys

I just don't understand this problem:

why do camera makers not support either a standard battery (or 3) as they did when we bought disposable non-rechargable batteries off the shelf?

Is it because we're all incapable of sending a message to camera makers to not do this, or is it because we're all just so naive (when considered as a buying group)?

For example, I have a few digital cameras,
  • Nikon Coolpix 990 (AA battery's)
  • Nikon Coolpix 5000
  • Canon Powershot A520 (AA battery's)
  • Canon IXUS 70
  • Panasonic G1
and only two of them use AA batteries. When I bought the 990 in 2002 it was one of my criteria to have AA batteries, then when I got the 5000 I thought "ok, we'll see how it goes".

Well it didn't go well, I've got 3 batteries which I need to keep with me in the field for longer trips than a day outing or it goes flat unexpectedly. This has become much worse as the camera (and therefore the battery) has become older.

Point: Li-ion batteries do not age well. Let me quote from Wikipedia:

A unique drawback of the Li-ion battery is that its service life is dependent upon aging (shelf life). From time of manufacturing, regardless of whether it was charged or the number of charge/discharge cycles, the battery will decline slowly and predictably in "capacity". This means an older battery will not last as long as a new battery due solely to its age, unlike other batteries. This is due to an increase in internal resistance, which affects its ability to deliver current, thus the problem is more pronounced in high-current applications than low. This drawback is not widely published.[23]


Meanwhile the same set of 4 NiMH AA batteries which I bought for my Coolpix 950 in 1999 (its not on the list, I sold that one) are still working today and doing good service also in my Metz flash, my Canon A520 or my MP3 CD player (as the case may be). Try that with camera specific batteries.

Li-ION batteries do not like the cold. So when I go out hiking in low temperature (or go to an outdoor event in winter) the bloody things die fast.

But wait, they don't like the heat either. As reading further in the above article indicates.

what a PITA

So, why do makers continue to shaft us with one-off orphan batteries and charge ridiculous prices for them. At the moment a battery for my new Panasonic G1 is 89 Euro or over US$100.

If I had been thinking about this issue in the beginning I would have avoided buying the camera. Seriously I feel that strongly about it. For years I avoided any digital camera that didn't have AA batteries simply because the proprietary Li-ION battery's are annoying:
  • don't last as long as AA NiMH batteries
  • are often way more expensive
  • require you to have a specific charger for each camera (I now have 3, one for a Canon, another for a Nikon and one more for this Panasonic). A friend has 2 canon IXUS camera's and each has its own charger and battery.
  • do not allow you to go "whoops I forgot to charge the camera while on the way to a camping trip / wedding / party and thus you have no options for buying disposable
I'm annoyed that I have to either fork over the bucks or restrict my camera purchase.

So camera makers:

Give us better and consistent battery technology please

G1 with a big lens

having now got both my G1 and the FD 300 f4 I'm sure you're wondering what it might look like, so here you are:


G1 with 300mm f4

the lens is made look bigger by the diminutive size of the G1. If you pop a bigger camera on it (like the 10D below) then it would look less bizarre (but then you'd be carrying the bigger camera too).


So, aside from what it 'looks like' what does it look like looking through it? Well this is the view from my balcony (pardon the ugly colour balance) with the standard zoom at the 45mm position (which is about 90mm on a full frame camera)


and from the same location this is what it looks llike with the 300mm

Quite impressive.

There wasn't much to photograph today (it being foul weather) so this image is the birds in the large tree to the left and just behind the shed.


The lens isn't the 'hottest' on the block and seems acceptable at f4 (with slightly ugly out of focus areas [bokeh]) but by f8 is looking good.

Sunday 5 April 2009

Epson 4990 response testing

Some time ago I tested my Epson 3200 scanner for its ability to plumb the depths of a Stouffer wedge. The reason is to understand (not guess at) how much density the scanner can cope with (meaning how much shadow detail can be recovered from slide scanning).

I scanned the wedge as a linear full range positive and then input the median values obtained from each 'patch'. That's the blue line is the scan value (255 - 0) returned, the red line is the Log10 of that.

Looking at the straight numerical levels shows that it really starts to plateau out at about 17 on the step wedge. It seems like a good result, but when compared to the much older 3200 its not that much different.


Since it is the log difference between the values that is important in film scanning I've placed them in the graph. Interestingly the 3200 actually remains linear in the log responce longer than the 4990.

I don't know if this is a good or a bad thing as film already has non-linear responses in the shoulder of the curve anyway.

Well, anyway it seems that the 4990 goes into the shadows a little better than the 3200, but despite how it seems on scanning film its not screamingly better when measured.